Video version
How to Add the Step-by-step Booking Form to Your Website
If the “Booking Search” and the “Booking Catalog” views do not work best for your website, and you’d prefer a “classic” step-by-step booking process, the “Step-By-Step Booking Wizard” view is the solution.
The “Step-By-Step Booking Wizard” gives your customers the option to choose everything about the booking in a few steps.
In order to add this booking form to your website, you will need to add Amelia shortcode to one (or more) of your website’s pages. Below you will find instructions on how to add Amelia shortcode using different page builders: Gutenberg, Elementor, and Classic editor.
If you use another page builder or cannot find the shortcode button you can use the next shortcodes:
- [ameliabooking] if you want to show the basic Step-by-step Booking wizard,
- [ameliabooking category=1] if you want to show only the services from a category with ID 1,
- [ameliabooking service=1] if you want to show the booking form for the service with ID 1.
- [ameliabooking employee=1] if you want to show the booking form for the employee with ID 1,
- [ameliabooking location=1] if you want to show the booking form for the location with ID 1,
Or any other combination that you need. Also, if you have Packages (Pro or elite license) you can choose whether you will show just services, just packages, or both.
- [ameliabooking show=services] if you have Packages enabled, but you only want to show services in the form,
- [ameliabooking show=packages] if you have Packages enabled, and you only want to show packages, without services in the form.
Just put the shortcode on the page and “Publish” it. You will find all the shortcodes available for Amelia on the Amelia Shortcodes page.
Gutenberg Blocks
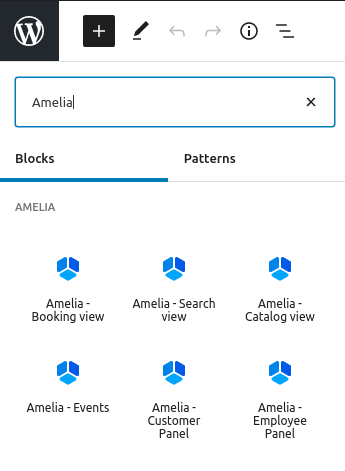
First go to WP Pages, choose “Add New” and in the top right corner or below the page title you will see the “+” (“Add Block”) option. Once you click on this option you will have the option to choose Amelia or you can write Amelia in the Search block.
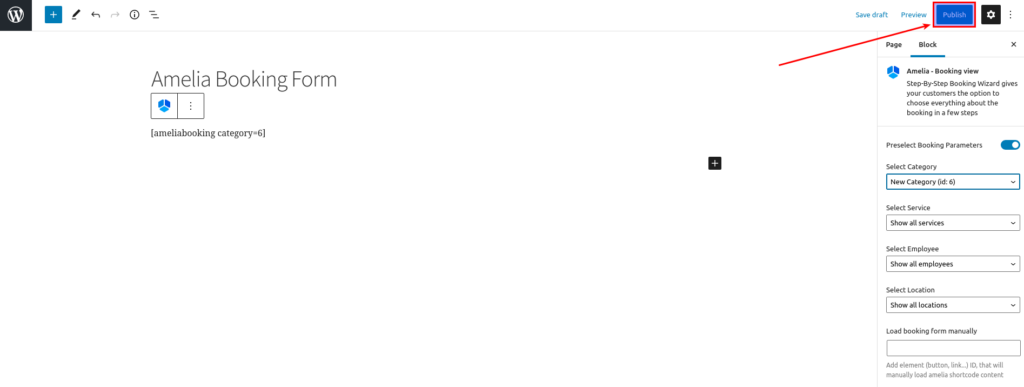
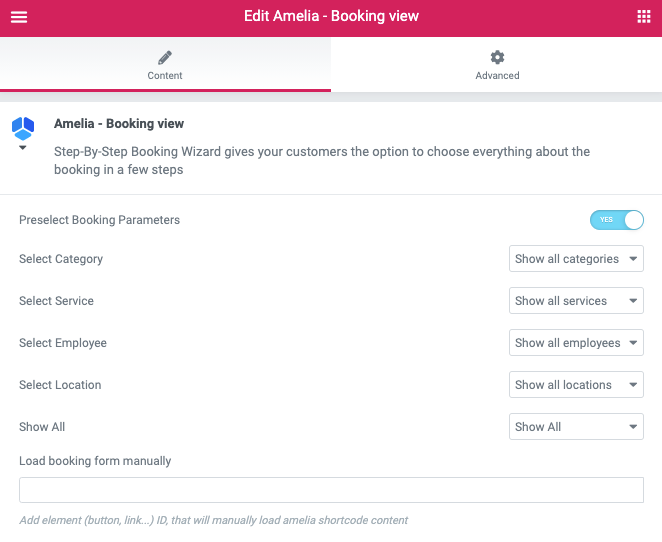
When you click on one of the options for displaying the booking form, the shortcode will appear in the block. When you choose Amelia – Booking view, in the menu on the right side you will see an option to enable “Preselect Booking Parameters”. This option is there if you want to create a shortcode that will show booking for just one category, service, employee or location, or combination of it. If you have the Pro or Elite license, and you have Packages, you will there see an option to choose whether you want to show only Services, only Packages, or both.
If you choose something in these fields you will notice that the shortcode is automatically changed.
When you finish preparing your Amelia shortcode, click on the “Publish” button to save your changes and publish the page.
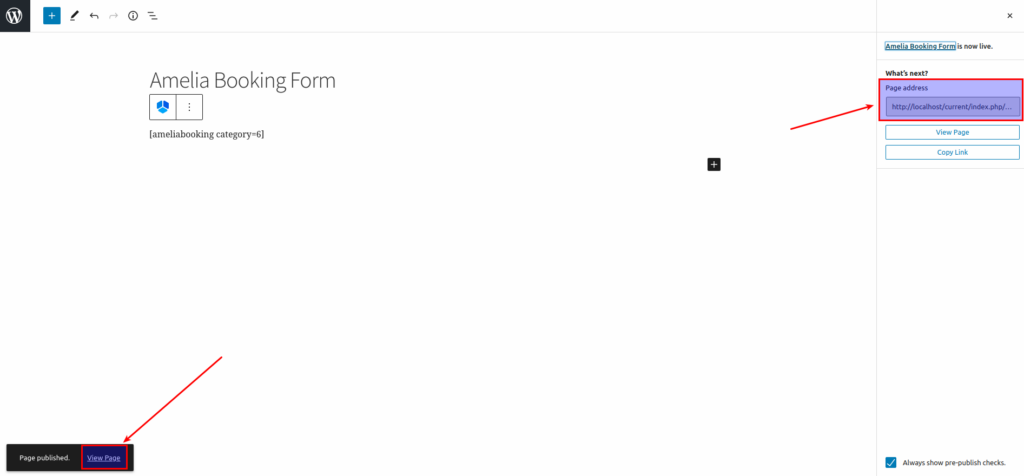
After you publish the page you can view it by clicking on the View page button on the left side or by clicking on the URL link on the right side of the page.
Elementor Page Builder
When you open Elementor Page Builder editor on your website where you have the Amelia plugin installed and set up, you will be able to search for Amelia or to scroll until you get to the Amelia blocks inside the Elementor interface as shown on the image below.
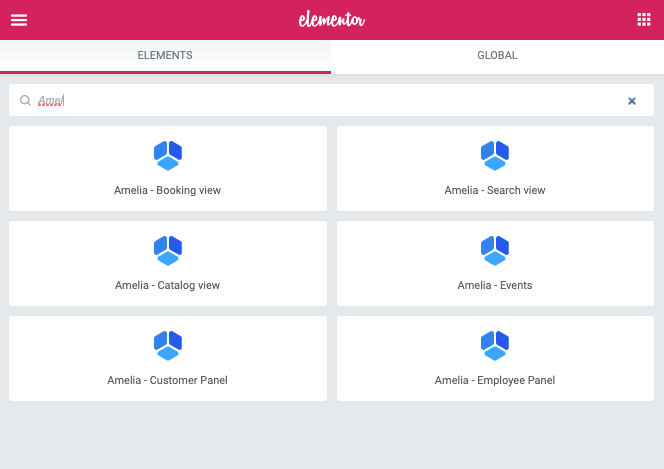
When you choose the desired block, drag-and-drop it to the page and you should enable the toggle “Preselect Booking Parameters for booking forms” and more options will be shown. There you can enable or disable options you want to show on the page of your website. The example of Amelia – Booking view is shown in the image below.
After you are finished do not forget to click PUBLISH to publish your page.
Classic Editor
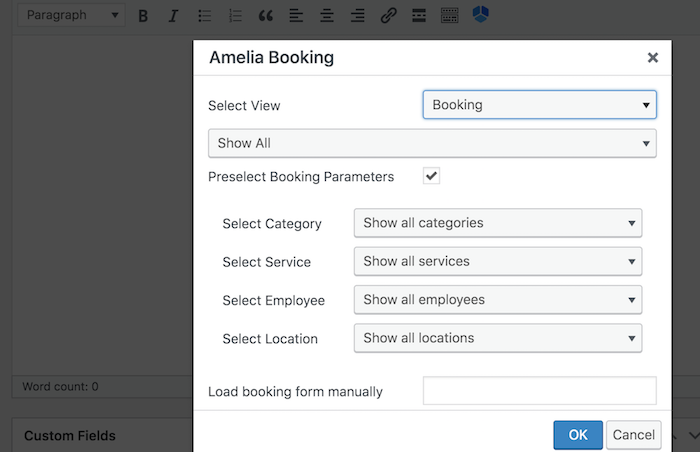
When you go to “Pages” in the WordPress admin panel, and then on the “Add New” button, you will see the Amelia insert shortcode button in the editor.

After you click on it, the Amelia booking widget will open. Select “Booking” from the drop-down, click “OK”, and “Publish” your page. This will show you the basic booking form with all the options for choosing the services, locations, and employees (if you have more than one). However, if you want to show a booking form for one specific employee, location, service, or you want to show the services from one specific category, click on the “Preselect Booking Parameters”. Four new options will appear so you can show a different booking form. These options allow you to set, for example, a different booking form for each employee. If you have Packages in Amelia, so Pro or Elite license of the plugin, there is also an option to choose whether you will show only services or only packages in the form, or both.
Step-by-step Booking View on Front-end
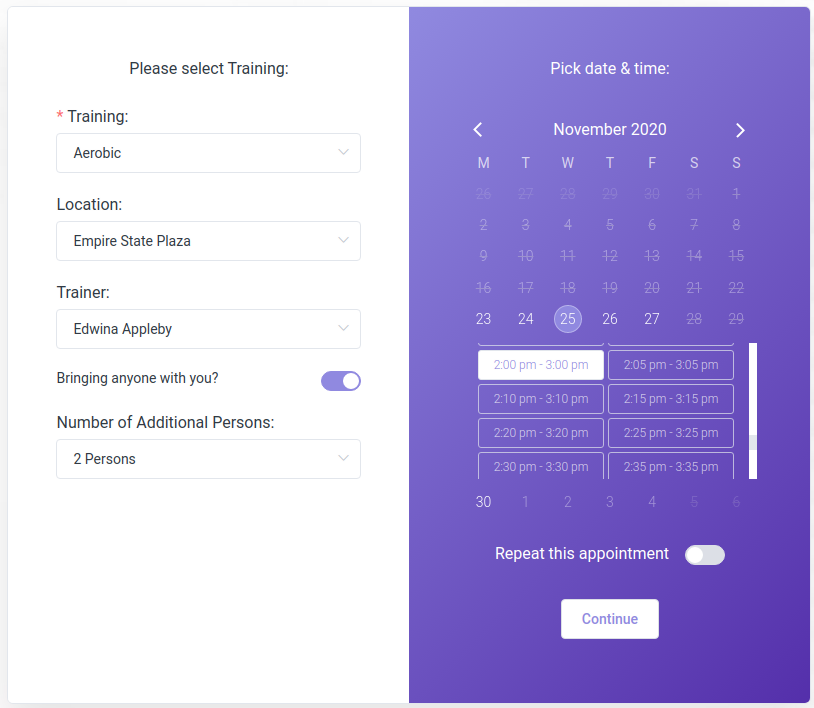
In the first step, your customer will be offered to choose a “Service”, a “Location” and an “Employee”. Depending on the chosen service two new options may appear: “Add extra” and “Bringing anyone with you?”. If the user chooses to add an extra, again, a new option will appear to select the extra and extra quantity. Depending on the chosen extra this action will affect free time slots and service price. “Bringing anyone with you?” is for customers that want to add some of their friends or family to come with them to the appointment without needing to enter data for all members.
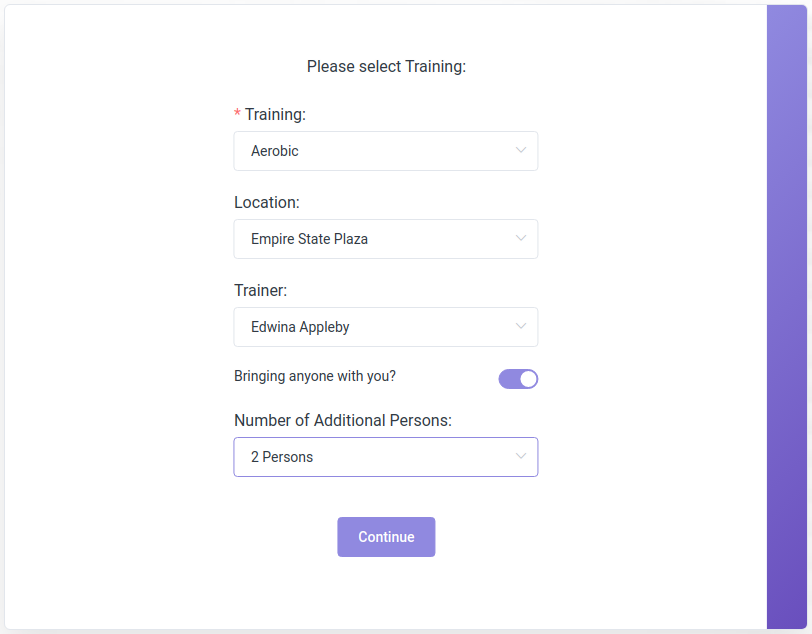
After they click “Continue” they will see the second step – the calendar in which they can choose a specific day from the available dates to book their appointment. Once they select the available date time slots will appear.
After the time slot is selected, clicking the “Continue” button will send them to the third step of the Booking Wizard.
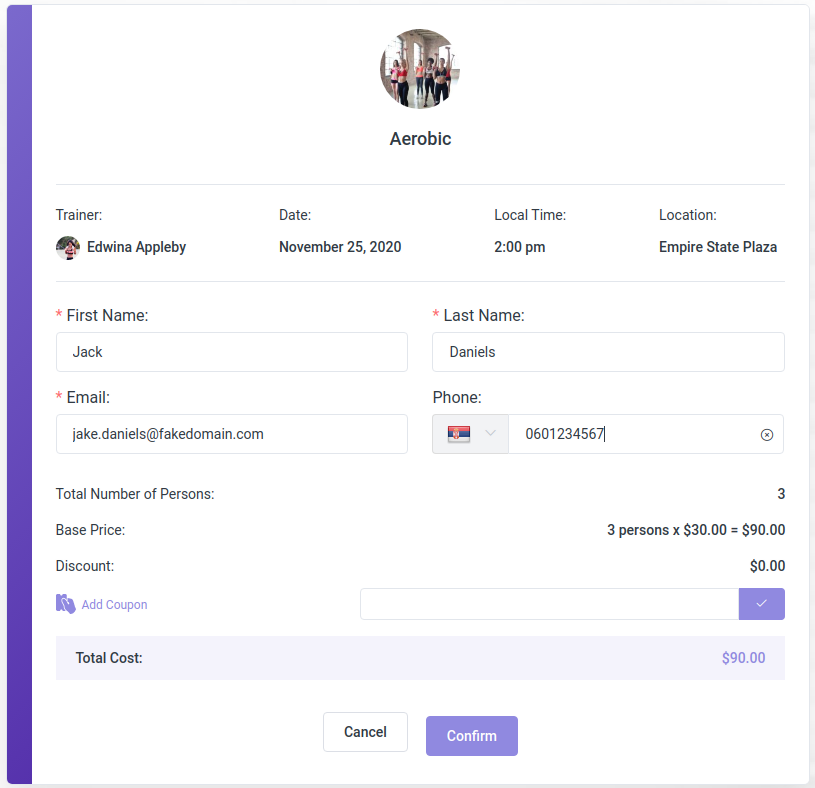
The third step is the same as explained in the “Front-end Booking Search” view. It is a step where your customer enters the personal info, selects the payment method, adds a coupon if he or she has one, and confirms that the appointment data and price calculation are correct. If the “PayPal” payment method was chosen, the “PayPal” modal will appear as the next step. If some other payment method is selected, the payment and emails will be sent, the appointment will be added, and the last step of the booking will appear.
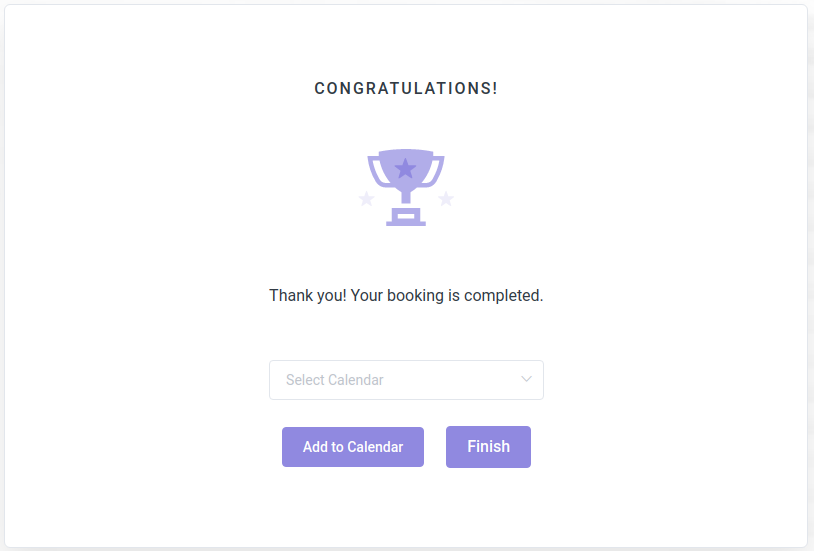
The last step of the “Booking Wizard” is an option for your customers to add their appointment to the calendar. There are four options to choose from: “Google Calendar”, “Yahoo Calendar”, “iCal Calendar” and “Outlook Calendar”.
