All Envato licenses are equivalent to the Amelia Standard plan on our website. They include lifetime updates but only 6 months of support.
For continued support and access to other plans, we recommend purchasing directly from our pricing page.
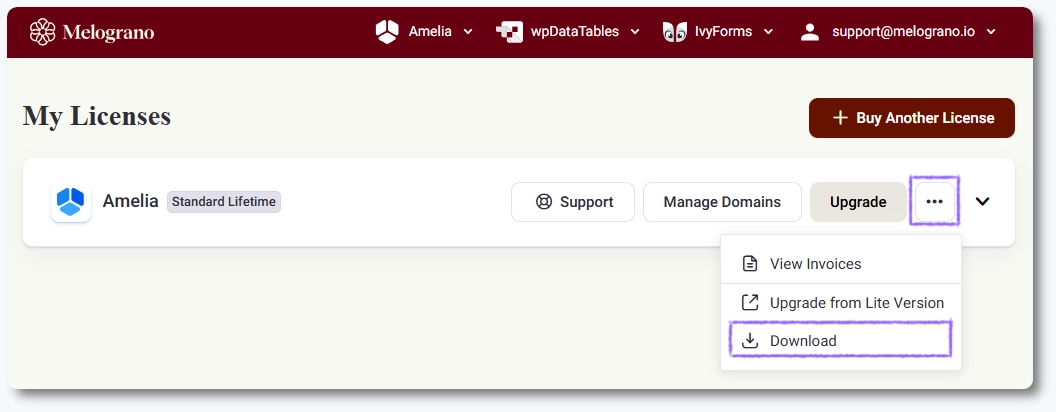
The Welcome onboarding guide is shown only after the first installation and activation of Amelia.