The Finance section in Amelia gives you a centralized overview of all financial data related to your bookings. From here, you can review transactions, manage invoices, and, if enabled, work with coupons and taxes. Each tab is optimized for a specific type of financial data and includes its own filters and table customization options.
Note
The availability of Invoices, Coupons, and Taxes depends on your active license and enabled features.
What tabs are available in the Finance section?
The Finance section is divided into four tabs:
Transactions: a list of all recorded payments.
Invoices: generated invoices, available when the feature is enabled.
Coupons: discount codes for services, events, and packages, available when enabled.
Taxes: configured tax rules applied to bookings, available when enabled.
Each tab focuses on a specific type of financial data and uses its own set of filters.
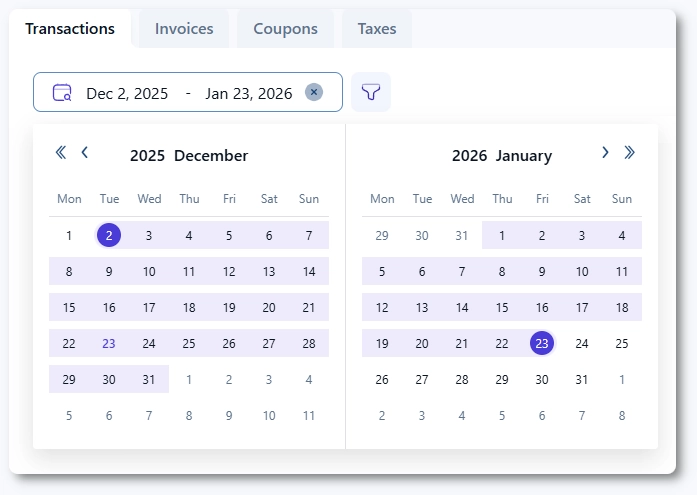
How do date range and search work in Finance?
The way you narrow down results depends on the selected tab.
Transactions and Invoices include a date range selector at the top.
Coupons and Taxes replace the date range selector with a search field.
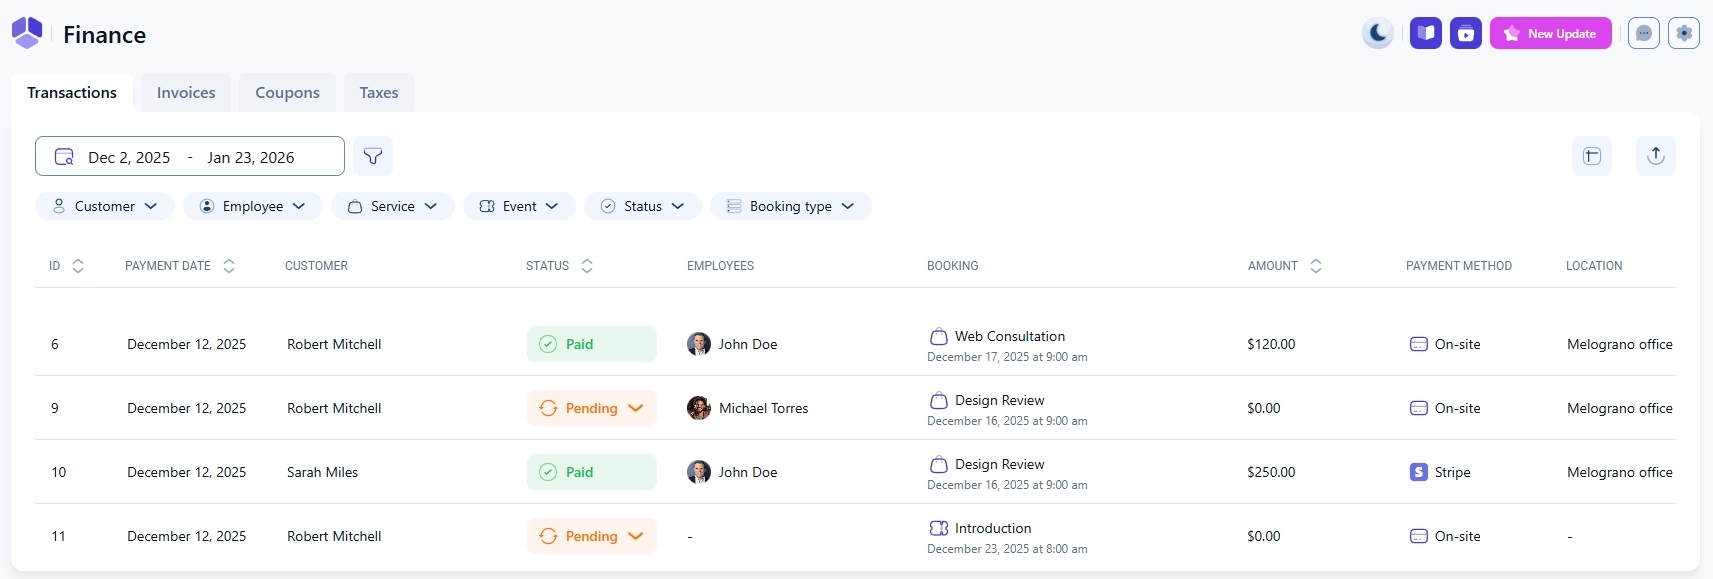
How do filters work in the Transactions tab?
The Transactions tab includes advanced filters to help you quickly find specific payments.
Customer
Employee
Service
Event
Status
Booking type (Appointments, Packages, Events)
You can combine multiple filters to narrow down the results.
Which columns can be sorted in Transactions?
In the Transactions table, you can sort results by clicking on the column headers for:
ID
Payment date
Status
Amount
How do I export transactions?
The Transactions tab includes an Export button in the top right corner.
Exports are generated in CSV format.
You can choose which columns will be included in the export.
This allows you to prepare reports or process financial data outside of Amelia.
How should I interpret dates in Transactions and Invoices?
When searching for a transaction or invoice, it is important to use the date when the booking was created, not the date when the appointment or event is scheduled.
The Payment date shows when the transaction or invoice was generated.
The Booking itself shows a separate date for when the appointment or event will take place.
This distinction explains why you may see two different dates in the table.
What is the Edit table option used for?
Each Finance tab includes an Edit table button that lets you customize the table layout.
Choose which columns are visible.
Reorder columns using drag and drop.
This helps you tailor each table to your workflow.
How do Invoices, Coupons, and Taxes work in Finance?
The Invoices, Coupons, and Taxes tabs follow the same general structure as Transactions, with filters and table customization.
Invoices focus on invoice status and totals.
Coupons show discount rules, validity, and usage.
Taxes list configured tax rates and their visibility.
New coupons and taxes can be added directly from their respective tabs, while detailed configuration is explained in their dedicated articles.
Where can I learn more about Coupons and Taxes?
For step by step instructions and advanced configuration, refer to the dedicated documentation pages: