How do I set up email notification settings in Amelia
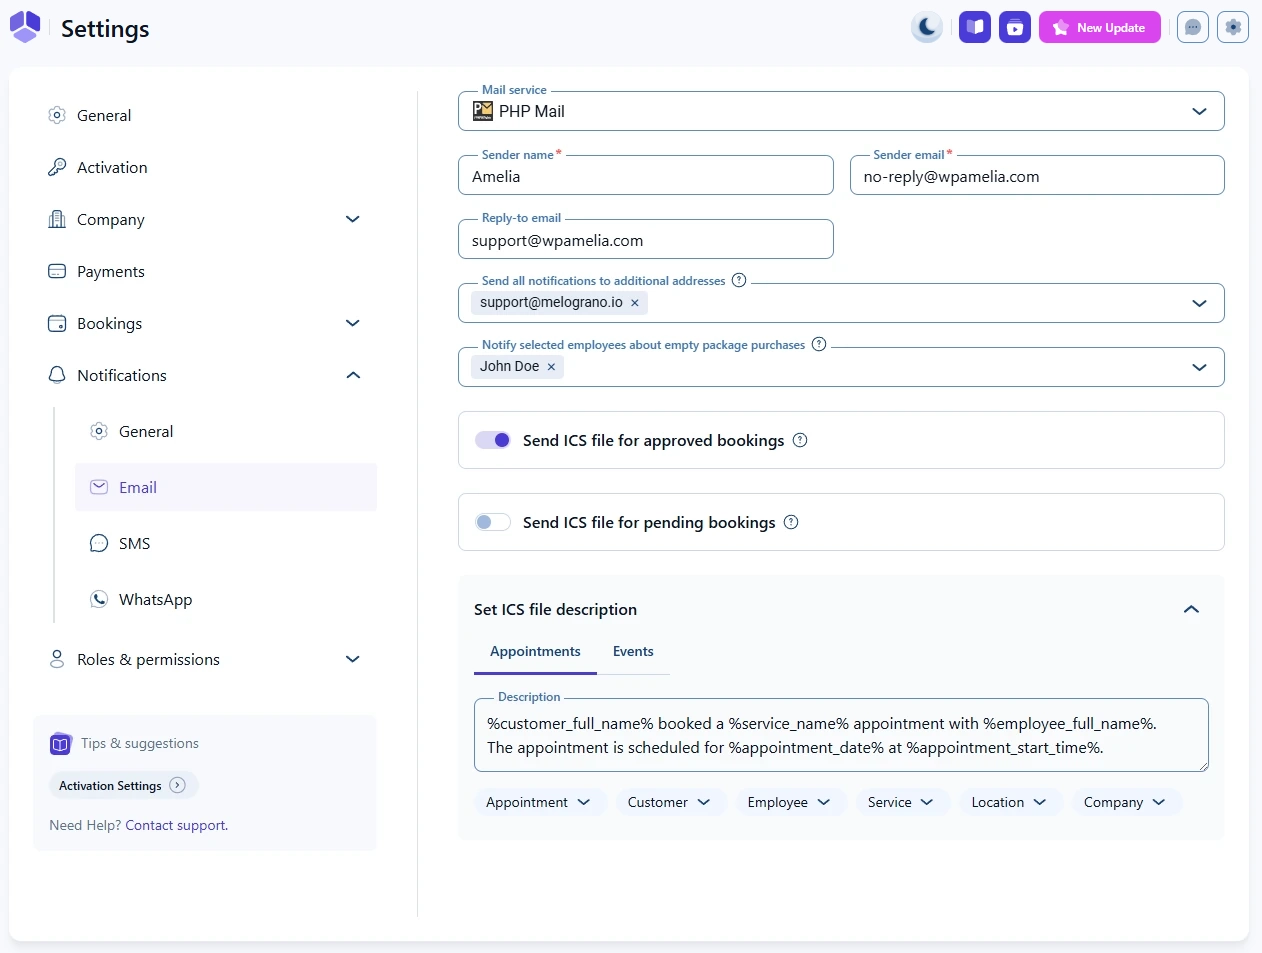
Email notification settings let you choose the mail service Amelia will use to send emails and configure sender details, reply-to behavior, ICS attachments, and additional recipients. These settings apply to all enabled email templates in Amelia → Notifications.
Which mail service can I use for sending emails?
The Mail service dropdown allows you to choose how Amelia sends your email notifications. Available services include PHP Mail, WP Mail, SMTP, Mailgun, and Outlook Mailer.
Each service displays different configuration fields. Some require API keys or authentication, while others rely on your WordPress environment or external plugins. You can find detailed instructions for each service in the linked subpages at the end of this article.
Note
If you are using a third-party plugin like WP Mail SMTP, select WP Mail in this dropdown.
What sender details can I configure?
The following options appear for every mail service you choose:
Sender name The name shown as the email sender. This field is mandatory.
Sender email The email address Amelia will use as the from email. This field is mandatory.
Reply-to email The email address to which customer replies will be delivered. If left blank, replies may be routed to the sender email depending on your provider.
How can I send notifications to additional email addresses?
The Send all notifications to additional addresses field lets you add extra recipients who will receive every enabled email notification, both customer and employee versions. Type an email address, press Enter to save it, and continue adding more if needed.
This is helpful for managers, administrators, or shared inboxes that need full visibility into booking activity.
Note
This setting copies all email notifications to the added recipients, including reminders and follow-ups.
How does the “Notify selected employees about empty package purchases” option work?
This option lets you choose employees who should receive the Package purchased email when a customer buys a package without booking any appointments inside it. Since no employee is assigned yet, Amelia can notify specific staff members instead.
Select one or more employees from the dropdown to enable this behavior.
How do I send ICS calendar files to customers?
Two sliders control whether Amelia attaches ICS files to emails:
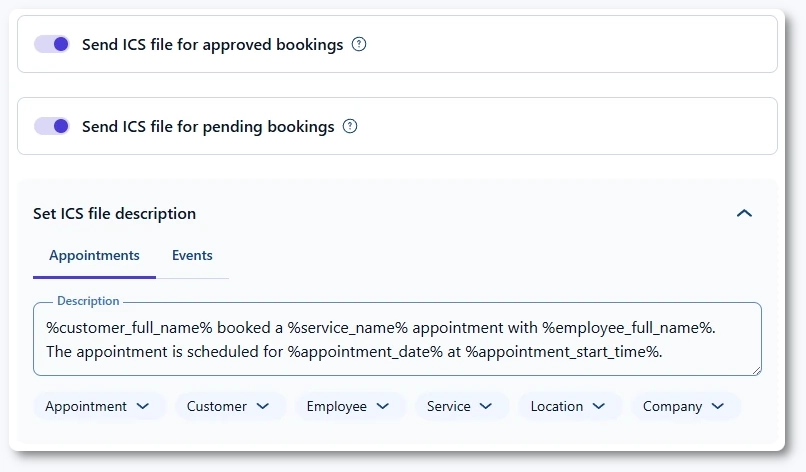
Send ICS file for approved bookings
Send ICS file for pending bookings
Enabling either one (or both) reveals the Set ICS file description section. The description can be different for Appointments and Events, and you can use placeholders listed in the dropdown below each editor.
How do I configure each mail service in Amelia?
Each mail service has its own setup process. To keep this page clear and focused, their instructions are provided separately: