The “Event Booking view” gives your customers the option to choose the event that they want to book from a list of events.
How to Add the Events List Booking Form to Your Website
To add one of the booking forms to your website, you will need to add Amelia shortcode to one (or more) of your website’s pages. Below you will find instructions on how to add Amelia shortcode using different page builders: Gutenberg, Elementor, and Classic editor.
If you use another page builder or cannot find the shortcode button you can use one of the following shortcodes for adding the Events list booking form:
-
- [ameliaevents] or [ameliaevents type=list] if you want to show a list of all your events,
[ameliaevents tag='name']if you want to show just the events that belong to the same tag defined during the creation of events, where “name” will be replaced with the tag name,- [ameliaevents event=1] if you want to show only the event with ID 1 without its recurring events,
- [ameliaevents event=1 recurring=1] if you want to show the event with ID 1 with all his recurring events.
Just put the shortcode on the page and “Publish” or “Update” it. You will find all the shortcodes available for Amelia on the Amelia Shortcodes page.
Gutenberg Blocks
First go to WP Pages, choose “Add New” and in the top right corner or below the page title you will see the “+” (“Add Block”) option. Once you click on this option you will have the option to choose Amelia or you can write Amelia in the Search block.
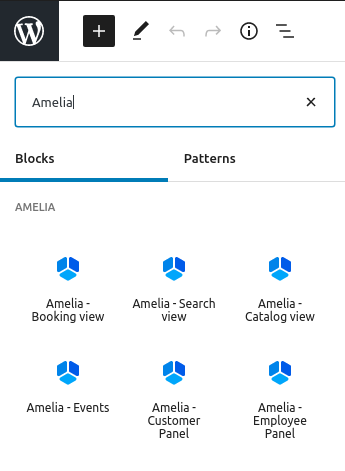
When you click on one of the options for displaying the booking form, the shortcode will appear in the block. Choose “Events” from the Amelia blocks list and you will see more options for the shortcode in the right panel. You can choose the List or the Calendar view (List view is the default one) and when you enable the option “Preselect Booking Parameters” you will see more options to choose from – you can choose if you want to show just one particular event, one event with all its recurring events or one particular type of events by choosing a tag from the list that you have previously added to your events during the creation. If you just want to show the list of all events, just skip selecting anything here.
If you choose something in these fields you will notice that the shortcode is automatically changed.
When you finish preparing your Amelia shortcode, click on the “Publish” button to save your changes and publish the page.
Elementor Page Builder
When you open Elementor Page Builder editor on your website where you have the Amelia plugin installed and set up, you will be able to search for Amelia or to scroll until you get to the Amelia blocks inside the Elementor interface as shown on the image below.
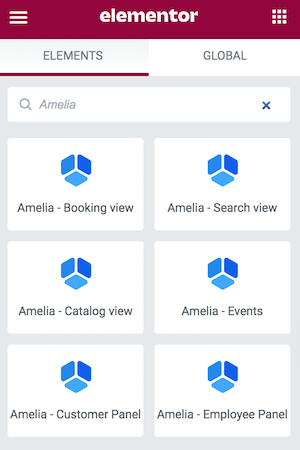
When you choose the desired block, drag-and-drop it to the page. After that, if Amelia – Events is chosen, in the left side menu you will see some additional options. There is an option to choose List or Calendar view (List is the default one) and if you enable the “Preselect Booking Parameters” option, you will see more options – you can choose if you want to show just one particular event, one event with all its recurring events or one particular type of events by choosing a tag from the list that you have previously added to your events during the creation.
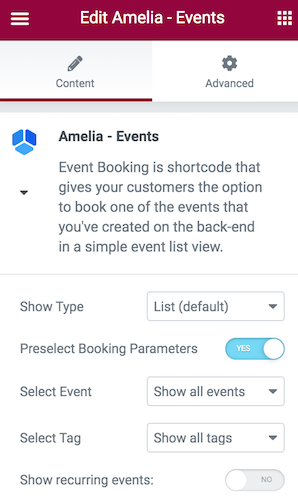
After you are finished do not forget to click PUBLISH to publish your page.
Classic Editor
To add this view on one of your pages, click on the “Pages” in the WordPress admin panel, and then on the “Add New” button. You will see the “Amelia” insert shortcode button in your TinyMCE editor.

After you click on it, the Amelia booking widget will open. Select “Events” from the drop-down, and you will see options to choose whether you want to show just one particular event, one event with all its recurring events, or one particular type of the events by choosing a tag from the list that you have previously added to your events during the creation. If you just want to show the list of all events skip selecting anything here, click “OK”, and “Publish” your page.
Events List Booking View on Front-end
Events can have three statuses:
- Open is the status of events that are opened for booking,
- Closed is the status of events that are either full or the period for the booking has expired,
- Canceled is the status of the events canceled by the admin.
For each event, you can choose whether the event will be shown on the front-end list or not, no matter which status it has (more about this option you can read here).
When a customer comes to the page for the first time he will see the list of all events that you have created and marked as visible on the list. Customers can filter events by types that are automatically added here when you add tags to the event, and they can also search by date. By default, the date picker is made to show all events from the selected date to the future.
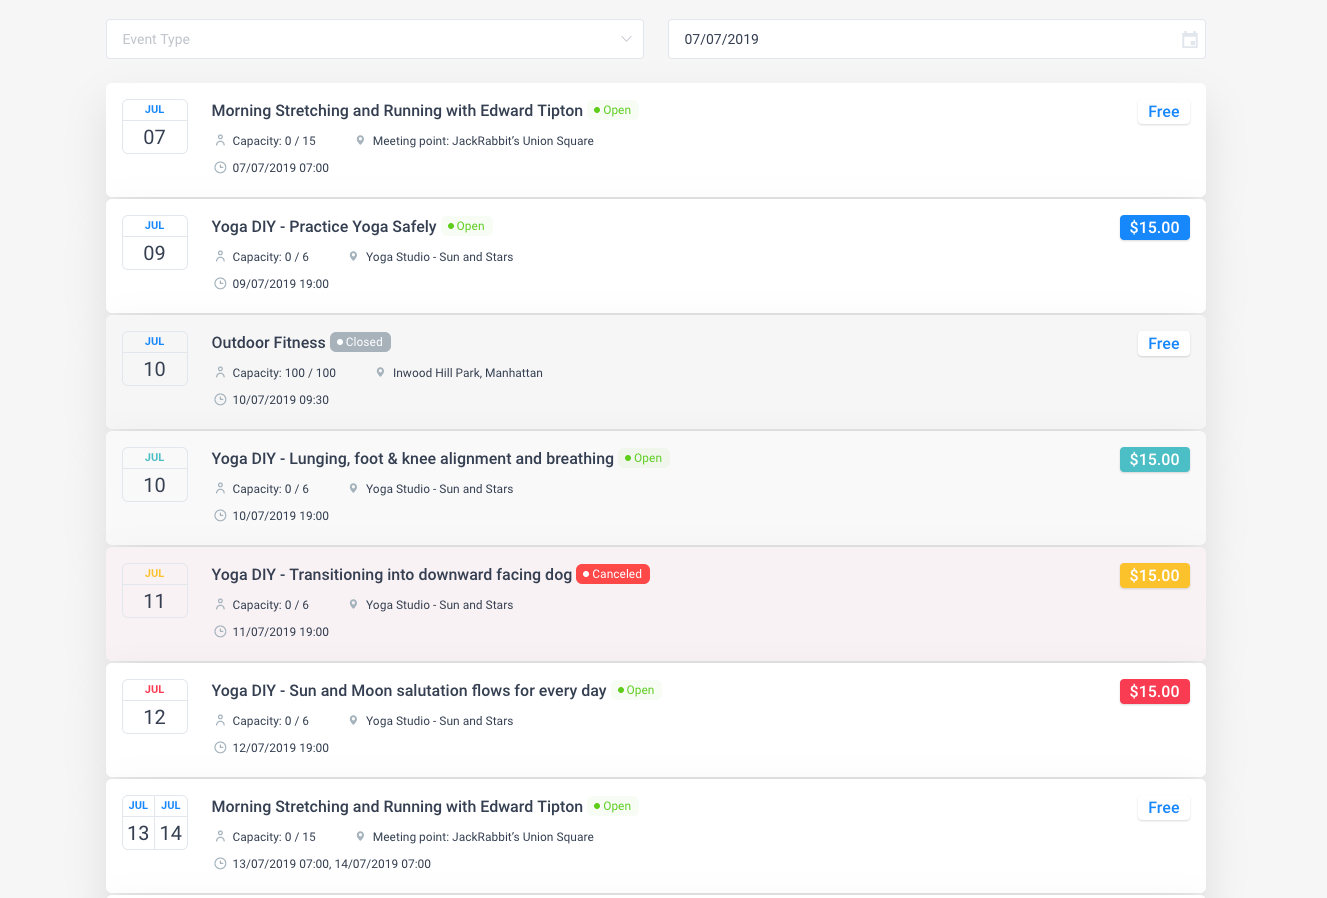
Once the customer clicks on one of the offered events, the event will expand showing pictures, description, and option to select the number of persons that are booking the event.
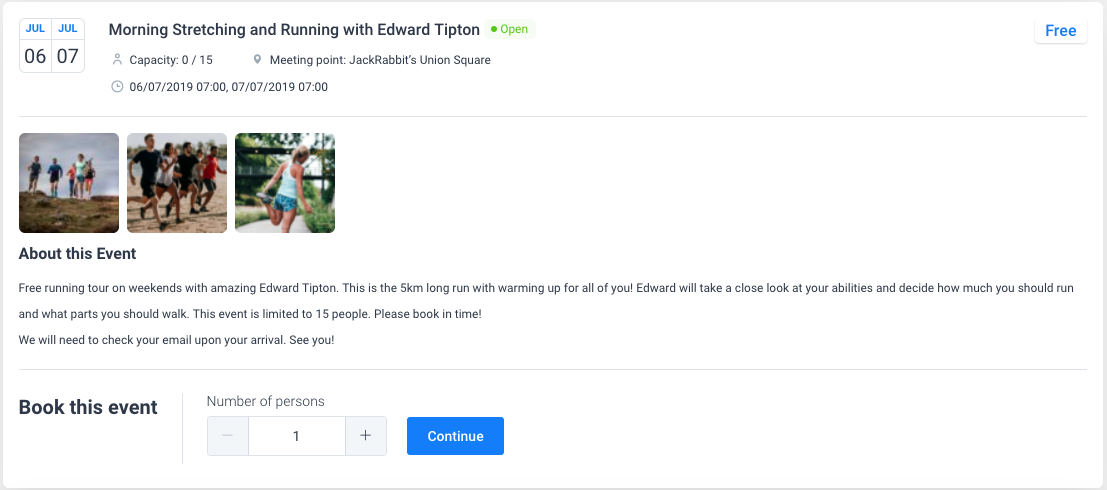
After the customer selects the number of persons and clicks “Continue” he will see the second step where he can enter his personal info and selects the payment method (if you have enabled multiple payment methods).
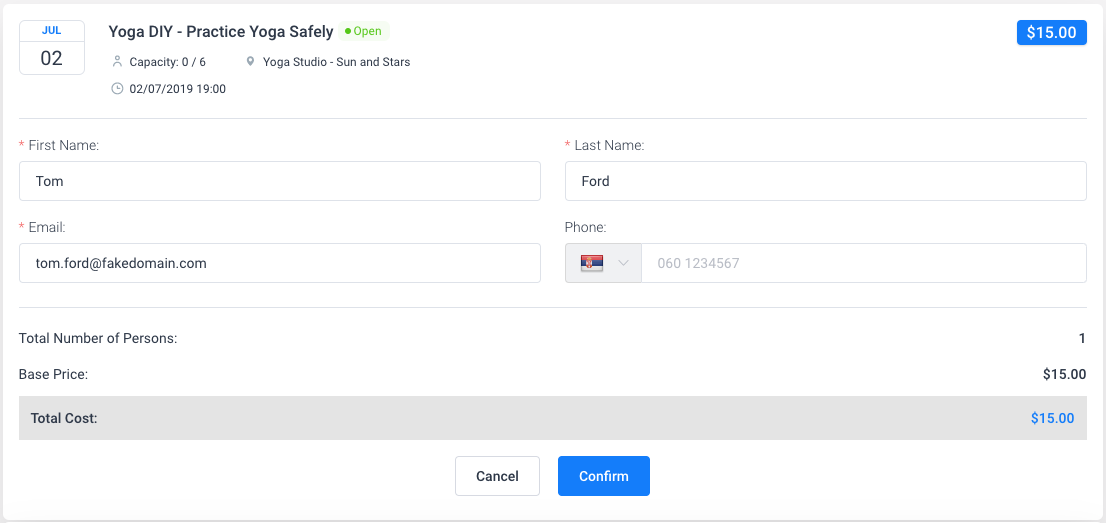
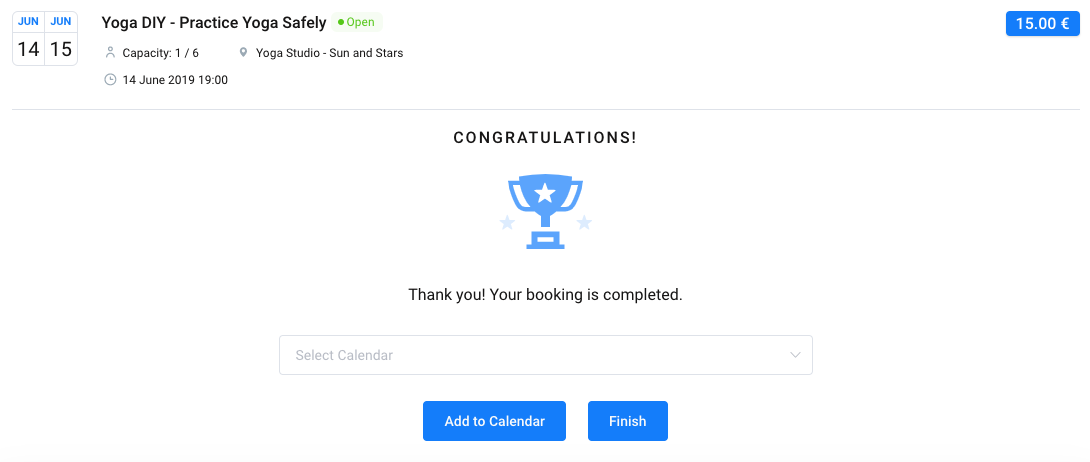
On “Confirm” the last step of the booking will be shown where your customers will be able to add this event to their calendar. You should know that you can remove the “Add to Calendar option” if you want, just go to the “General Settings” and there you will see the option to hide it.
