Video Version
How to Add the Catalog Booking Form to Your Website
Following in the steps of the new and redesigned Step-By-Step booking form, the Catalog booking form is the next one to receive an overhaul! We hope you’ll enjoy it!
With it, we’ve joined the old Search booking form with the Catalog booking form, so you can either use it with or without the filters and the sidebar – it’s up to you to decide.
In order to add this booking form to your website, you will need to add Amelia’s blocks or widgets, if you’re using page builders: Gutenberg, Elementor, Classic editor, and Divi Page Builder; or you can add the shortcode to one (or more) of your website’s pages.
If you use another page builder or cannot find the shortcode button you can use the following shortcodes:
- [ameliacatalogbooking] if you want to show the full Catalog Booking form,
- [ameliacatalogbooking category=1] if you want to show only the services from the category with ID 1,
- [ameliacatalogbooking service=1] if you want to show the booking form for the service with ID 1.
- [ameliacatalogbooking employee=1] if you want to show the booking form for the employee with ID 1,
- [ameliacatalogbooking location=1] if you want to show the booking form for the location with ID 1,
Or any other combination that you need. Just put the shortcode on the page and “Publish” it. You will find all the shortcodes available for Amelia on the Amelia Shortcodes page.
Classic Editor
If you’re still using the Classic editor, you will be able to use Amelia’s icon to select and insert the new Catalog booking form through the editor.
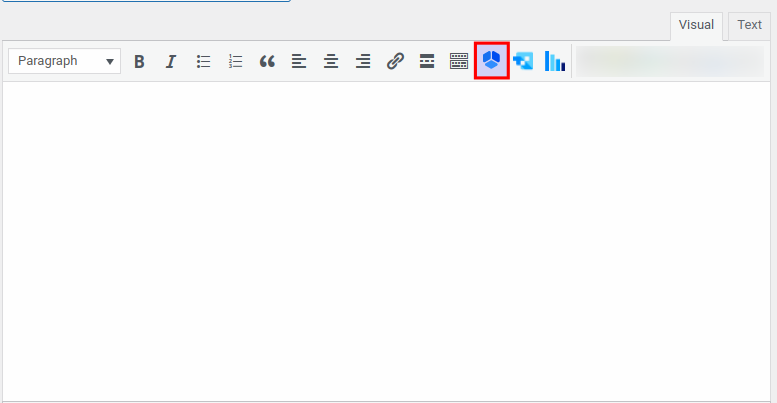
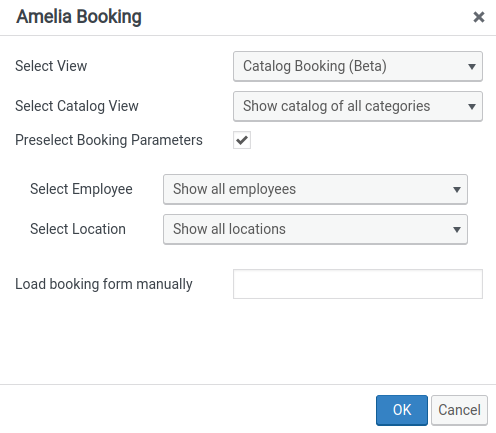
After you click on it, the Amelia booking widget will open. Select “Catalog Booking (Beta)” from the drop-down, click “OK”, and publish your page. This will show you the booking form with all the options for choosing the services, locations, and employees (if you have more than one). However, if you want to show a booking form for one specific employee, location, or service, or you want to show the services from one specific category, click on the “Preselect Booking Parameters”. Two new options will appear so you can show a different booking form. These options allow you to set, for example, a different booking form for each employee.
Catalog Booking Form on the Front-end
First, select the category to gain access to the Services view:

When you click on the “View all” button, you’ll see all available services within a selected category. By default, you’ll see the “Search” box, filter by Employee, filter by Location above the services, and the Category selection in the left sidebar, but this can be disabled in the new Customize 2.0 section.
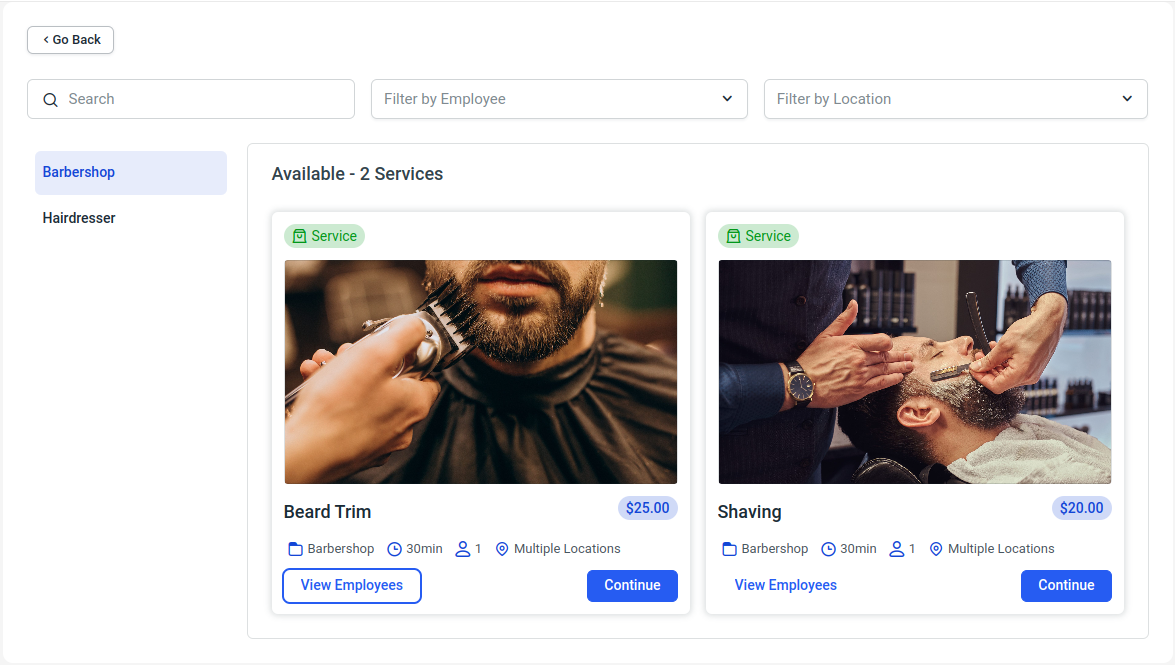
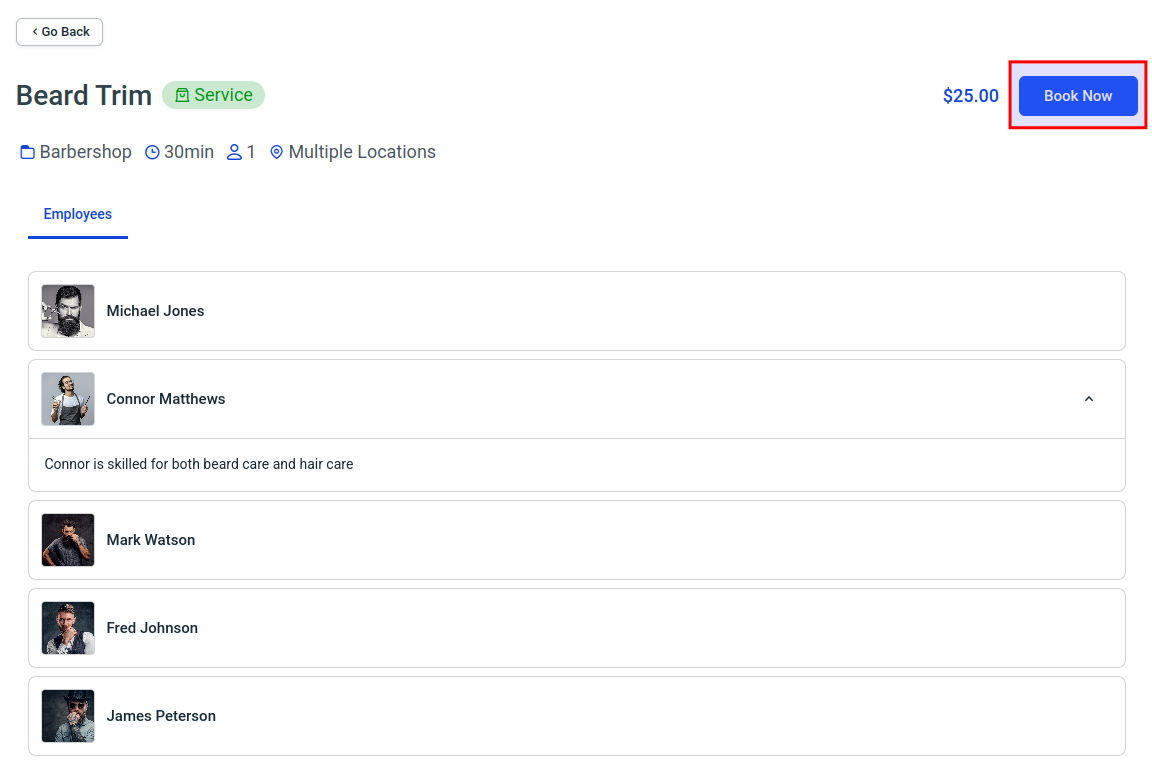
Clicking on the “View Employees” button, a list of all employees that are assigned to the service will appear. Also, if you added the description of your employees, those employees will be expandable as shown in the screenshot below.
You can choose to Book this Service from within the modal that pops up, or you can close it, and simply click on Continue in the bottom right corner of the service card.
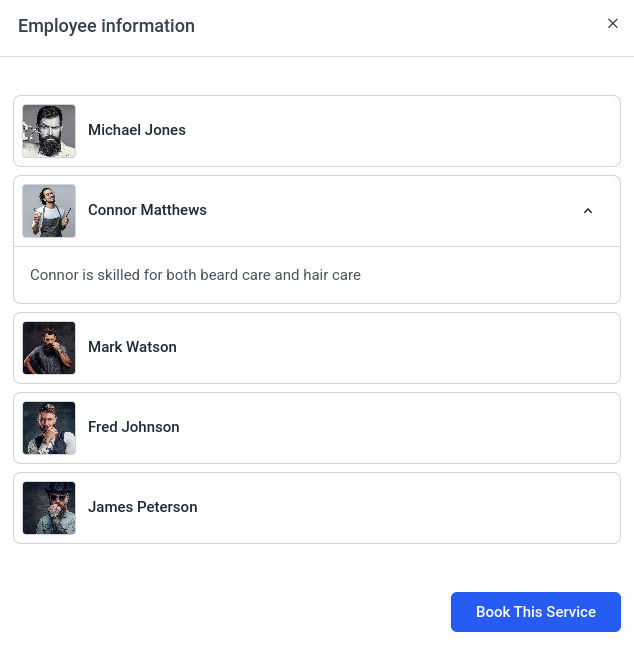
Please note that the “View Employees” button only shows a list of employees and their descriptions. Once you click on Book this Service from the “View Employees” modal or click on Continue in the service card, you’ll be taken to the next screen, where you’ll also see the list of employees and their descriptions.
The Book Now button in the top right corner brings up the Step-by-step booking form in a popup.
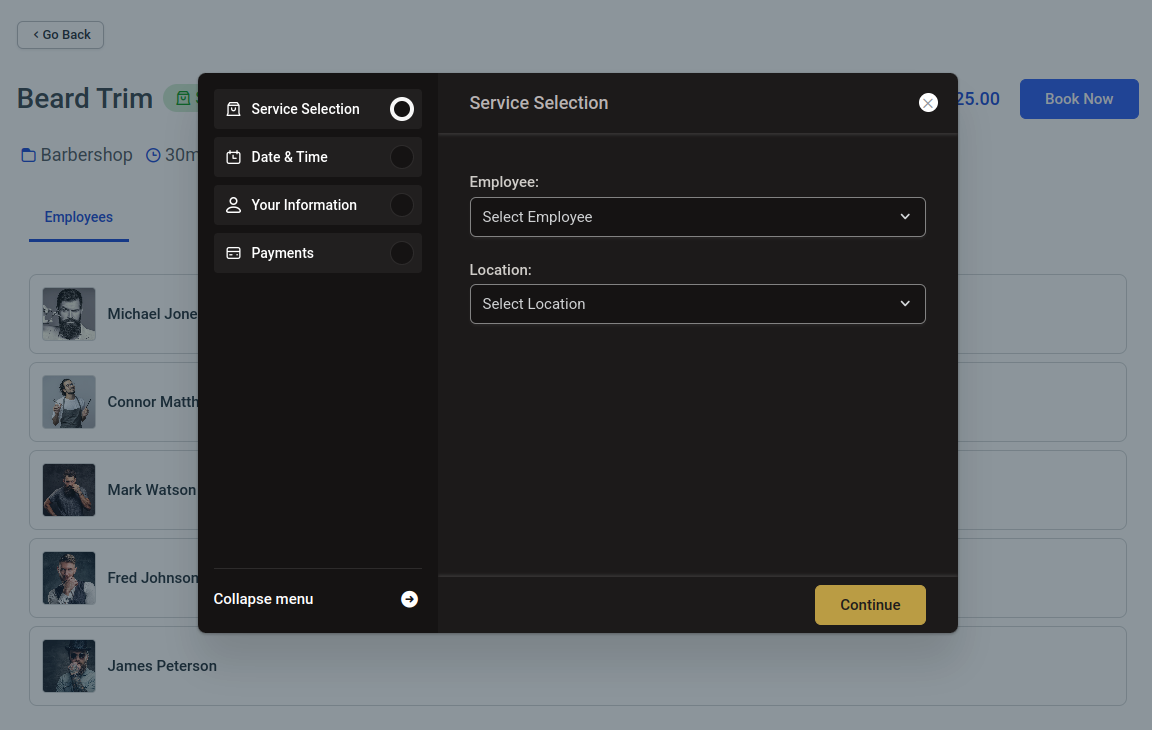
The Step-by-Step booking form doesn’t need to have the same design, so even though the Catalog form uses the default theme, the Step-by-Step booking form that pops up is using different colors.
It is filtered by the Category and the Service selection, so you need to choose the employee and the location (if applicable).
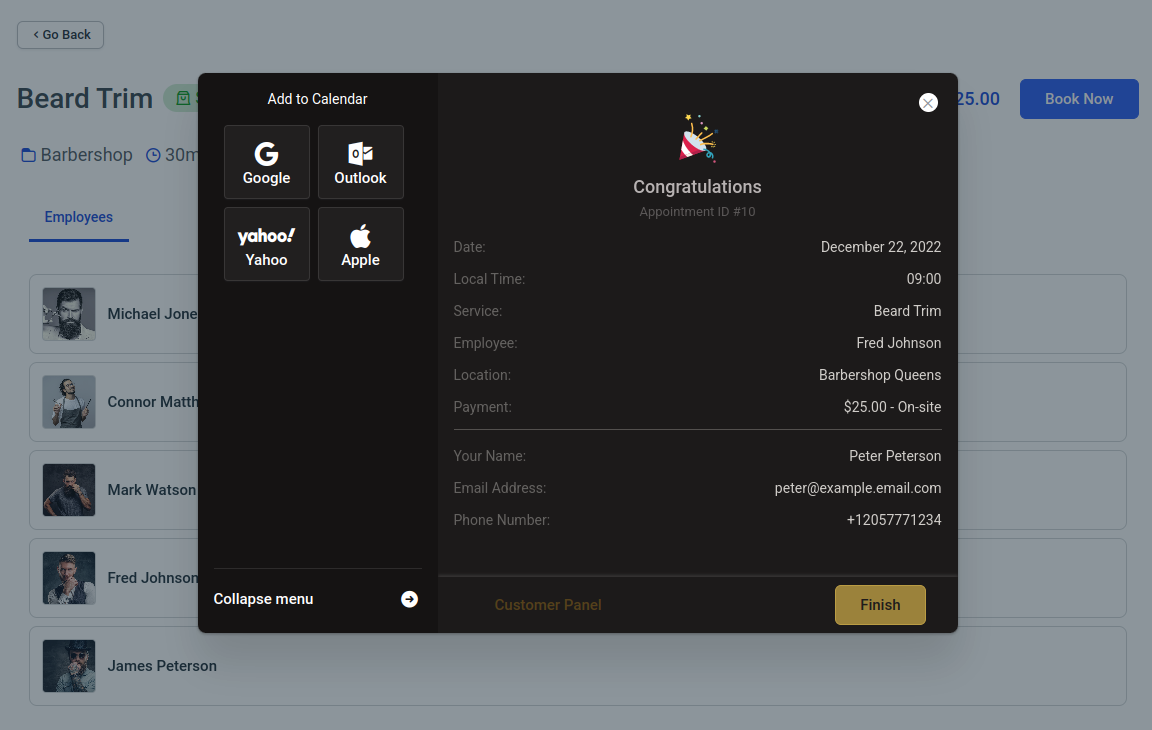
All remaining steps in the booking process are pulled from the Step-by-Step booking form, so up until the Congratulations screen, your customers will see the same form that you’ve configured for the regular Step-by-step booking.
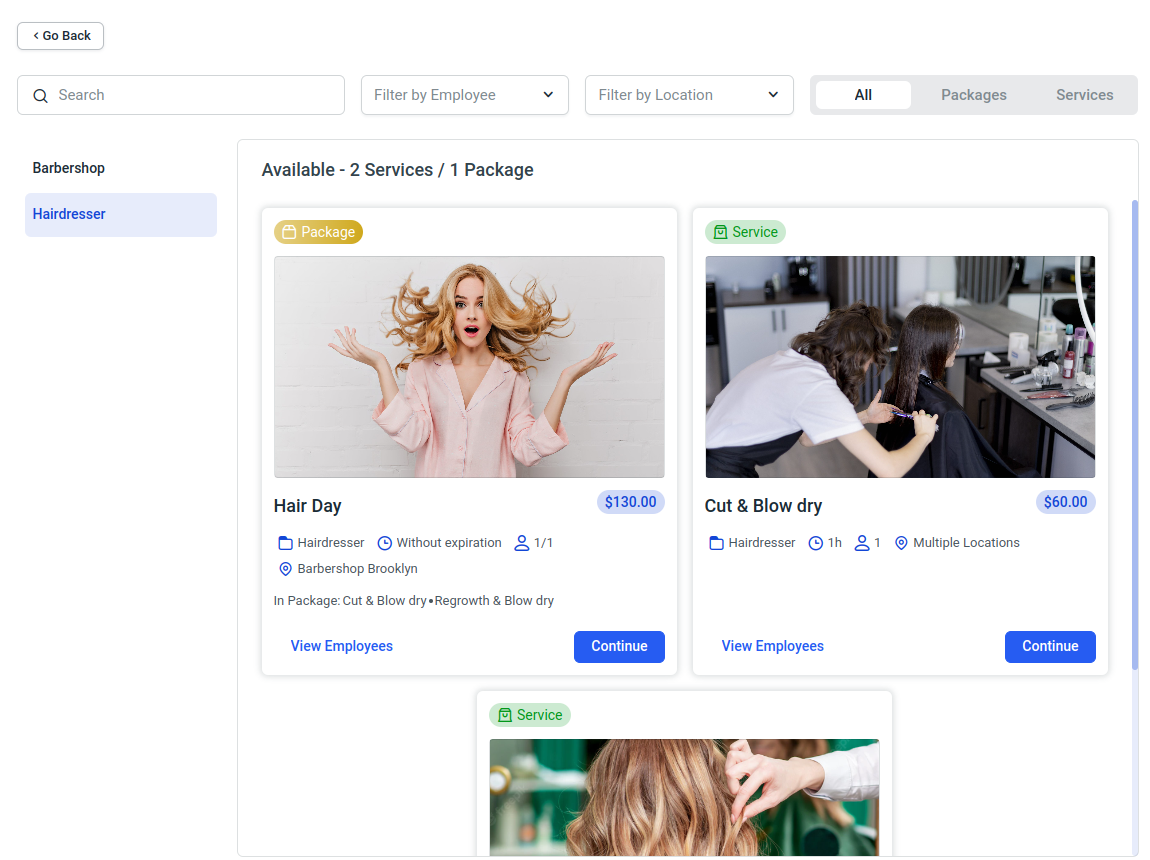
In case you have the Pro or the Elite license plan, and you created one or more Packages, the form will offer these packages as an option for booking to the customers. In the example below, you can see that the Package is listed next to the services.
Your customers are able to distinguish between them with the labels in the top left corner.
The selected package is in a form with a fixed width and the booking popup, so you can scroll down through the Package and see employees assigned to the services in it, and the services that are included.
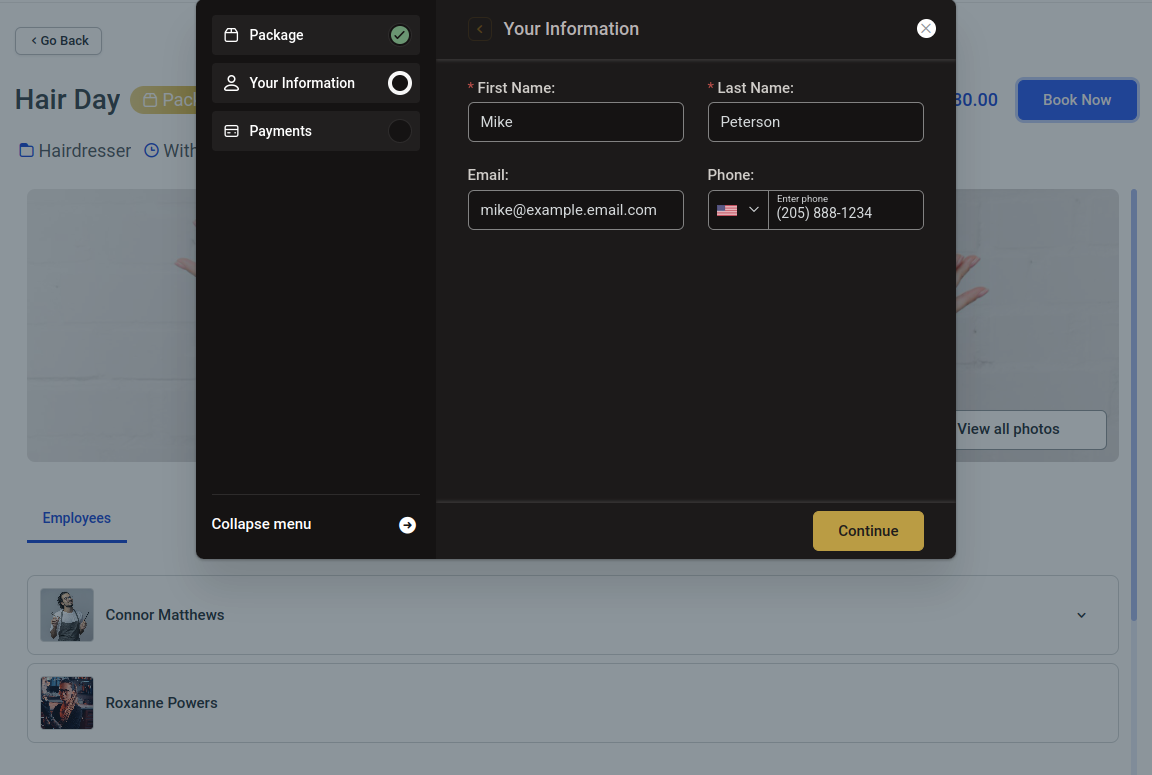
Since the services, employees, and locations are preselected through the Catalog form, the form that appears in the popup will only show the “Your Information” section, where the customer needs to fill in their details, and then proceed with booking the service in the same way they’re used to with the Step-by-Step booking form.
You will be able to use Customize 2.0 in order to change the look and feel of the new Catalog booking form.