Events Calendar Booking View gives you the option to show your events in a form of a monthly calendar so your customers can easily see your events in the current month, choose one of them and book it.
Add Events Calendar to a Page
To add one of the booking forms to your website, you will need to add Amelia shortcode to one (or more) of your website’s pages. Below you will find instructions on how to add Amelia shortcode using different page builders: Gutenberg, Elementor, and Classic editor.
If you use another page builder or cannot find the shortcode button you can use the following shortcode for adding the Events calendar booking form:
[ameliaevents type=calendar]
Just put the shortcode on the page and “Publish” or “Update” it. You will find all the shortcodes available for Amelia on the Amelia Shortcodes page.
Gutenberg blocks
First go to WP Pages, choose “Add New” and in the top right corner or below the page title you will see the “+” (“Add Block”) option. Once you click on this option you will have the option to choose Amelia or you can write Amelia in the Search block.
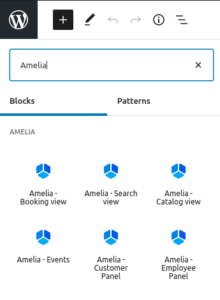
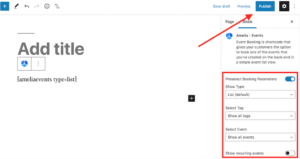
When you click on one of the options for displaying the booking form, the shortcode will appear in the block. Choose “Events” from the Amelia blocks list and you will see more options for the shortcode in the right panel. You can choose the List or the Calendar view (List view is the default one) and when you enable the option “Preselect Booking Parameters” you will see more options to choose from – you can choose if you want to show just one particular event, one event with all its recurring events or one particular type of events by choosing a tag from the list that you have previously added to your events during the creation.
If you choose something in these fields you will notice that the shortcode is automatically changed.
When you finish preparing your Amelia shortcode, click on the “Publish” button to save your changes and publish the page.
Elementor Page Builder
When you open Elementor Page Builder editor on your website where you have the Amelia plugin installed and set up, you will be able to search for Amelia or to scroll until you get to the Amelia blocks inside the Elementor interface as shown on the image below.
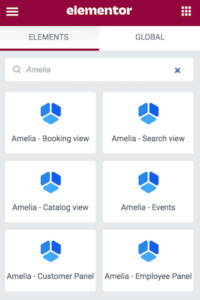
When you choose the desired block, drag-and-drop it to the page. After that, if Amelia – Events is chosen, in the left side menu you will see some additional options. There is an option to choose List or Calendar view (List is the default one) and if you enable the “Preselect Booking Parameters” option, you will see more options – you can choose if you want to show just one particular event, one event with all its recurring events or one particular type of events by choosing a tag from the list that you have previously added to your events during the creation.
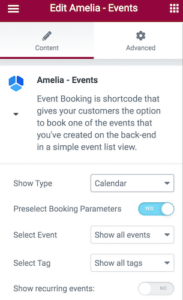
After you are finished do not forget to click PUBLISH to publish your page.
Classic Editor
To add this view on one of your pages, click on the “Pages” in the WordPress admin panel, and then on the “Add New” button. You will see the “Amelia” insert shortcode button in your TinyMCE editor.
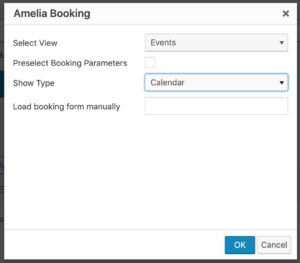
After you click on it, the Amelia booking widget will open. In “Select View” select “Events” from the drop-down, and you will see an option “Show Type”, by default the List view will be selected. Instead of the List view choose Calendar and the shortcode will change, then click “OK”, and “Publish” your page.
Events Calendar Booking View on Front-end
We will go through each option on the Event Calendar Booking View.
1. Today – this option can help your attendees to easily go back to the current date and month if they have searched for the specific event across multiple months.
2. Arrows – these arrows are here so attendees can easily switch from month to month to see your events.
3. Search – Search gives your attendees the option to search for a specific event by event name.
4. Filters – filters give more options to your attendees to filter the events on the monthly view based on the specific location, assigned host/employee, status, and type (which is added based on the tags that you add during the event creation).

5. Calendar section shows the events for the current month. If you have multiple events on the same date the first two will be shown with a name and others will be displayed below with the +X Events label. With a click, the user can easily see all those events in the popup and if the attendee clicks on the date in the Upcoming section those events will be shown.
The number of free slots left will be shown for each event so attendees can know how many places have left.
6. Upcoming Events
In the upcoming events section, you will see the upcoming Events starting from Today or if you click on some other date in a month starting from that date. This section allows your users to see more about the several next events so they can choose one of them and book the place.

Booking Through Events Calendar
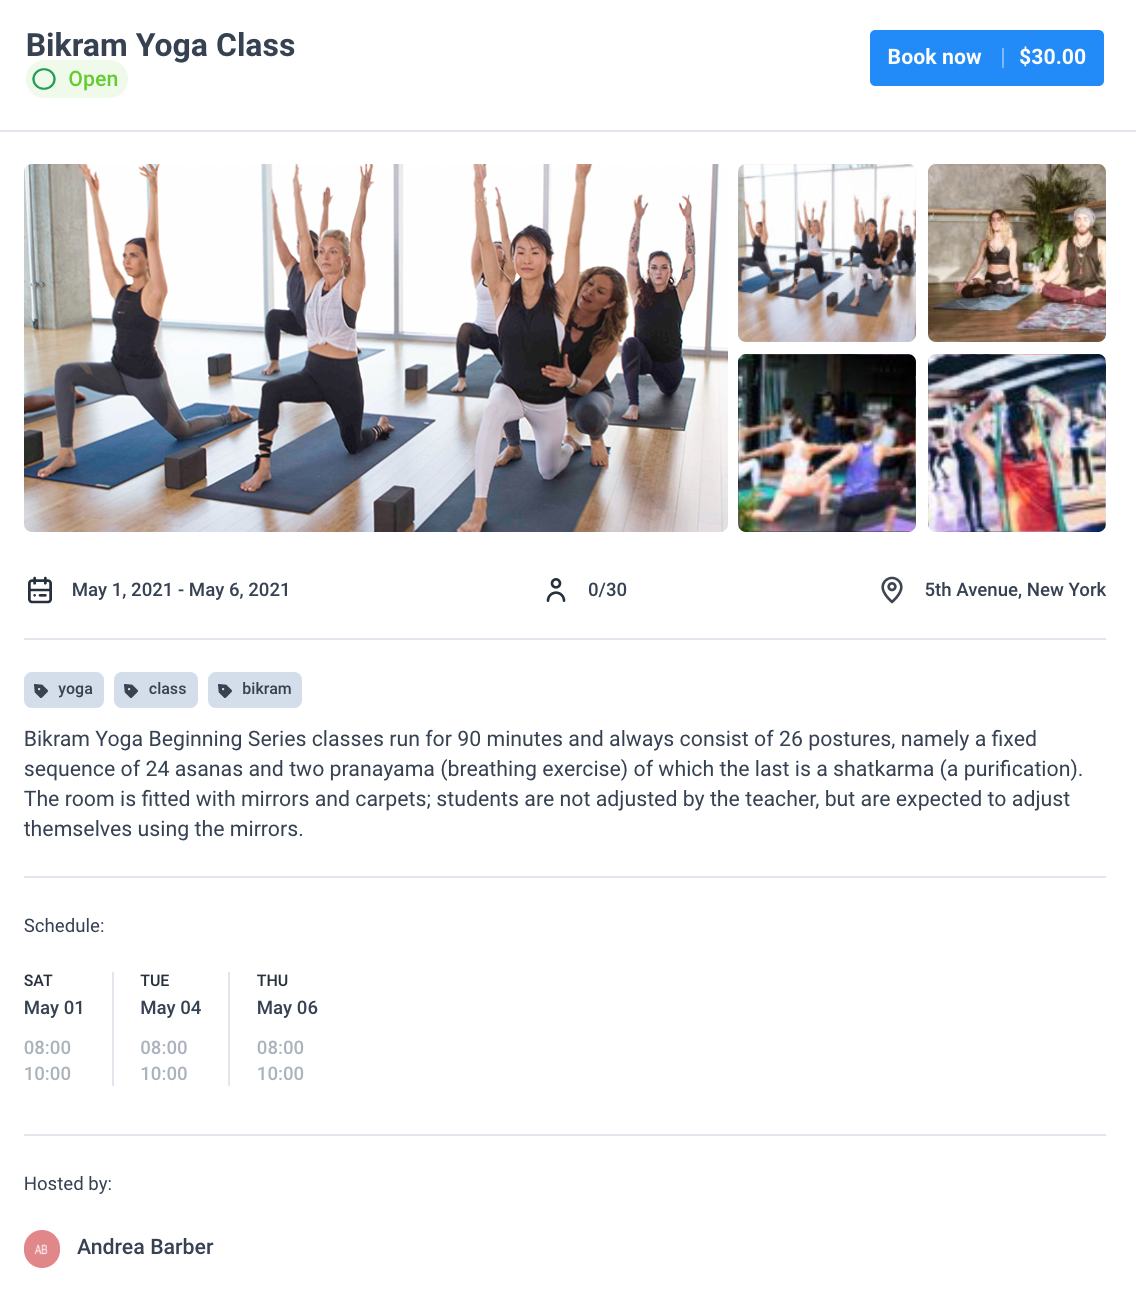
When your potential attendees see all events in the Calendar, they can click on a certain event in the month or click on the event from the Upcoming Events list, and details about that event will be shown with the option to book it.
In the Event Details section your attendees will be able to see:
- Name of the Event, with its status (Open for booking, Closed for booking or Canceled)
- Event Gallery – if you have a large gallery then the first four pictures will be shown with the +number option so attendees can click on it and see the entire Event’s gallery.
- Start and End Date of the Event, the number of places left, and total capacity and address on which the Event will be hosted.
- Event’s tags
- Event’s description
- Event’s schedule where all dates with start and end time will be shown
- Event’s hosts
The rest of the booking process is the same as on the Events List. Based on the capacity that you’ve set and based on whether you have allowed one attendee to add more people (with the “Allow bringing more persons” option) once the attendee clicks the “Book now” option the option for selecting more people will be shown.
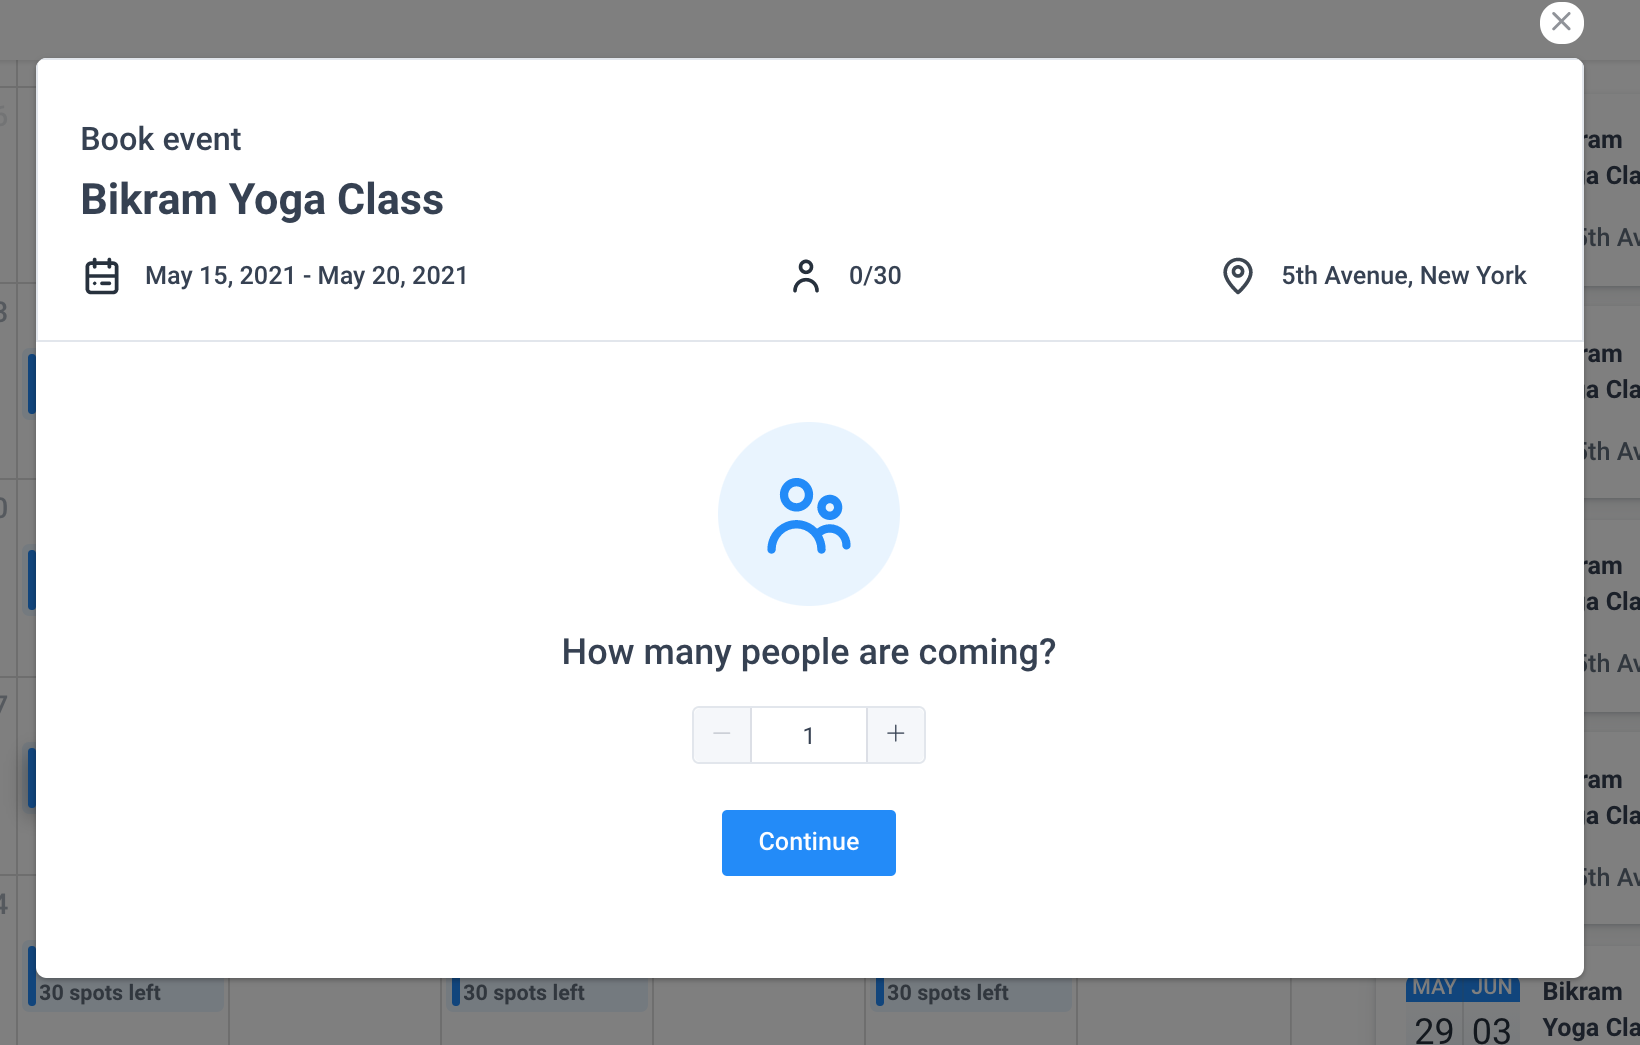
Once the attendee chooses the number of persons and clicks “Continue” the screen with the attendee’s details and payment options will be shown. When all personal info is entered attendee can continue and finish the booking process.

