Video version
The main advantage of the WooCommerce integration is that it allows you to use their payment gateways, send invoices, and include taxes for your services. In order for this integration to work, you will need a WooCommerce product that can serve as a connection between WooCommerce and the Amelia Booking plugin.
Setting up WooCommerce in the Amelia Booking plugin
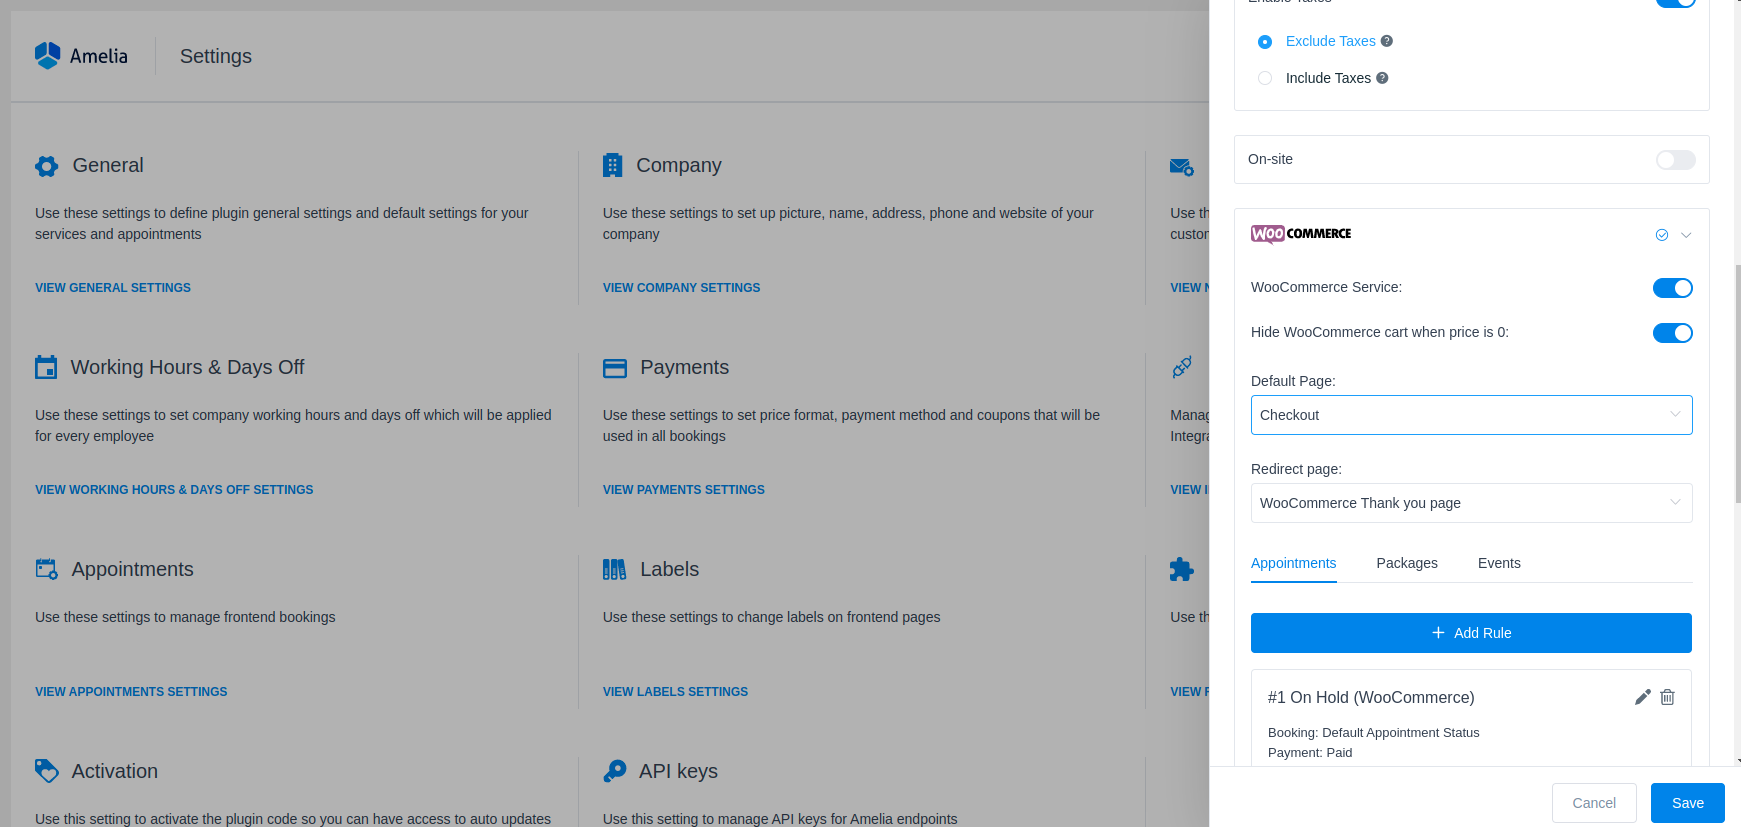
Start by installing the WooCommerce plugin on your WordPress website if you haven’t already. Once the installation is complete, navigate to the ‘Settings‘ page within the Amelia Booking Plugin. Open the ‘Payments‘ settings modal and toggle on the ‘WooCommerce‘ option.
Enabling the WooCommerce service automatically disables other payment methods, as WooCommerce supports the same payment options. This integration ensures a seamless and consolidated payment experience for your booking system.

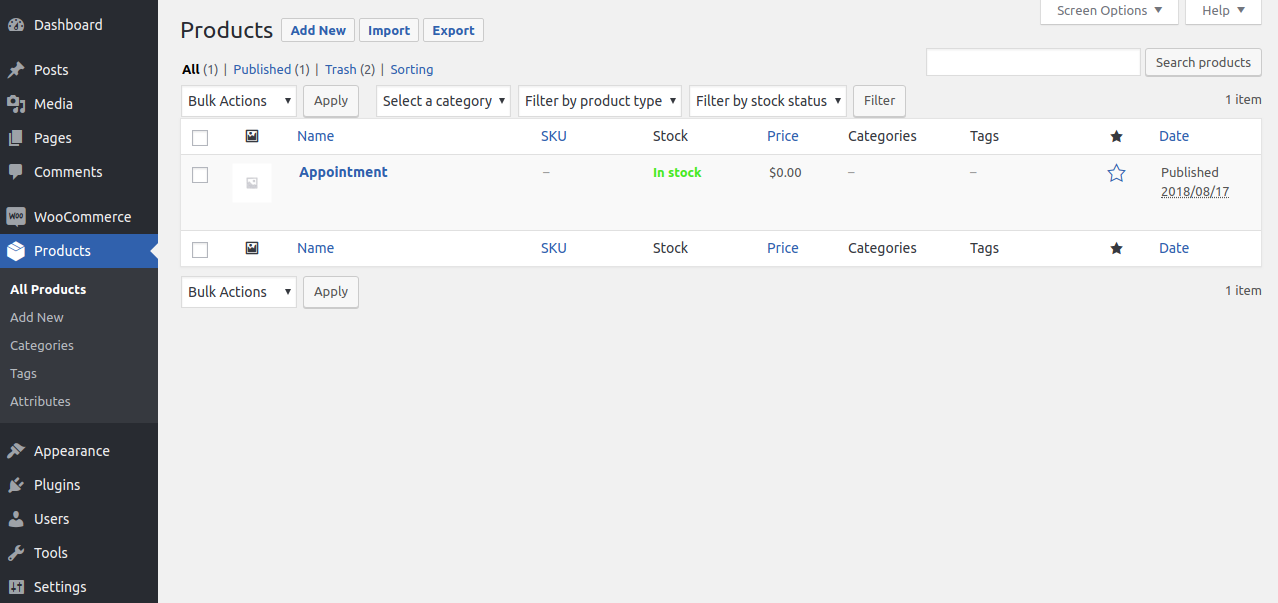
Once you’ve enabled the “WooCommerce” option, a WooCommerce product will be created automatically, and a new section in your WordPress panel will appear below WooCommerce named ‘Products’. These ‘Products’ provide the necessary connection between WooCommerce and Amelia. It will not however be visible to your customers. The default product name is Appointment, but you can change it by going to the “Product” page, clicking on the product, and changing its name.
It is possible to hide WooCommerce Cart if the price for your service is $0. You just need to enable this option in Payment Settings on the Settings page just below the WooCommerce option.
In the “Default page” dropdown you can choose between “Cart” and “Checkout”, meaning you can select if you want to go through the Cart or just the Checkout page when customers are redirected to WooCommerce from the Amelia booking page.
In the “Redirect Page” option you can choose which page customers will be redirected to after they finish their booking successfully. If you select the “WooCommerce Thank you page”, your users will stay on the last page of WooCommerce, and if you chose the “Amelia Add to Calendar page”, your customers will be redirected to the Congratulations page in Amelia, with the option to add their appointment or event to their calendar.

It is possible to set different WooCommerce products for different services and events. By default, all services/events are connected to one WooCommerce product, but if you create multiple products you will be able to choose a product that will be connected to each service/event.
Once you enable WooCommerce as a payment method, go to the Services page, open one of the services and you will see a Settings tab. When you choose this tab you will see the option “Select WooCommerce product” where you can choose a product that will be connected to this service. The same applies to Events. This way, you will be able to set different taxes and other WooCommerce options for each product and each service/event in Amelia.
After setting the product, you can set the Tax and/or invoice option, or if you don’t need either of these options, you can start using the WooCommerce payment methods.
Connecting statuses in Amelia with order statuses in WooCommerce
You can choose which appointment, event, and package status in Amelia will match which order status in WooCommerce. When you change the order status in WooCommerce it will automatically be changed in Amelia. By default, you have three rules for status correlation, “On-hold”, “Processing” and “Completed”, but by clicking on the “Add rule” you can create more correlation between Amelia and WooCommerce statuses. When you click on that button a new section will appear with the following options, that you need to set:
- “Order” dropdown, from which you can choose one of the WooCommerce order statuses that you want to correlate with status in Amelia
- “Apply On” is where you can define the rule which will trigger the change of the appointment status, and that an action can be either order creation or order update.
- “Booking”, here you choose the status in Amelia you want to correlate with the WooCommerce status, depending on if you are creating a rule for appointments, events, or packages.
- Lastly, on the “Payment” dropdown, you can choose the payment status that will be set, once the order is WooCommerce is created or updated.
Adding Taxes in WooCommerce
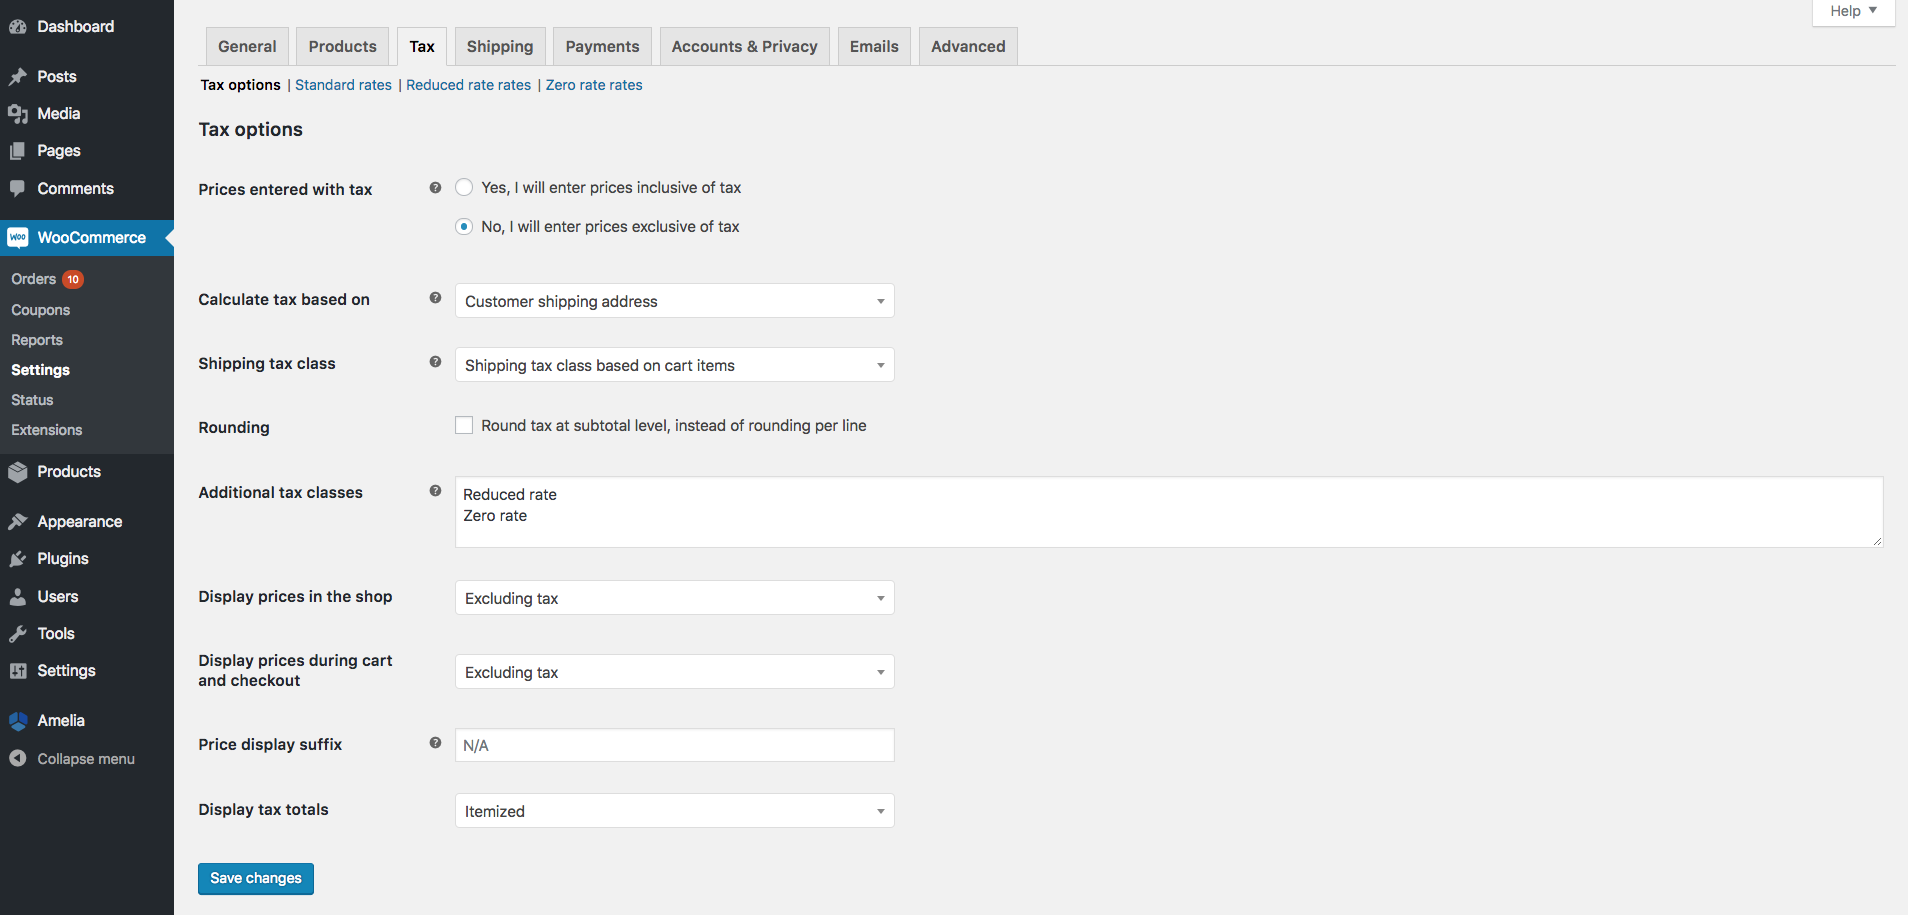
To add tax click on “Settings” in WooCommerce, and then open the “Tax” tab. Configure the tax settings as you need to, and click “Save changes”.

Having done that, open the “Standard rates” page in the Tax tab, click on the “Insert row” button, enter the rate you want to be applied for your services in the Rate % cell, and enter a Tax name and any other information you need. Then click Save changes and your rate will be applied for all future bookings.

Sending invoices with WooCommerce
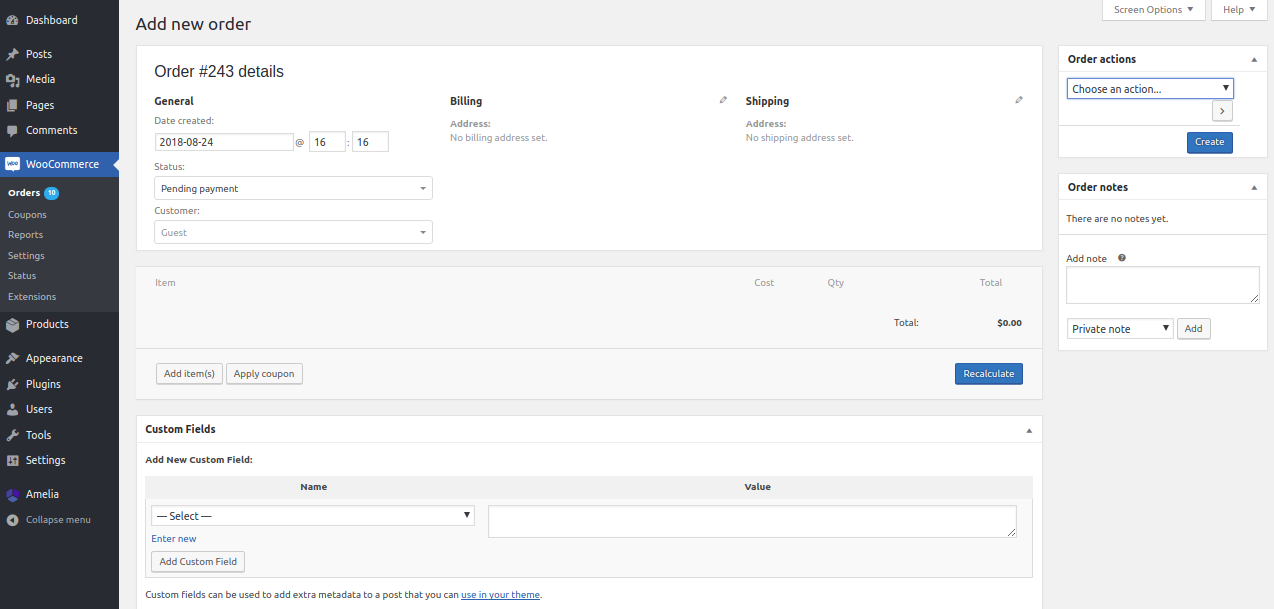
If you need to send invoices to your customers, you can do so with WooCommerce. You simply need to change a single setting. Go to the “Orders” page in WooCommerce (if you don’t have any orders yet you’ll need to add a new one to set this setting). If you’ve already used WooCommerce, simply open an existing order. Once you’ve opened the order, on the right side you will see “Order actions“. Click on it and choose “Email invoice/order details to the customer” and click on the “Update” button below it.

Now that you’ve set invoices when a customer schedules using the WooCommerce appointments option, they will automatically receive an invoice via email.