Imagine you’ve organized a popular event, and all spots are fully booked. However, several customers are still interested in attending. Instead of manually managing cancelations and re-booking, the Waiting List feature simplifies the process.
When a spot opens up due to a cancelation, an admin or employee can easily approve one of the customers from the waiting list to fill the available spot. This ensures no seat goes to waste while keeping your customers informed and engaged throughout the process.
Enabling the Waiting List
To enable the Waiting List, navigate to Amelia Settings → Appointments and Events. In the side menu, switch to Events and enable the Waiting List option.
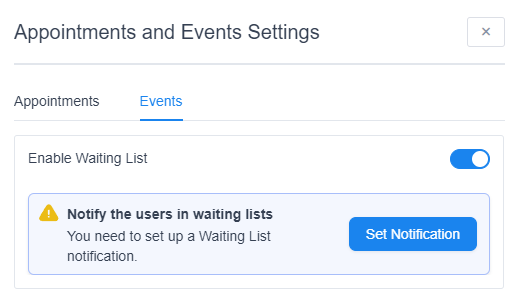
Once enabled, you’ll see a notice to configure the appropriate notification for the waiting list. Clicking on this notification will take you to the Notifications section, where the “Event Waiting List” template is already enabled and ready for use. You can modify this template to align with your company’s communication style.
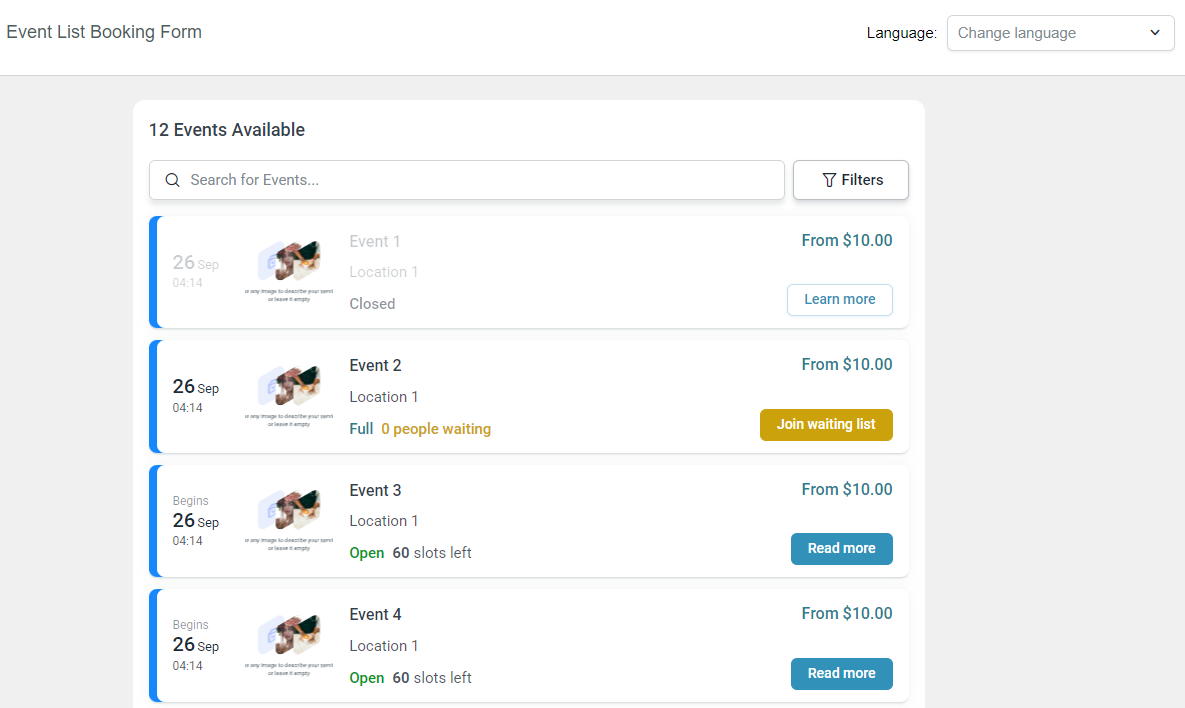
Additionally, once the waiting list is enabled, the Customize section for both the Event List and Event Calendar updates, allowing you to see how it looks and customize these forms to your liking.
Creating an Event with a Waiting List
To configure an event that includes a waiting list, start by creating the event as usual. Once all the event details are configured, navigate to the Waiting List tab to define the capacity of the waiting list itself.
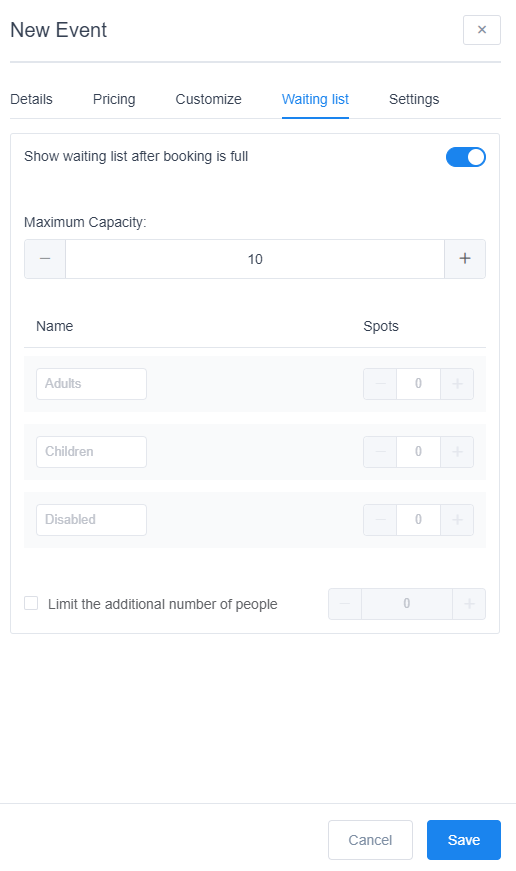
It’s important to note that the Waiting List has its own capacity. For example, if your event is configured for 20 people, setting the maximum capacity of the waiting list to 10 means that once 20 attendees book the event, an additional 10 people can join the waiting list.
Additionally, you have the option to limit the number of extra guests that customers who join the waiting list can bring with them.
Here’s how a fully configured event looks with the waiting list enabled:

You’ll notice that, in addition to the current status of the event, there’s a “Waiting List” label displayed below it.
It’s important to note that while Admins can add attendees to a full event, potentially creating an overbooking for the event, your customers will not have this capability on the front end.
To add people to the waiting list, simply click on Attendees and switch to the Waiting List tab. Adding an attendee to the waiting list is similar to adding a regular attendee: just click the large blue + Add Attendee button at the top and either select an existing customer or create a new one.
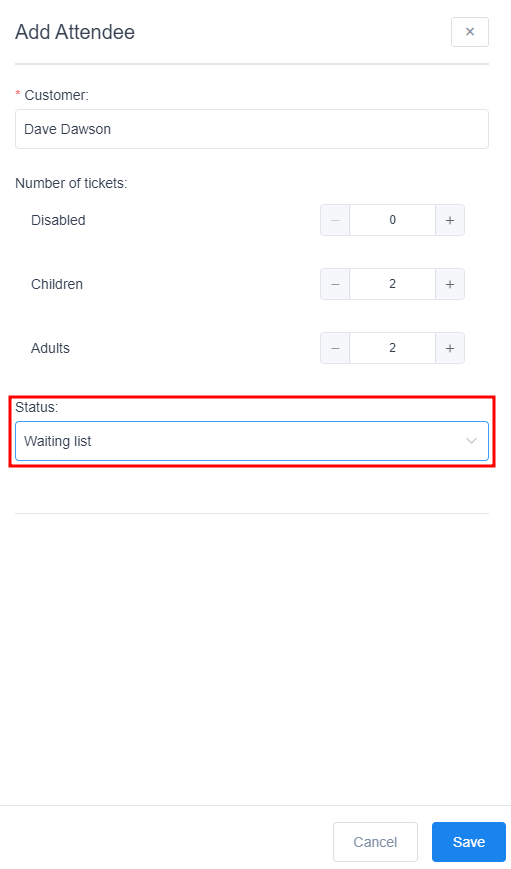
The important difference is the Status drop-down menu, where you need to select Waiting List. Remember, Admins can overbook events, so you wouldn’t want to save an attendee as Approved if they should be on the Waiting List. Doing so could send them an email confirming their successful booking, which would require you to reach out to apologize and move them to the waiting list. To avoid this stress, just keep an eye on the capacity and ensure you select Waiting List when manually adding attendees from the back-end.
Within the Attendees side menu, you’ll be able to see all approved attendees as well as those on the waiting list.
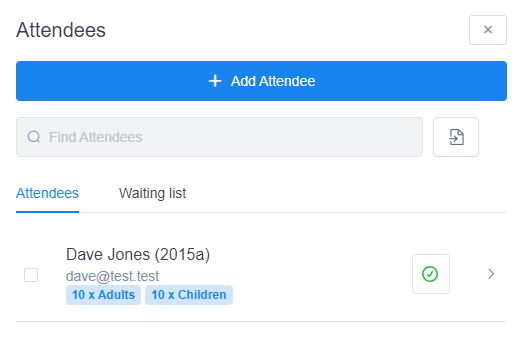
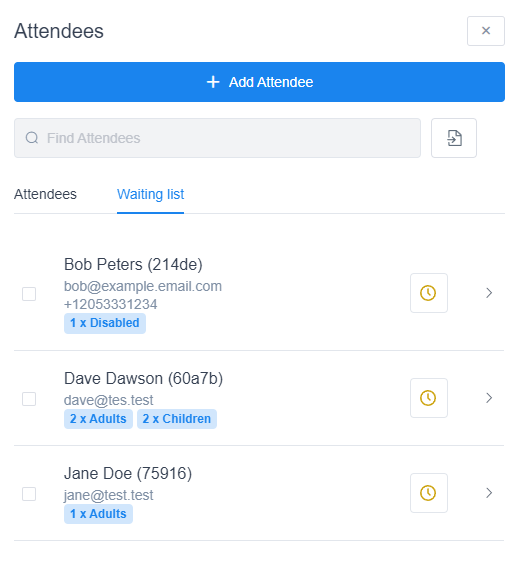
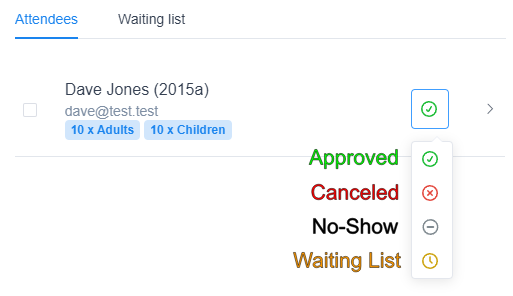
At any time, you can click on the status symbol in either the approved or waiting list sections to change the status of a specific attendee. From the Attendees tab, you have the option to set the status to no-show, cancel, or move an attendee to the waiting list. However, within the Waiting List tab, you can change an attendee’s status to Approved (which moves them to the approved attendees tab) or cancel their attendance.
Viewing Waiting List Forms
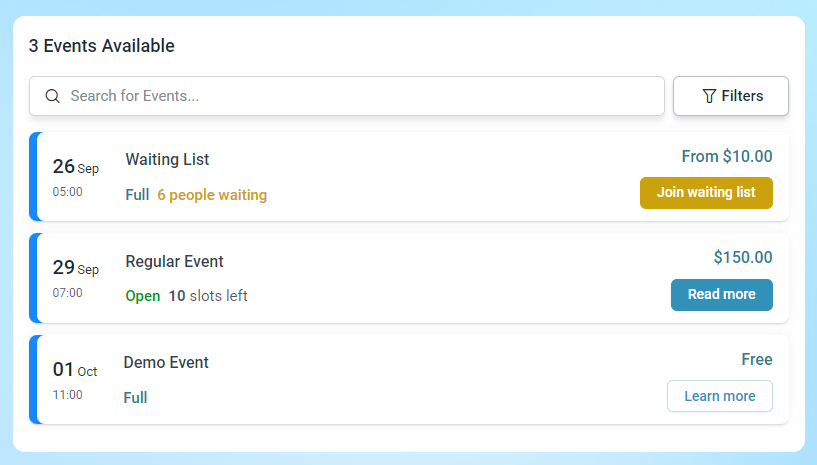
The Waiting List feature does not add any additional load to the Event List and Event Calendar forms. However, if it is enabled and an event utilizes this feature, it will be displayed to customers once the event is fully booked.
Event List:
Event Calendar:
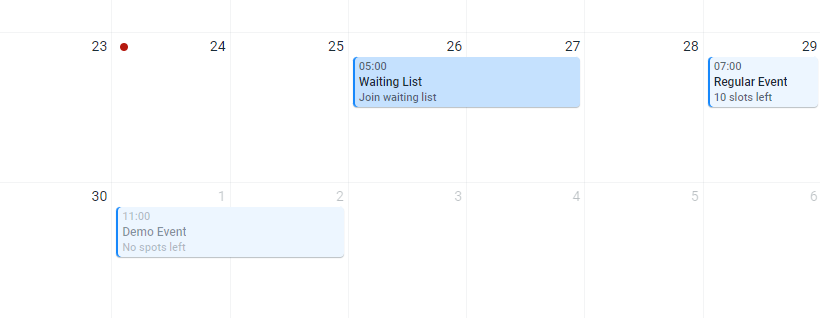
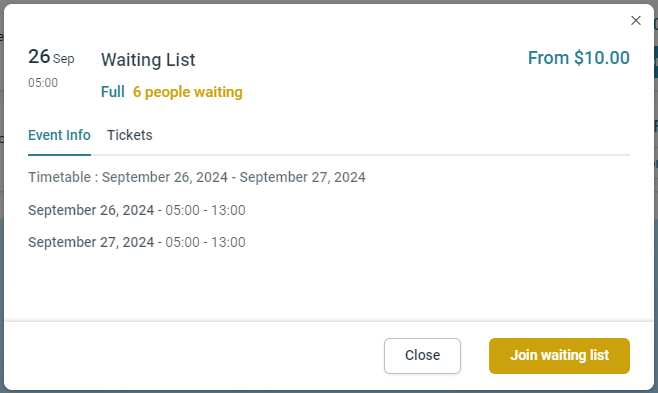
While it is clearly visible that an event can only be joined as a waiting attendee in the Event List booking form, the Join Waiting List option on the Event Calendar form is somewhat smaller due to space constraints.
Clicking on the event from either form will bring up the same popup window, where customers are informed about the date(s) and time(s) of the event, the tickets, and the description.
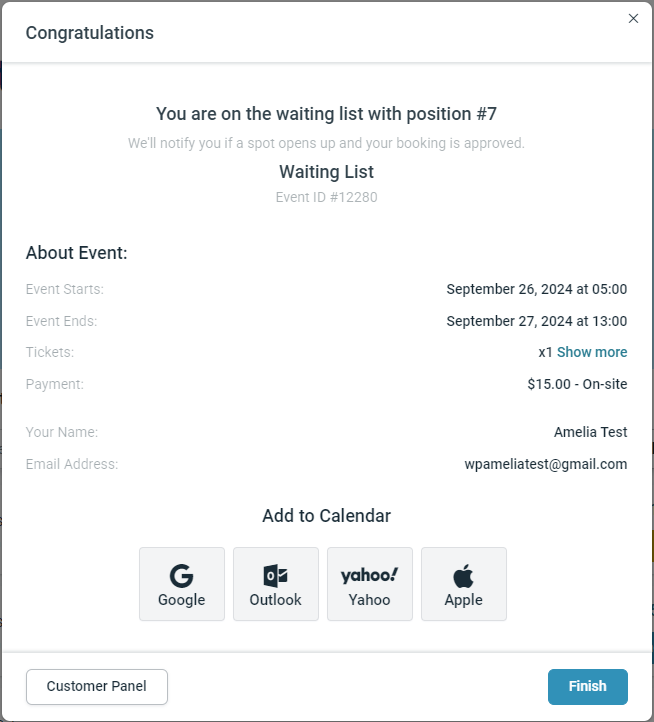
While the entire booking process remains the same as a regular booking, the end message for joining the Waiting List is slightly different. It displays the position the customer holds on the waiting list, giving them an estimate of where they stand.
You don’t need to worry about this, as you can approve any attendee from the waiting list, regardless of their position. Customers only see their position on the confirmation screen, but they aren’t aware of other attendees. Therefore, even if you approve the attendee in position #7 before the one in position #1, they wouldn’t know.
Customizing the Forms
We’ll briefly show you how and where to customize the segments of the forms that display the Waiting List. For a more comprehensive guide on customizations, please refer to this page.
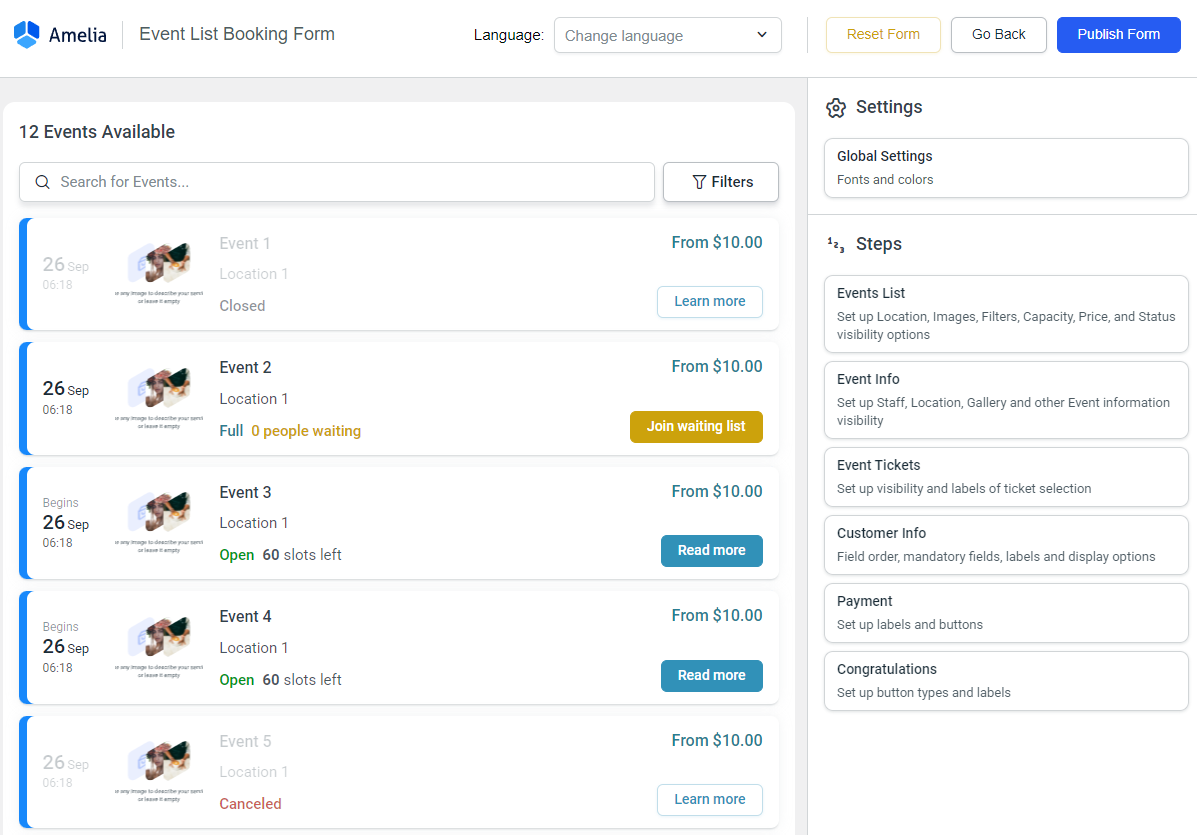
When you access Amelia’s Customize section, the first step is to select the form you wish to customize (either Event Calendar or Event List). For this article, we will use the Event List. Please note that the waiting list segments will appear in the Customize section only if you have enabled this feature, as mentioned at the beginning of this article. Once you select the form, a dummy event list will automatically load, displaying every state of the events.
When you access Amelia’s Customize section, the first step is to select the form you wish to customize (either Event Calendar or Event List). For this article, we will use the Event List. Please note that the waiting list segments will appear in the Customize section only if you have enabled this feature, as mentioned at the beginning of this article. Once you select the form, a dummy event list will automatically load, displaying every state of the events.
You can navigate through every step of the event booking procedure and configure the appearance of the “Waiting List” button, the labels for these buttons, and all information related to the waiting list. One of the most important sections to highlight is the last step—the Congratulations step—where you can edit the labels and modify the final screen that customers see when they join the waiting list.

The Waiting List feature in Amelia provides an effective way to manage event bookings while ensuring that no spots go to waste. By enabling this feature, you can keep customers engaged and informed about their status, allowing for a smoother booking experience. We hope this guide has helped you understand how to set up and customize the Waiting List for your events. If you have any further questions or need additional assistance, please feel free to reach out to our support team.