The Google Calendar API credentials for Amelia are set up by creating an application in the Google Cloud Console and configuring it to allow Amelia to connect securely with Google Calendar. The process may sound technical, but it’s just a few steps, and once you’ve done it, you won’t need to touch it again. If configured correctly, this one-time setup ensures that Amelia can sync appointments and events with Google Calendar smoothly.
Step 1 – Create a new Google Cloud Project
-
Go to the Google Cloud Console.
-
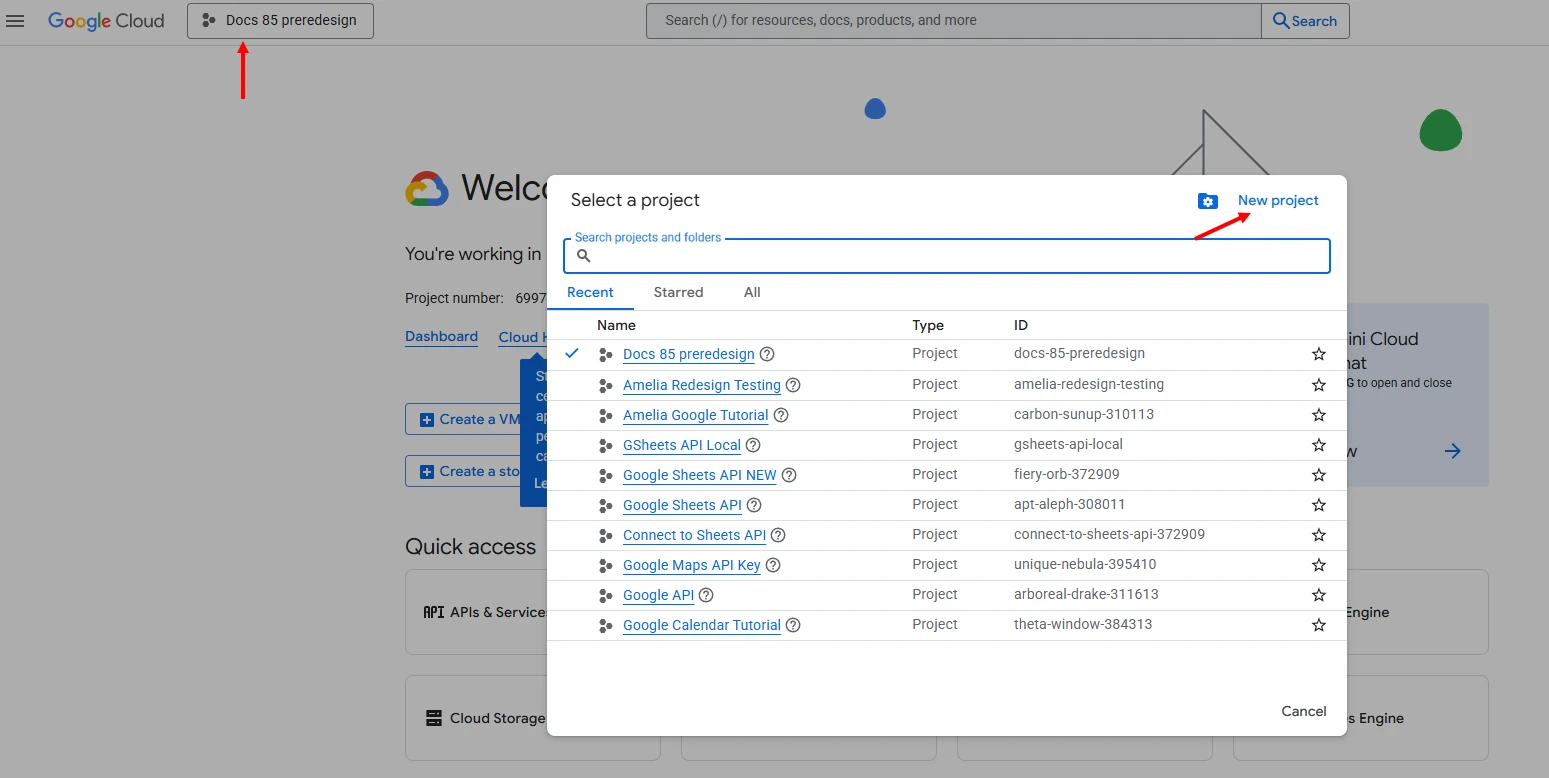
Click on the Project Picker in the top left (next to the “Google Cloud” logo) or press CTRL+O.
-
In the pop-up, click NEW PROJECT in the top right corner.
- Select No Organisation (if you’re using a free Google account) or your company profile (if you’re using Google Workspace).
-
Enter the project name (e.g., Amelia GCal Integration) and click CREATE.
Step 2 – Enable the Google Calendar API
-
Once the project is created, click Select Project from the notification in the top right of the page (or open the Project Picker again with CTRL+O and select the project you just created).
-
Open the menu (☰ in the top left, or just press “.” on your keyboard).
-
Go to APIs & Services → Library.
-
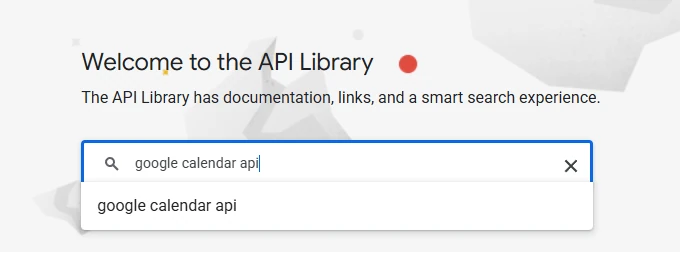
Type google calendar api in the search bar.
-
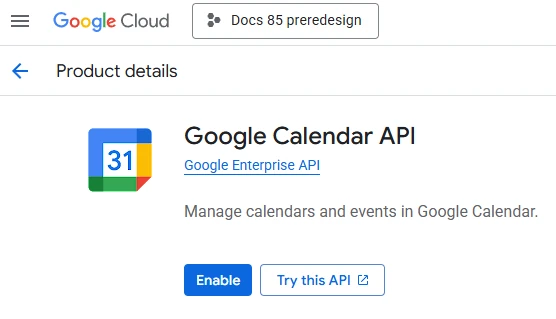
Click Google Calendar API, then click Enable.
Step 3 – Create your OAuth Credentials
-
After enabling the API, click Create Credntials in the top right corner of the screen;
-
Alternately, go to APIs & Services → Credentials and click the mid-screen “+ Create Credentials” drop-down → OAuth client ID
-
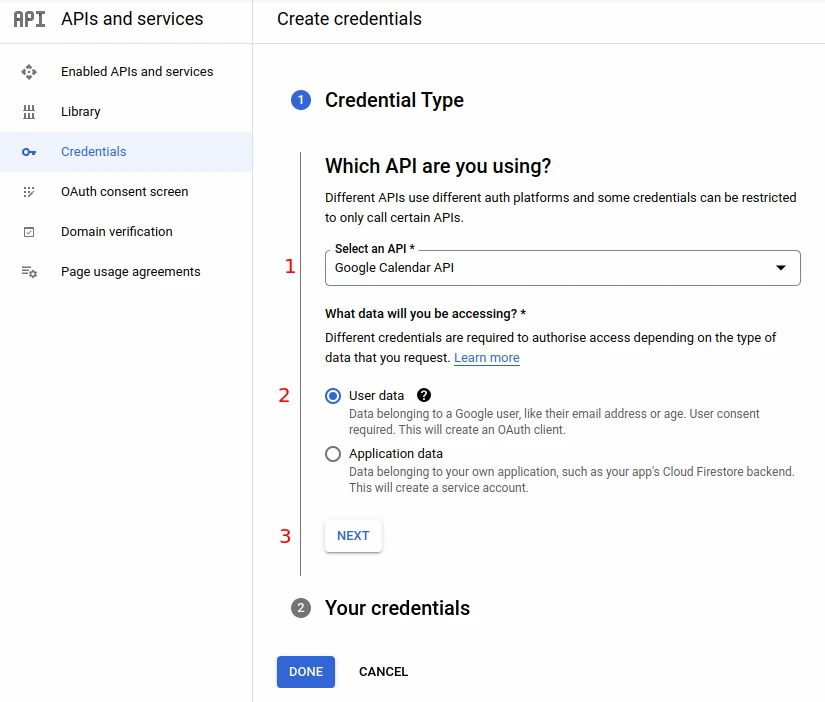
Choose:
-
Google Calendar API
-
User Data
-
Click Next.
-
-
Enter an App name (e.g., Amelia GCal).
-
Choose your own email for both the User support email and the Developer contact information.
-
Click Save and Continue.
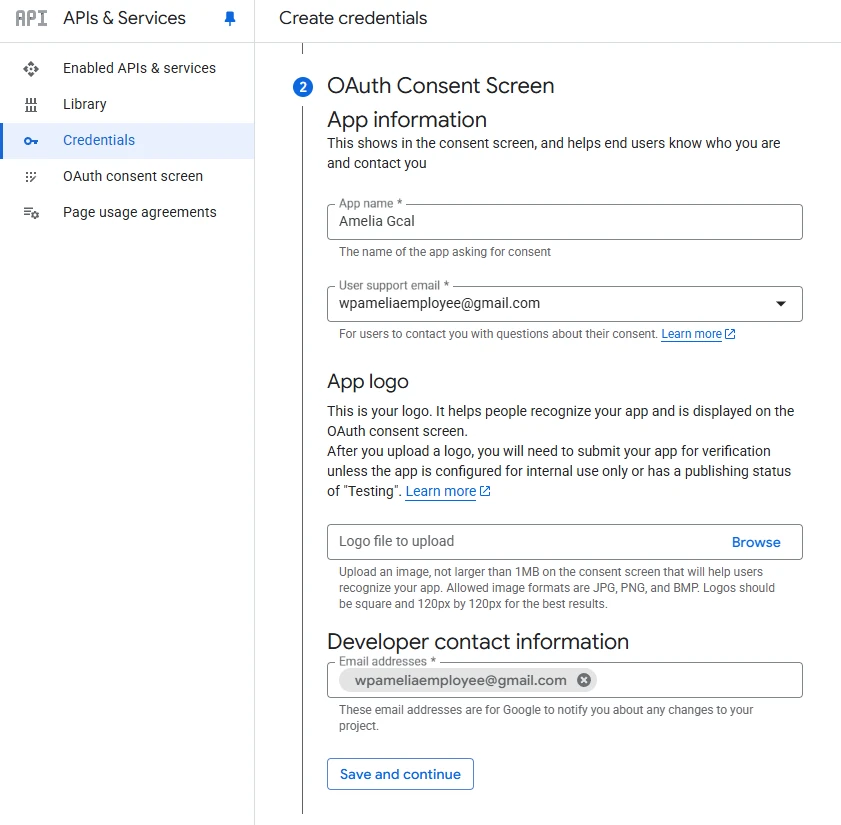
Step 4 – Define the OAuth Client ID
Skip Scopes by clicking on Save and Continue again. This will bring you to the OAuth Client ID:
-
Under “Application type”, choose Web Application.
-
Give it a name (e.g., Amelia GCal).
-
Scroll down to Authorized redirect URIs, click + Add URI, and paste the Redirect URI from Amelia → Settings → Integrations → Google Calendar.
-
Example:
https://yourdomain.com/wp-admin/admin.php?page=wpamelia-employees
-
-
(Optional but recommended) If you’re using the Employee Front-end Panel, also add the full panel URL (e.g.,
https://yourdomain.com/staff-portal/). Don’t forget the trailing/. -
Click Create.
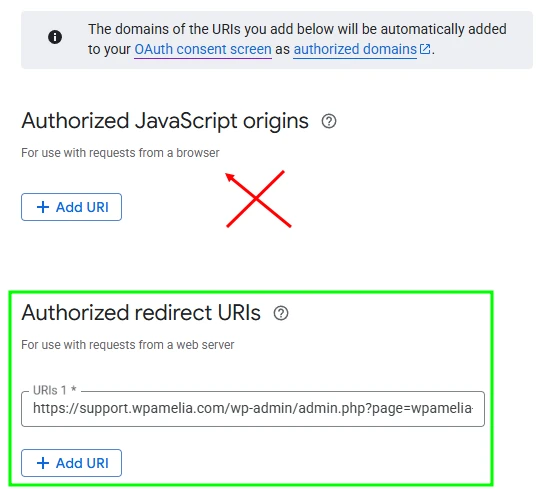
Step 5 – Get your Client ID and Client Secret
While still on the previous screen, copy the Client ID and paste it into the corresponding field in Amelia → Settings → Integrations → Google Calendar, and then click Done (in Google Cloud console).
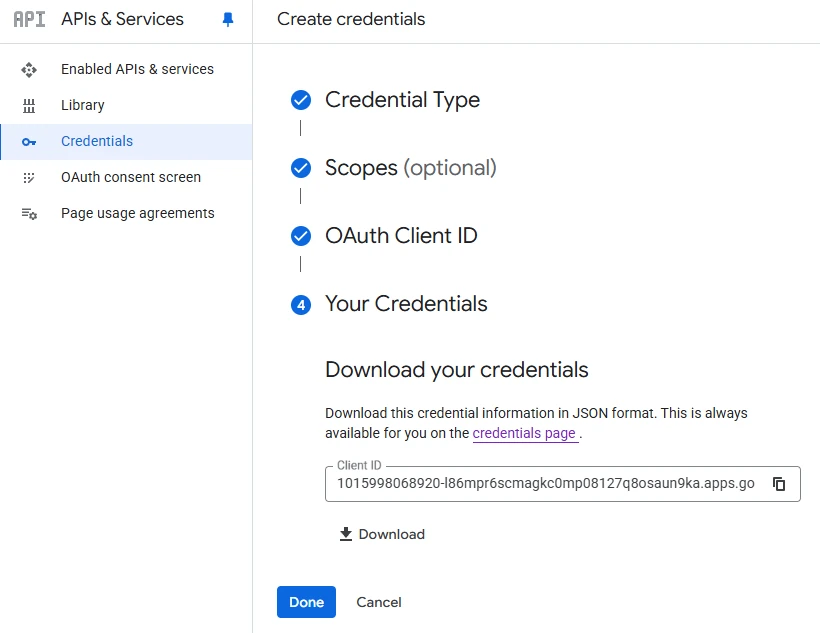
If you accidentally skip this step, you can still access the Client ID when fetching the secret:
- Open the menu (☰ in the top left, or just press “.” on your keyboard).
-
Go to APIs & Services → Credentials.
-
Under OAuth 2.0 Client IDs, click the name of your new app.
-
On the right, you’ll see your Client ID and a hidden Client Secret (click the copy button).
-
Paste these values into Amelia → Settings → Integrations → Google Calendar.
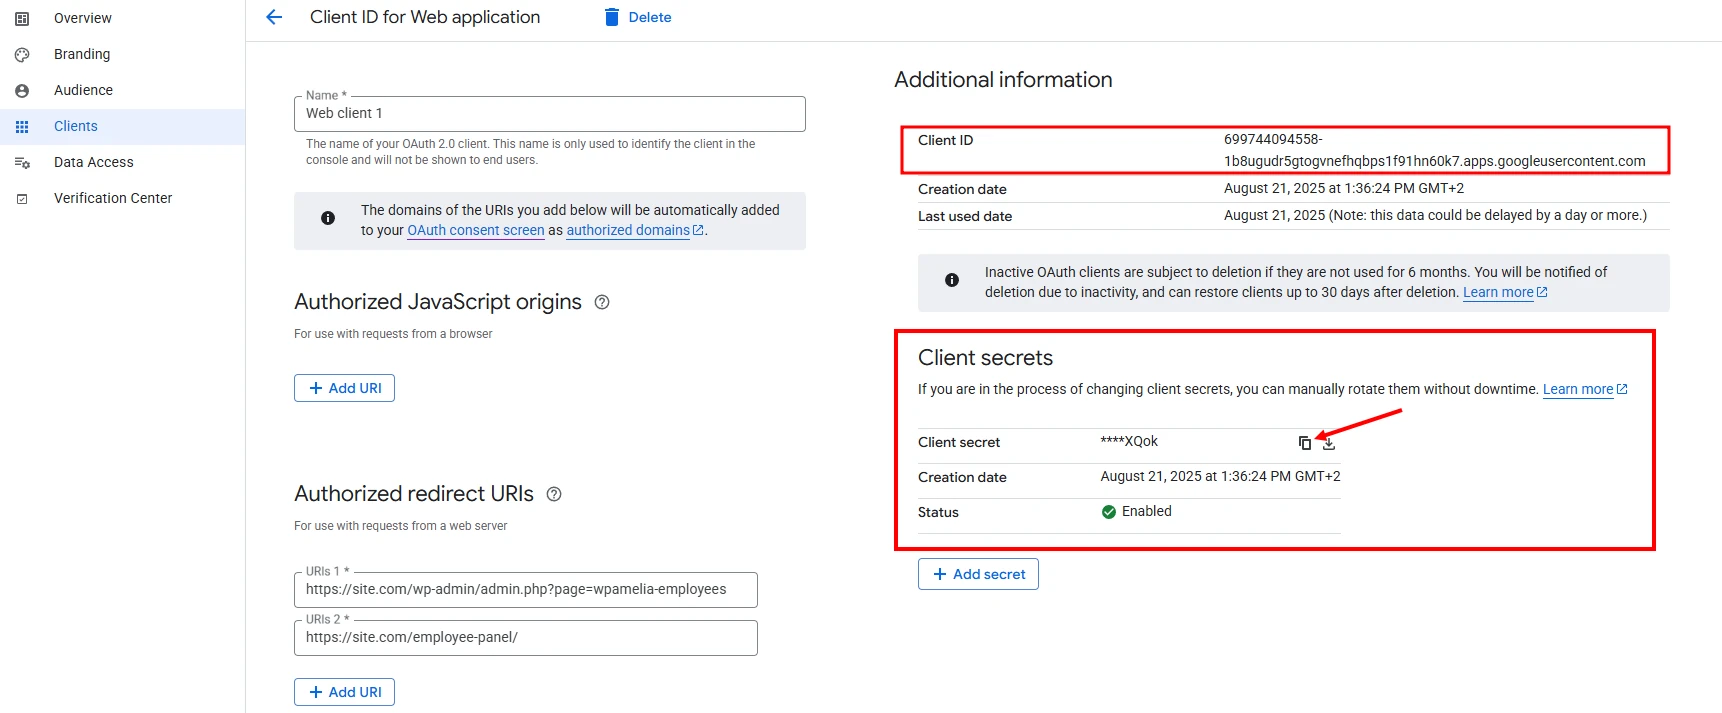
Step 6 – Publish the App
- Open the menu (☰ in the top left, or just press “.” on your keyboard)
-
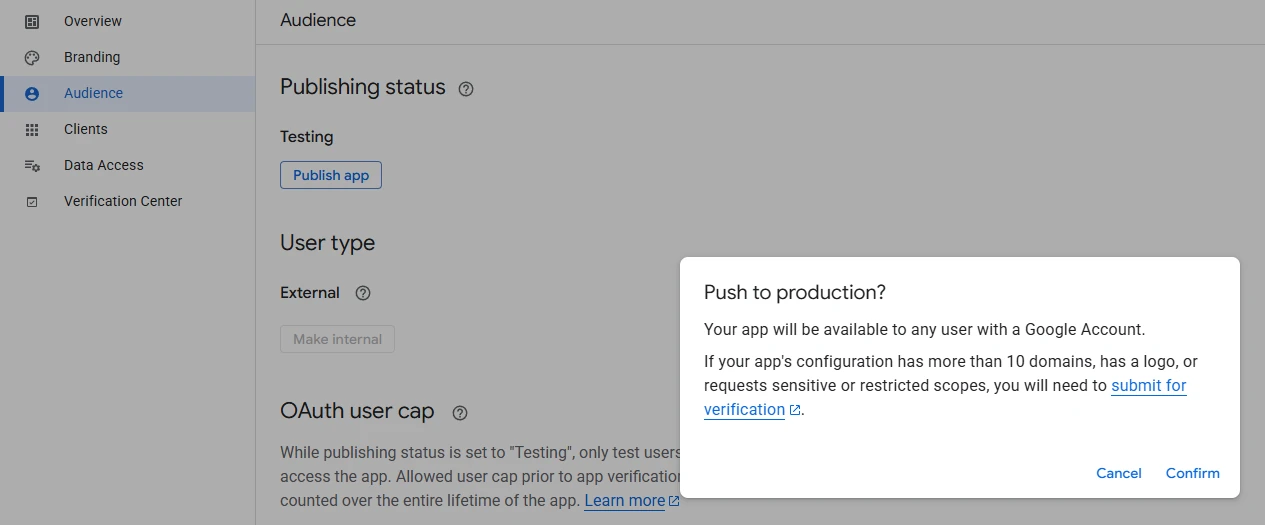
Go to APIs & Services → OAuth consent screen → Audience.
-
Under Publishing Status, click Publish app.
-
Confirm when asked “Push to production?”.
That’s it — Amelia is now connected to Google Cloud!
Next Step: Now that you’ve set up your credentials, the next step is to Connect your employees to their Google Calendars so they can start syncing appointments.