Video Version
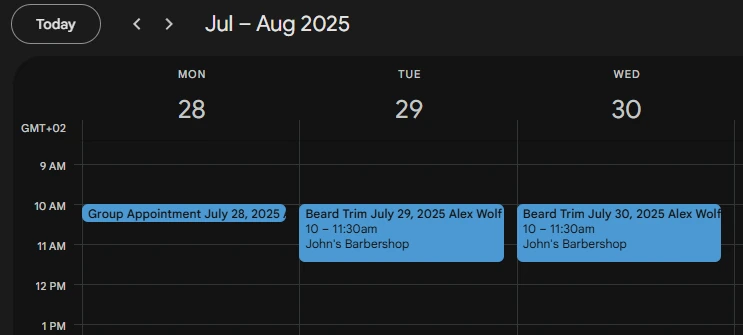
With Google Calendar Integration, all employees in Amelia can sync their working schedules with their Google Calendar. Each appointment booked in Amelia will be added to their Google calendar with the customer added as a participant.
If an Employee already has events in the Google calendar marked as busy, those will not be available for booking in Amelia – this will prevent overbooking. Rescheduling, canceling, or deleting the appointment needs to be done in Amelia. Suppose you reschedule the appointment in Google Calendar. In that case, that will not reflect in Amelia, but if you reschedule the appointment in Amelia, it will be updated in Google Calendar as well.
Client ID and Client Secret
Before you can integrate Amelia with Google Calendars, you must create a “Client ID” and “Client Secret”.
- Go to the Google Cloud Console.
- Click on the drop-down where the name of your current project is to create a new project.
- In a new window that appears, select “No Organisation” (if you’re using a free account), or your company’s profile. Then click on “NEW PROJECT” in the top right:
- Enter the project name, and click on “CREATE”:
- You will see the project is being created in the upper right corner, and when it is created you will see a notification similar to what you can see here:
- In that notification, click on “Select Project” and the project will automatically be selected. Since this is a new project, there will be no available APIs, so we’ll need to create them.
- In the left-side menu seen in the screenshot above, click on “Library” and you’ll be taken to Google’s Library from where we need to add the API for Google Calendar.
- On the next screen, start typing “Google Calendar”, and the “google calendar api” option will appear:
- If you click on that option, or simply hit ENTER, you will see two results. Click on “Google Calendar API“
- Next, click on the “Enable” button.
- When the API is enabled, you will be taken back to the “Enabled APIs and services” screen. Click on the “Create Credentials“ button in the top right corner.
- This will open the “Credentials” window. There you need to select:
- Google Calendar API;
- User data;
- Click on “Next”.
- When you click on “Next”, step 2 will open up, where you need to provide the “Name” of the App; select the email in the “User support mail” dropdown, and provide the email of the App developer (this is usually the same email as the “User support mail”):
- After you’re done, click on “Save and Continue“, below the “Developer contact information”, and skip the remaining steps by clicking on “OAuth Consent Screen” in the left-hand side menu:
- Here, the “User Type” will be set to External by default, and we only need to Publish the app.
- A new popup opens, asking you if you want to push the app to production. Click on “Confirm” to complete this process.
- A new modal will pop up, where you need to select “In production” and click on “Confirm” in the bottom right of the popup:
- Before continuing, verify that the publishing status is set to “In Production” and that the user type is External:
- Now, you can go to “Credentials” in the left-hand side menu, and you will see empty lines for “API Keys”, “OAuth 2.0 Client IDs” and “Service Accounts”.
- On the top, click on “+ Create Credentials“
- This will open a drop-down, where you need to click on “OAuth client ID“:
- Here, from the “Application type”, select “Web application” (1), enter the name of the application (2), and click on “+ Add URI” (3).
- A field will appear, where you need to paste the redirect URI, found in Amelia Settings/Integrations/Google Calendar/Redirect URI field. After you paste the URI, click on the “Create” button below.
- If you use the front-end Employee panel and want to allow employees to connect their Google calendars from there, you also need to add the full URL of the page where you have the front-end Employee panel, as well. Please make sure to include the whole URL, with the closing ” / ” included, as shown in the screenshot below (“staff-portal” redirect URI).
- A new modal will open up, and from there you will need to copy and paste “Your Client ID” and “Your Client Secret” into related fields in the “Amelia Settings/Integrations/Google Calendar” dialog in Amelia. After that, you or your employee (if the employee has access to the WordPress dashboard) will be able to connect Google Calendar with Amelia from the employee edit dialog.
Connect employees with their Google accounts
Once you’ve completed these settings, there’s one more thing to set on the employees’ side. Each employee should log in to the WP backend or the front-end Employee panel and connect to their Google calendar for the integration to work. All they need to do is open the Employee dialog (or the My profile page on the Employee panel) and click on the button beside the Google Calendar option. They will then be redirected to choose their Google Account. Once they have chosen it, they will be returned to their profile in the Amelia Plugin with the selected Google Calendar email (if the account is successfully connected the button should change the color from blue to red).
- Please visit THIS PAGE to see how to connect employees with their Google Calendar.
If your employees experience one of the following issues during the connection please configure your security system so that it doesn’t block requests from Google, or click on the browser URL field, delete this part at the end of the URL: “=https://www.googleapis.com/auth/calendar”, and press Enter.
“Not Acceptable!
An appropriate representation of the requested resource could not be found on this server. This error was generated by Mod_Security.”
Or:
“Forbidden.
You don’t have permission to access this resource.”
Again, if you see this “Forbidden” error, please delete this part at the end of the URL: “=https://www.googleapis.com/auth/calendar”, and press Enter, and your employee will be connected to the calendar.
Redirect URI
Read-only field that you should add to the “Authorized redirect URIs” field in process of creating Google project.
Event Title
Here you can configure the title of the event that will be displayed in the Google Calendar. This option works with placeholders from the Notifications page so to set the title you will need to copy placeholders from the notifications page and paste them here. You will find these placeholders once you click on the </> Show Email Placeholders on the Notifications page.
Event Description
Here you can configure the description of the event that will be displayed in the Google Calendar. This option works with placeholders from the Notifications page so to have the information you want here, you will need to copy placeholders from the notifications page and paste them here. You will find these placeholders once you click on the </> Show Email Placeholders on the Notifications page.
Insert Pending Appointments
When this option is enabled, appointments with pending status will be added to the employee’s calendar.
Add Event’s Attendees
Enable this option if you want your employees to see customers that attend the appointment in the Google event. You can share an event with customers by adding them as attendees. This places the event on their calendar.
Customers will not be able to see other attendees of the same appointment in Google calendar.
Allow customers to see other Attendees
This option allows you to choose whether your customers will see other attendees in Google Calendar events if they choose to add scheduled group appointments in their Google Calendar. By default, this option is disabled so your customer will only see themselves in their events. If enabled, each customer that adds the group appointment to their calendar will see other customers as attendees in the list.
Send Event Invitation Email
If enabled, this sends an invitation email to the customers. This option can be enabled, only if Add Event’s Attendees option is turned on.
Remove Google Calendar Busy Slots
Enable this option if you want to remove the time slots of the Busy events in your employees’ Google Calendars from their work schedules in Amelia. When enabled, time slots in the Amelia Calendar will be removed whenever there is a Busy event in the Google Calendar.
Include Buffer time in Google events
This option is made for you to choose if the buffer times that you add for each service will be added in the Google events. If you enable it, the buffer times for scheduled appointments will be added together with the appointment in the employee’s Google Calendar preventing the employee to add an event to Google that would overlap his buffer time of the appointment scheduled in Amelia.
Maximum Number Of Events Returned
Here you can set the maximum number of events that will be returned from your employees’ Google Calendar into the Amelia calendar. These events will not be visible as they only affect the available time slots in the Amelia calendar.
Connect Amelia Events with Google Calendar
The integration with Google Calendar is also supported for events in Amelia, so employees can have their events in their calendars as well. In order for an event in Amelia to be synced with Google, you need to add an Organizer for the event when you create the event on the Amelia Events page. You will find the option in the Event modal and you can choose one of the employees you have in Amelia for this position, but please note that the employee you choose must be connected to their Google calendar on the Employees page as well.
You can also add more employees to the event, of course, using the Staff option, and the event will be added to these employees’ Google Calendars as well (if they are connected to their Google calendars on the Employees page). The employee that is assigned to the event in Amelia as the Organizer will be shown in Google as the organizer as well. Employees that are assigned to the Amelia event as Staff, will be shown as attendees in the Google Calendar event.