Creating a new appointment
The Amelia Booking Plugin provides two ways to schedule customer appointments:
Video version
- Through the front-end: Here, the customer takes the initiative of scheduling an appointment with the website, while you have the option to change the appointment status, reschedule, cancel, or assign another employee. You can read more about this way of scheduling an appointment in these documentation sections:
- Through the back-end: This approach allows admins and managers (see Amelia Users and Roles) to schedule an appointment from the WordPress dashboard. This is the best way to schedule an appointment if you have a customer on the phone or have just received a message from a customer requesting an appointment.
In this chapter, you’ll see how to schedule appointments through the back-end. The following process for scheduling an appointment begins after you click the “+ New Appointment” button located at the top of the page or the “+” (plus icon) button in the bottom right corner of the page. Once you click on any of the buttons, a “New Appointment” dialog will appear, allowing you to choose all necessary information in order to create a new appointment.
“New Appointment” dialog is divided into two tabs:
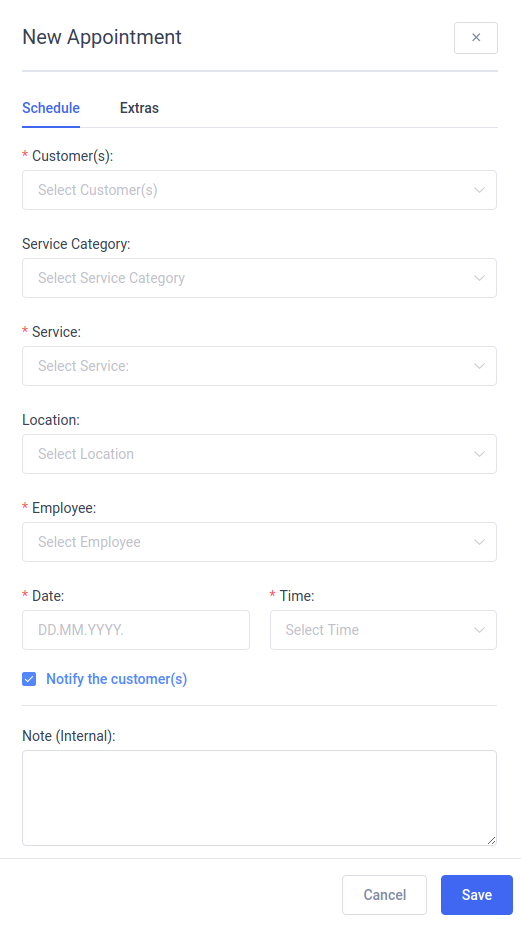
- “Schedule”: Use this field that you must populate pane to create a new appointment. “Customer(s)”, “Service”, “Employee”, “Date”, and “Time” are mandatory and you need to populate these fields to schedule a new appointment. There is no specific order in selecting “Customer(s)”, “Service” and “Employee”, but before you can choose the appointment date, you have to populate these three fields. After selecting the date, you will be able to select the time of the appointment:
-
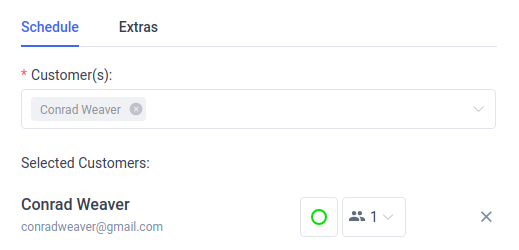
- “Customer(s)”: Here you need to select the customer(s) to whom the service will be provided. If the customer is not an existing customer, click the “Create New” button. The “New Customer” dialog will open and you’ll be prompted to add basic details, such as the customer’s first name, last name, email address. Creating a new customer is described in greater detail in the “Managing single Customer” chapter. The newly created customer will be added to the appointment. Each selected customer represents a single customer booking. After selecting the customer(s) you will be able to configure the number of persons for each customer booking. This can be useful when one customer wishes to book an appointment for several people. This is possible if services allow you to have more than one customer at the same time. It is also possible to change the booking status of each customer booking separately.
-
- “Service”: Select the service that will be delivered to a customer(s). Once you select the service, it will narrow down to the employee and location options. You will only be able to select employees that are assigned to provide the selected service and the locations where this service is offered.

-
- “Employee”: Find and select the employee that you want to provide the appointment. Selecting an employee will narrow down to the service and location options, so you will only be able to select the services that the chosen employee provides and to the work location of the employee.

-
- “Apply Coupon”: If you wish, you can add a coupon here in order to reduce the appointment price. Find and select the coupon that you want to apply for the appointment. Only coupons that are created for the chosen service will be available in the list. You can read more about creating coupons on the Finances & Coupons page.

-
- “Date”: Select an available appointment date from the date picker. Dates won’t be available until you choose the customer(s), service, and employee. Once you have selected the appointment date, you will be offered available time slots in the “Time” drop-down.

-
- “Time”: Choose the time of the appointment from the available time slots.

-
- “Service Category”: While this field is not required it will make it easier for you to select the service by filtering the services of the chosen category.

-
- “Location”: While this field not required, it will make it easier for you to select the employees that work in the selected location. The field is not visible if you don’t have at least one created location.

-
- “Notify the customer(s)”: When this option is checked, a notification that contains the summary information for the booked appointment will be sent after you save this appointment. To configure this option, view the “Notify the customer(s) by default” setting in the “Notification Settings”.

-
- “Note (internal)”: Here you can write a quick note to pay attention to customer(s) particular needs. This note is internal and is not visible to the customer(s).

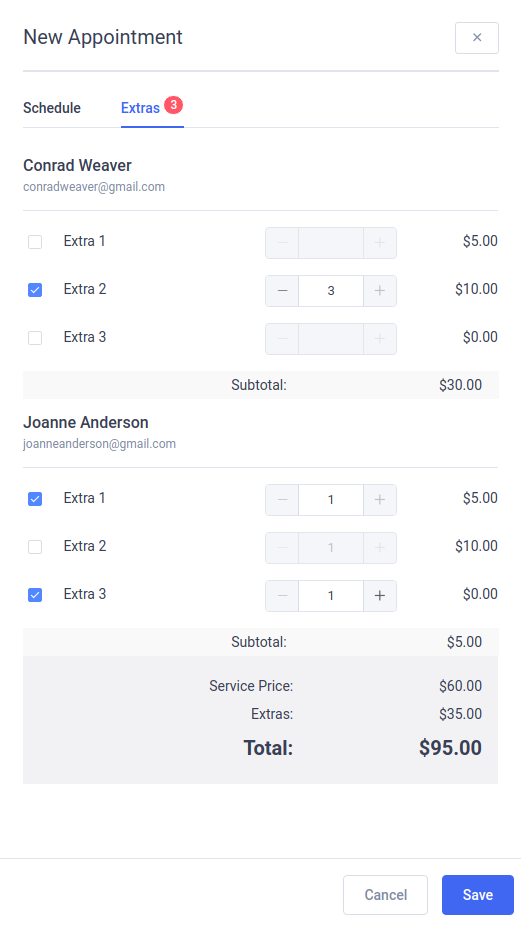
- “Extras”: After selecting “Customer(s)”, “Employee” and “Service” navigate to the “Extras” tab to add the additional service extra. You can configure the extra for each customer booking. Check the extra item that you want to add to the appointment and choose the quantity of the extra item. If an extra item is chargeable the price of the extra will be multiplied by the number of persons in the customer booking. If the extra item increases the appointment duration it is recommended to select an extra item before you select the appointment time because selecting extra within a duration can decrease the number of available time slots.
Editing a single appointment
It often happens, that you need to make changes to an existing appointment. Maybe the customer needs to reschedule their appointment, or maybe an employee is unexpectedly out of the office. To edit an existing appointment, simply click on the “Edit” button to the right of the appointment you want to change.

Clicking on the “Edit” button will open the “Edit Appointment” dialog where you can change any appointment parameters. The difference between the “Edit Appointment” and “New Appointment” dialogs is that the “Edit Appointment” dialog has the “Payments” tab where you can see and change payment information.
In the “Edit Appointment” dialog you have the option to reschedule the appointment, change customer booking status, change the employee, change the service… If you are changing the date, you may see that a selected employee is not available for the newly selected date, or that the selected time slot is busy. If this occurs, simply select a different employee or choose a different time slot.
You can choose whether or not to send the customer(s) an email notification of the change, notification by checking/unchecking the “Notify the customer(s)” checkbox.
Once you’re finished, click the “Save” button in the dialog footer to save your changes.

To delete an appointment from the “Edit Appointment” dialog, simply click on the “Trash” icon button and click “Delete” to confirm.

You can also duplicate the appointment by clicking on the “Copy” icon button. It will open a “New Appointment” dialog with the same information as the duplicated appointment. You’ll have to pick an available date and available time slot for the new appointment. Duplicating an appointment might be helpful when you are in a meeting with a customer, and he/she wants a follow-up appointment for the same service and employee.

List of Appointments
The “Appointment” page shows all the information about individual appointments. To specify the number of records that are to be displayed, select the required number in the “Default items per page” in the “General Settings”.
With the search input, you can search for appointments by customer’s name, employee’s name, or service’s name.

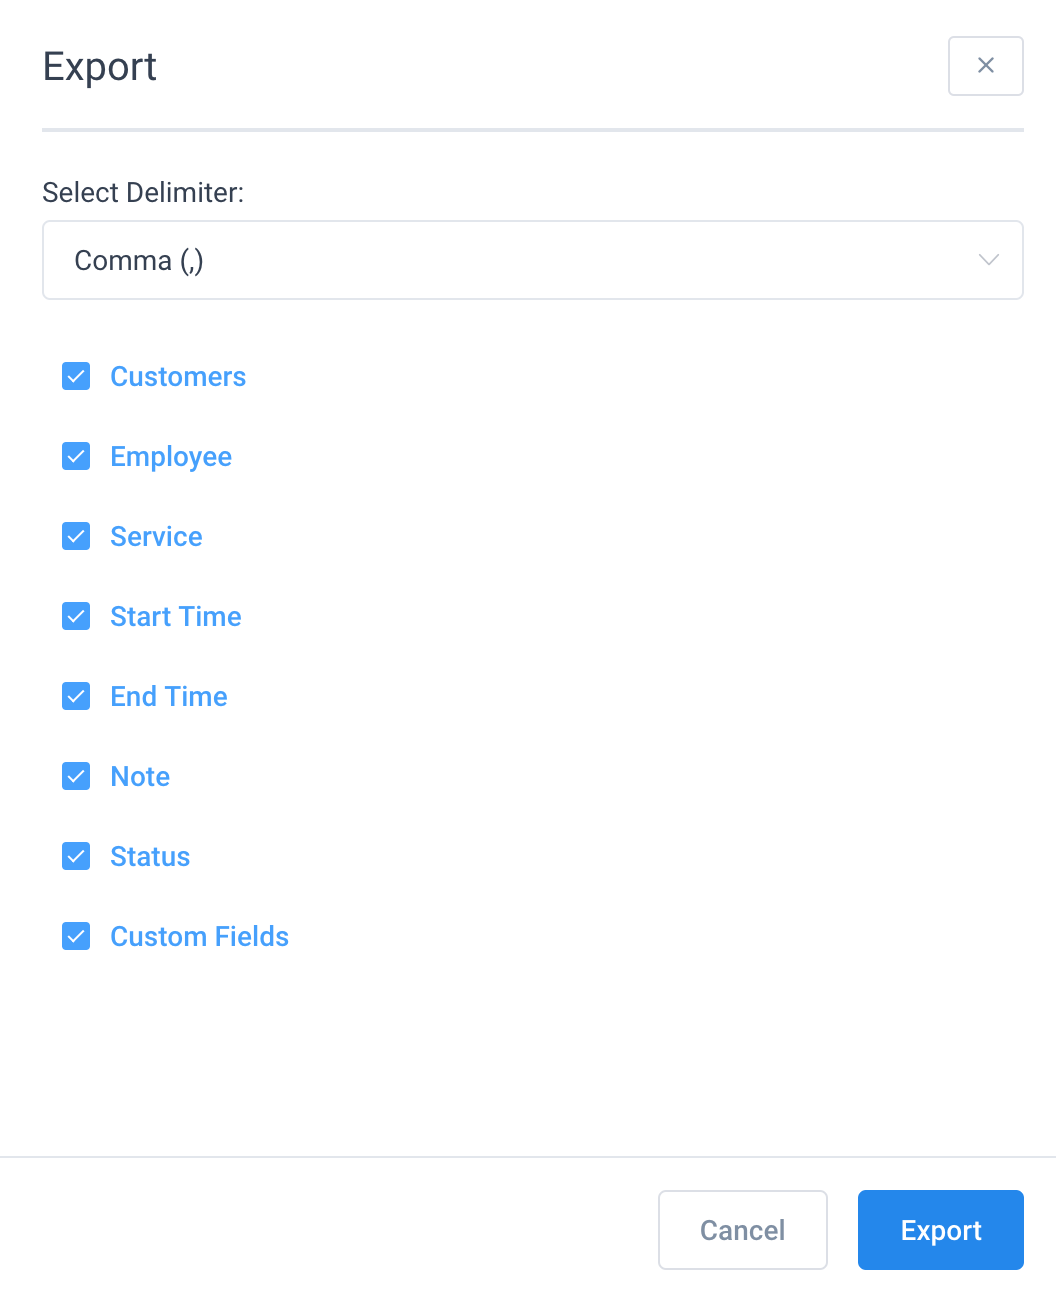
Your appointments can be exported as a CSV for reporting. At the top right of the “Appointments” page, next to the search input, tap the “Export” icon button. Clicking on the “Export” icon button opens a dialog that allows you to choose the delimiter used for CSV and select the columns you’d like to export. When you are ready tap on the “Export” button in the dialog to download the CSV file.
With filters that appear at the top of the page, you can narrow down appointments by common characteristics such as date, employees, customer, services, or status. The date filter is predefined by the period of seven days starting from the current date.

The appointments table is grouped by date and provides information about the appointments such as time, a customer(s), employee, service, duration, payment, and status. You can expand an appointment (row) by clicking on it. An expanded record shows the information about the customer’s phone customer’s email. You can use the “Status” drop-down to change the status of all customer bookings at the time. Click the “Edit” button to open the “Edit Appointment” dialog for the chosen appointment.
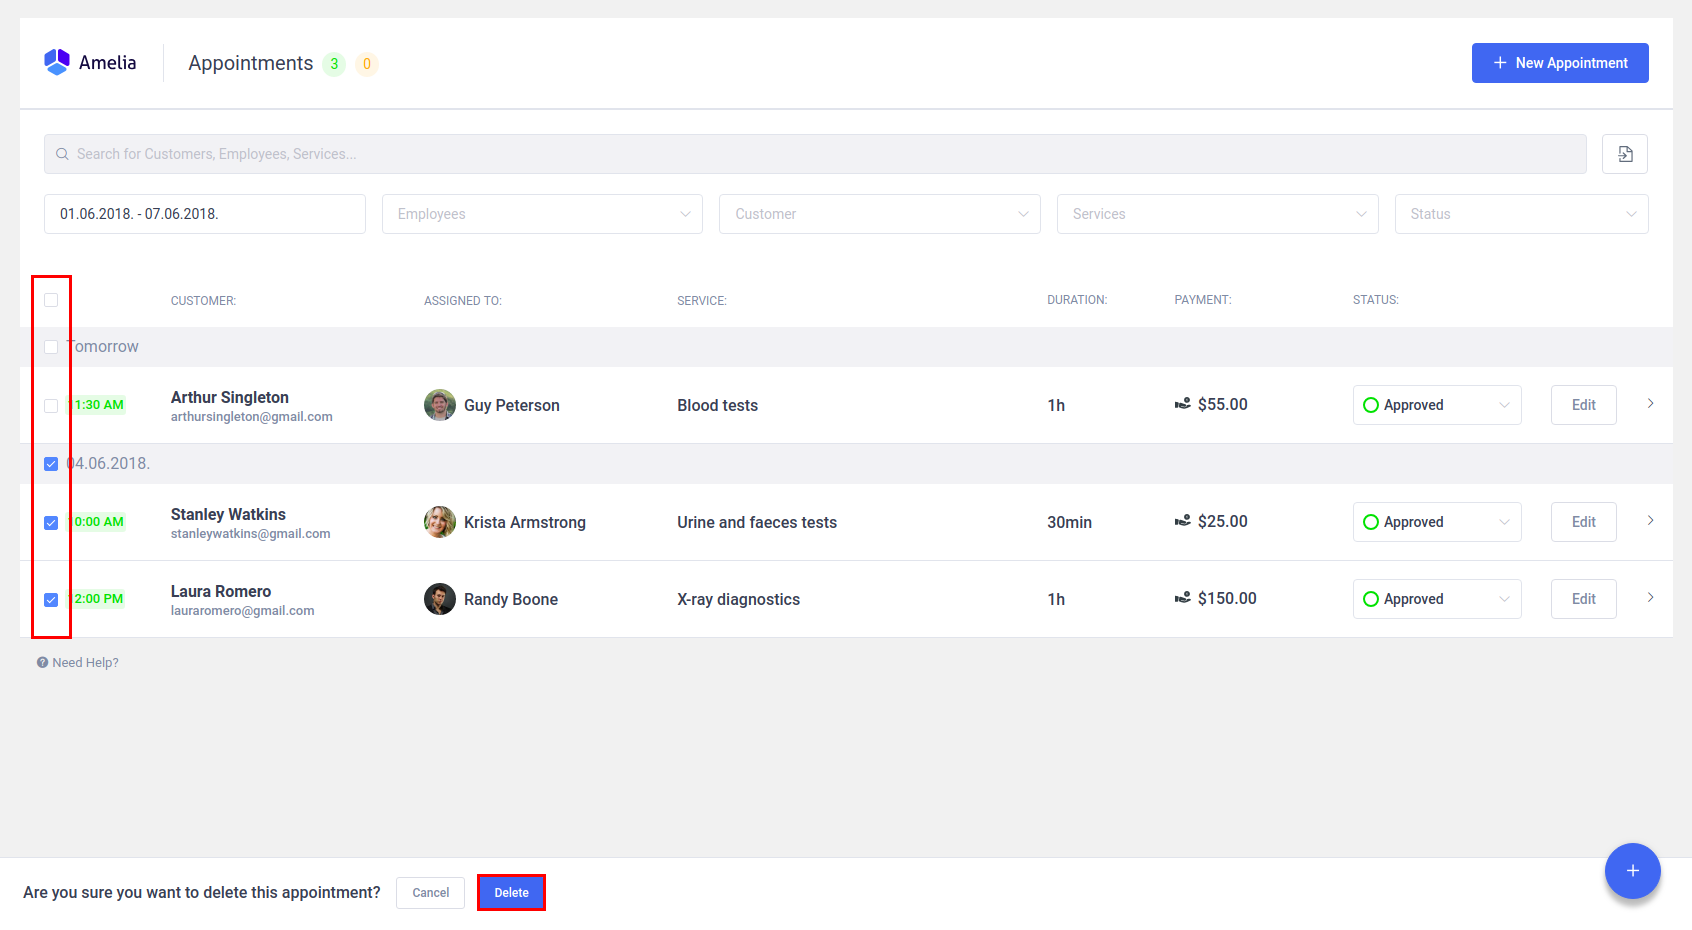
You can delete multiple appointments at the same time by checking the appointments you want to delete. The dialog box will appear in the table footer when you check at least one appointment you want to delete. Once you are certain you want to delete the records click the “Trash” icon and then the “Delete” button.
