Here we tried to summarize the most popular questions and requests that we receive through our support system, together with answers. If you didn’t find an answer to your question, feel free to get in touch with us through the contact form, support portal, or submit a feature suggestion!
Can’t find the answer to your question? Ask on our support platform.
Getting started
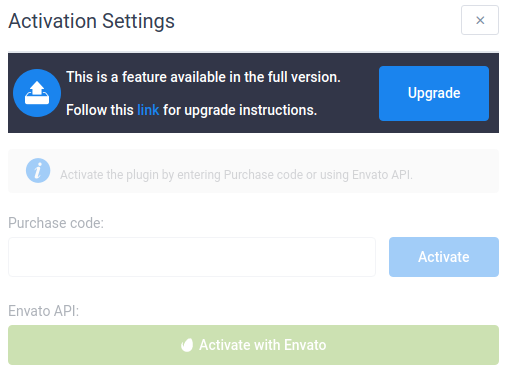
Amelia Activation says “This is a feature available in the full version”. I can’t activate the plugin
If you see this screen, that means that you still have the Lite version of the plugin installed.
The Lite version needs to be deactivated/deleted, and the full version installed to be able to activate the license and use all features of the plugin.
You can download the full version by logging into our store with the credentials you received when you purchased the plugin via e-mail.
If you already configured Amelia, don’t worry about your data. It is saved in the database, and it will be there after you install the full version.
Do you have a list of all Amelia shortcodes?
Here’s the list of all our shortcodes:
For Step-by-Step Booking Wizard view:
[ameliabooking] if you want to show the basic Step-by-step Booking wizard,
[ameliabooking category=1] if you want to show only the services from a category with ID 1,
[ameliabooking service=1] if you want to show the booking form for the service with ID 1.
[ameliabooking employee=1] if you want to show the booking form for the employee with ID 1,
[ameliabooking location=1] if you want to show the booking form for the location with ID 1,
[ameliabooking category=1 employee=1] if you want to show only the services from a category with ID 1 that are assigned to the employee with ID 1,
[ameliabooking category=1 location=1] if you want to show only the services from a category with ID 1 that are provided on the location with ID 1,
For the Service Catalog view:
[ameliacatalog] if you want to show the basic Service Catalog view,
[ameliacatalog category=1] if you want to show only the services from a category with ID 1,
[ameliacatalog service=1] if you want to show this form for the service with ID 1,
[ameliacatalog employee=1] if you want to show the services of one specific employee with ID 1,
[ameliacatalog location=1] if you want to show the services of one specific location with ID 1,
[ameliacatalog category=1 employee=1] if you want to show only the services from a category with ID 1 that are assigned to the employee with ID 1,
[ameliacatalog category=1 location=1] if you want to show only the services from a category with ID 1 that are provided on the location with ID 1,
For the Search view:
[ameliasearch] if you want to show the basic search view,
[ameliasearch today=1] if you want to show the search view with a preselected current date.
For the Event booking:
[ameliaevents] if you want to show list of all your events,
[ameliaevents tag='name'] if you want to show just the events that belongs to the same tag defined during the creation of events, where “name” will be replaced with the tag name,
[ameliaevents event=1] if you want to show only the event with ID 1 without its recurring events,
[ameliaevents event=1 recurring=1] if you want to show the event with ID 1 with all his recurring events.
Amelia Front-end Customer Panel
[ameliacustomerpanel appointments=1 events=1] if you want to show both Appointments and Events,
[ameliacustomerpanel events=1] if you want to show only Events,
[ameliacustomerpanel appointments=1] if you want to show only Appointments in the Customer Panel.
Amelia Front-end Employee Panel
[ameliaemployeepanel appointments=1 events=1] if you want to show both Appointments and Events,
[ameliaemployeepanel events=1] if you want to show only Events,
[ameliaemployeepanel appointments=1] if you want to show only Appointments in the Employee Panel.
I have set everything but the front Booking form just loads, what can be the issue?
For the booking form to load, you need to add an Employee, create a Category and a Service, and assign the employee to that service. This is the most common reason for this kind of issues.
I’ve changed the colour scheme, but it doesn’t change on the front-end, can you help?
When you apply a new style (change colours and font styles for the booking form) in the “Customize” section, you will need to delete stored cache in your browser, for the changes to be visible on front-end. That is – the change is already there, and you can see it if you open an Incognito window, it’s just that the current browser session stored cache with old style, and it needs to be clear for you to see it.
If you configured WooCommerce, but the plugin redirects you to another page, or refreshes the booking form, after clicking on “Confirm” in the booking form, without taking you to the cart, please check if you have “Cart” and “Checkout” pages created in WooCommerce Advanced settings. They should be created by default, but if you don’t have them, simply create a couple of new pages in your WordPress site, and name them “Cart” and “Checkout”. After that you will be able to select them from the menu seen below:
Translations
Can I use Amelia in other languages? Which translation do you have included in the Amelia WordPress Booking Plugin?
At the moment we have Spanish, German, Dutch, Russian, Romanian, French, Finnish, Italian, Swedish, Brazilian Portuguese, Portuguese, Greek, Arabic, Slovak, Hungarian, Danish, Belgian, Japanese, Polish, Hebrew and Chinese translation.
Approximately 90-95% of the plugin is translated into the languages stated above, but you can always translate it using Poedit or Loco Translate.
How can I translate Amelia Booking Plugin?
You can translate Amelia plugin using the POEDIT. Here are the steps that you need to do:
1. You need to download and install POEDIT.
2. After that open the program and open the file from your website located in ameliabooking/languages/fr_FR/wpamelia-fr_FR.po.
3. Translate all the strings that are not translated
4. Save the translation.
5. Go to ameliabooking/languages/fr_FR/ folder and copy these two files called wpamelia-fr_FR.po and wpamelia-fr_FR.mo back to your website in the location ../wp-content/plugins/ameliabooking/languages/fr_FR/.
Please note: this fr_FR language code is for French translation and it should be replaced with your language code. You can find your language code on this link.
I translated the plugin to my language, so why do “Employee” and “Service” still show up in English?
We have “Labels Settings” integrated in Amelia. They are used when you want to change the default words “Employee” and “Service” to better fit the services you offer (so it could be “masseur” instead of “employee” and “massage” instead of “service” – for example).
When you translate WordPress to your language, the plugin is also translated, but these two strings remain with what ever value is stored in “Labels Settings”. Please go to Amelia Settings/Labels Settings, and simply turn them off. After that, when you refresh your page it should be displaying what it finds in the .po file.
Working hours
I configured Company’s working hours, but I don’t see those hours in the booking form
If you created your employees before you configured Global Working Hours, those employees picked up the Company’s working hours which come as default with the plugin (09:00 – 17:00).
Employees can have different working hours than those of the company, so to configure availability for your services, you need to configure the working hours of employees assigned to those services. Employees’ working hours override the company’s working hours. To set them up, you need to go to the “Employees” section, select the employee, and configure their schedule from the “Work Hours” tab.
I'm able to book appointments 24 hours a day, it's not following work hours.
This can happen only if you enabled "Allow admin to book appointment at any time" in Settings/Roles/Admin, and you're viewing the form while you're still logged in as an administrator.
This setting allows your website administrators to book any time slot regardless of employee's work hours, so if you don't want to allow this, you can turn off this setting. While checking the form from the front-end, make sure to do it from the Incognito window, so your Admin role doesn't affect the plugin in any way.
I have set working hours but time slots in the front Calendar don’t match with them, what can be the issue?
Amelia doesn’t have any time zone settings, so if you’re experiencing this issue please check whether you enabled the “Show booking slots in client time zone” option in General Settings. If yes, go to the WordPress General Settings and check whether you have set your current time zone in Time zone option, since this is the most common reason for this kind of issue.
Please note that UTC time zones can display wrong times. To avoid this, please select the city closest to you in WordPress General Settings.
I have set working hours but all dates in the Calendar as shown as unavailable, what can be the issue?
If you experience this issue please check if your service duration can fit in the periods that you have set in the working hours, since this is the most common reason because this problem happens. If your service duration is, for example, 1 hour, your periods cannot be set like 9:00-9:45, 10:00-10:45, etc., since 1 hour service cannot fit here. Our plugin sees this 15 minutes between the time slots as a break.
Each week I have classes that are in the specific time of the day and I don’t want my clients to be able to book them in any other time, how can I set this?
You can set this in the Working hours tab on the Employee’s profile. For each day you can add multiple periods of time and assign to each period service/s that will be provided then. In that way, your customers will not be able to book a service in any other time then it is set here.
Do you have an option for setting a different schedule for some specific days?
Yes, with our Special Days option you can set a custom schedule for each employee for just one specific day or range of dates. So if, for example, you need to set shorter working hours for just one day or add some service for just certain days in one week or month, you can do this here.
Google Calendar Integration
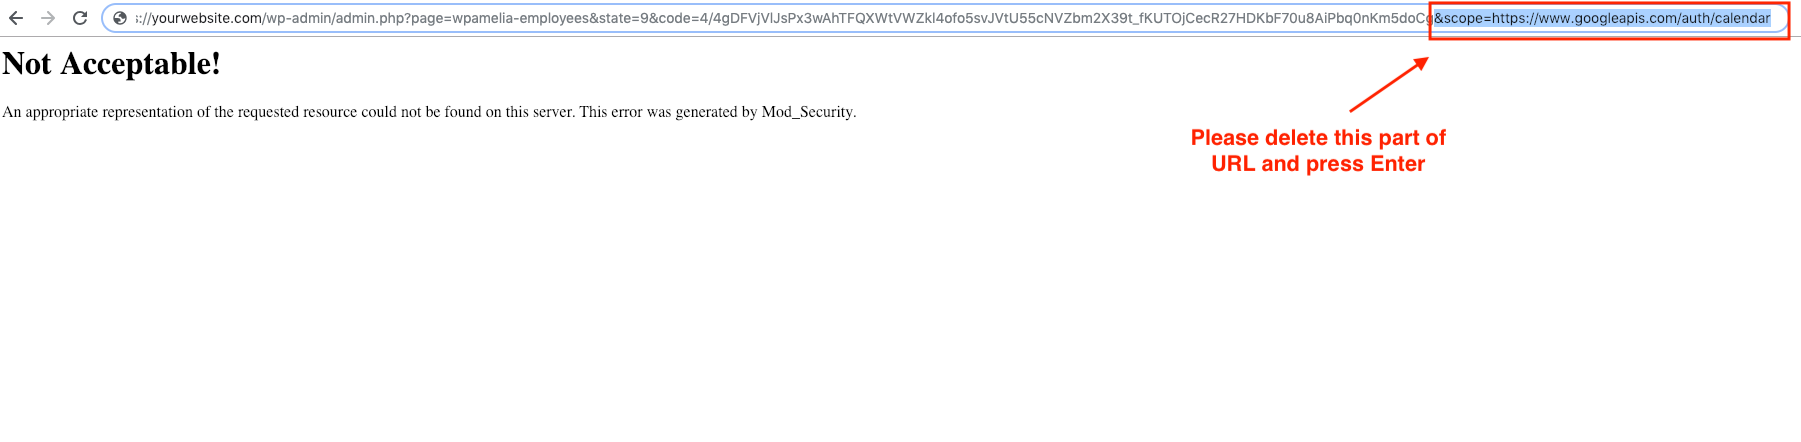
I tried to connect my employee to Google Calendar and I got the error: “Not Acceptable! An appropriate representation of the requested resource could not be found on this server. This error was generated by Mod_Security.” What should I do?
To solve this please configure your security system so that it doesn’t block requests from Google, or click on the browser URL field, delete this part at the end of the URL: “=https://www.googleapis.com/auth/calendar”, and press Enter.
Why are the busy Calendar Events still available in Amelia after I successfully synchronized with Google Calendar?
This issue can occur if you configured the Google Calendar correctly, but forgot to connect the employee with his/her Google Calendar:
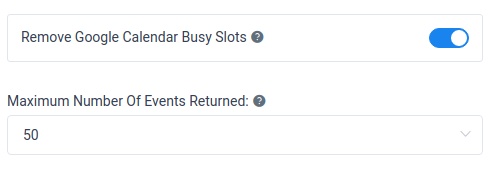
Another reason could be that you didn’t enable “Remove Google Calendar Busy Slots” in Google Calendar Settings (in Amelia Settings), or that you’ve defined a low number of events returned:
Please note that if you have 2 busy events created in Google Calendar that are being repeated every day, Amelia will return only 50 of them (if your setup matches the screenshot above). That means that it will remove these time slots for the next 25 days, and if you configured Amelia so your customers can book in the next 60 days, those time slots will not be available after 25 days pass. To avoid this, you would need to increase the amount of busy slots returned to a greater value.
Notifications
How to set the cron job notifications in Amelia Booking?
Scheduled notifications require a bit of additional configuration with your server cron scheduler. The command that has to be added can be found on the “Notifications” page when notification that requires scheduling is active. You can recognize these notifications by the clock icon next to the notification name. Copy command and paste it in the cron file. The command looks like this:
GET 'https://yourdomain.com/wp-admin/admin-ajax.php?action=wpamelia_api&call=/notifications/scheduled/send' > /dev/null
You can see the more detailed tutorial of how to set up cron at this link.
If you are not familiar with this, you can use the plugin WP Crontrol for creating a cronjob.
First, go to Amelia/Notifications, and click on one of the scheduled notifications. For example "Appointment Next Day Reminder". Below that email template, you will see an info block, that shows what needs to be entered in your server, to configure the cron event. For WP Crontrol plugin, you only need to copy the URL:
Then, go to Tools -> Cron Events admin panel, and click on the "Cron Schedules" tab. In it, add a 15-minute interval.
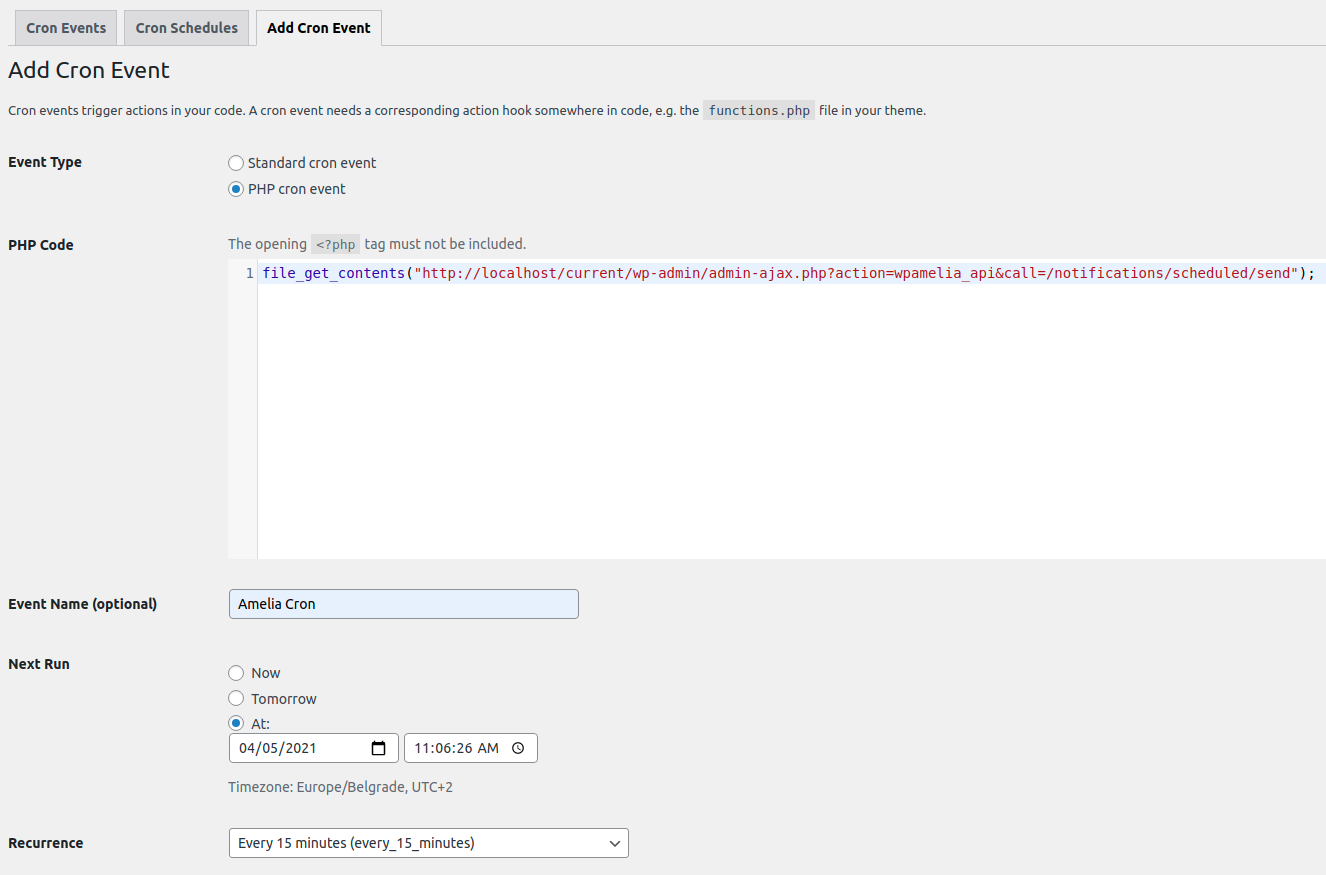
Now go back to "Cron Events" tab, and click on "Add New".
Below it, select "PHP Cron event" radio button, and add the URL you copied from Amelia/Notifications in this form:
You don’t need to provide the PHP opening tag (<?php).
Please replace “https://yourwebsite.com” with your real web address.
Set the Event name, and set the next run to be "At", and a few minutes in the future. Select the recurrence (the event you created as the first step, in WP Crontrol - the "every_15_minutes" interval.
I configured Notification settings, but the e-mails are not being sent
Some hosting providers don’t allow 3rd party SMTP settings (Gmail, Yahoo, Outlook, etc.) to be saved, and are intentionally blocking them because they use their own. If you configured the Notification Settings, and your e-mails are not being sent, please contact your hosting provider, and ask them if they are blocking the SMTP.
Are SMS and Push notifications supported?
From version 1.4 SMS notifications are included in Amelia, but Push notifications are not supported at the moment.
My notifications no longer work, but they used to.
If you're using Gmail's SMTP settings, please note that you most likely need to enable "Allow less secure apps" in your Google account, again. Google updated their privacy policy, and they indicate they will deactivate the "allow less secure apps" setting automatically if it is not being used frequently.
Payments
Stripe and PayPal payments are not working
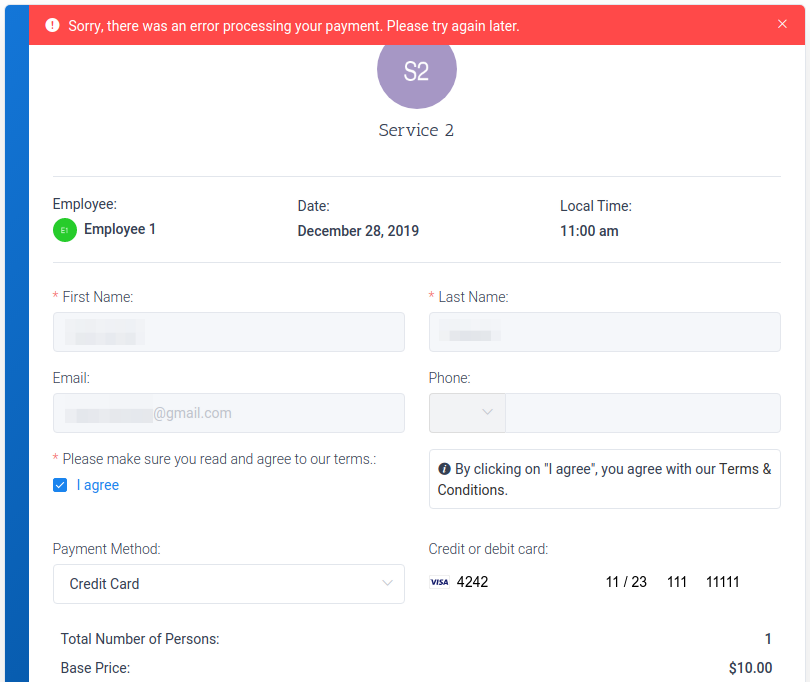
When using Stripe or PayPal through Amelia, the most important thing to mention is that Amelia only connects your existing account, and there are no other settings other than what’s described in Payment Settings section. So, if you’re having issues with payments the issue probably lies with the payment service’s credentials. The issue usually displays as an error on top of the booking form:
If you’re simply testing the payment with “Sandbox” or “Test” mode, you need to enable them first, in Payment Settings, and copy your Test credentials from PayPal or Stripe into their corresponding fields.
Also, you cannot perform Test payments with a real credit card, nor can you enable Live payments and run your test card. It’s not going to work as Live payments need a real card #, and test payments need test card #. If you wish to test the payment, you can get the Stripe’s test card details on this link.
Can I configure different payment options per service in Amelia WordPress Booking Plugin?
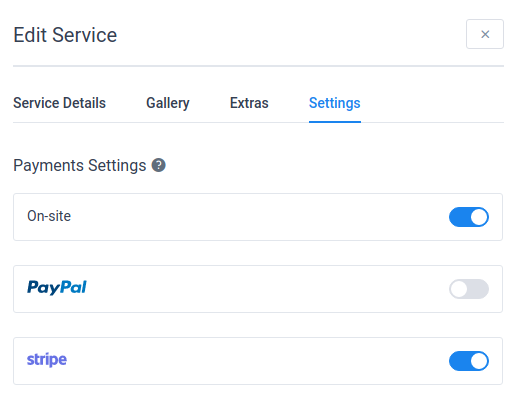
Yes, from version 2.3.1, if you have more than one payment option enabled in Payment Settings, you can choose which payment method will be applied to each service.
To do this, access the service you want to modify, and go to the “Settings” tab. There you will be able to choose which payment options will apply to that specific service:
Please note: If you enable WooCommerce in Payment Settings, you won’t be able to apply any other payment option.
Users and roles
How can I grant more permissions to Amelia Managers?
By default, Amelia Manager is allowed to hide but not delete anything; a manager cannot customize the front-end look of the plugin and doesn’t have access to WordPress settings.
However, if you want to change that, and apply some permissions to the manager, you can do that with the help of User Role Editor plugin. When you install it, its settings will be accessible through “Users” and “Settings” sections in your dashboard:
This plugin allows you to modify any WordPress user role, as you can see in the screenshot above. All Amelia permissions start with the keyword “amelia”, so please tread carefully when applying permissions. You may also apply other permissions to the user role, but that’s not recommendable.
Please note: Applying certain permissions to your employees will allow them to access, change and even delete your settings. Please consider whether your employees should have these permissions, and carefully choose which ones you wish to apply.
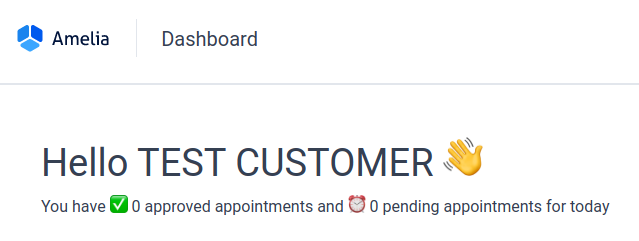
The dashboard displays a different name instead of my name.
When you access Amelia’s Dashboard and see something similar to the screenshot below, it usually indicates that you tested the plugin while still logged in with your account, so when you entered the customer details, they were saved under your user ID in the database.
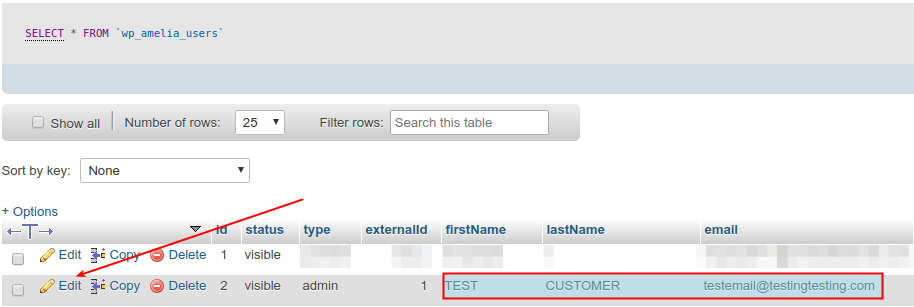
At the moment, the only way to change that would be to access your database (via PHPMyAdmin or any other database administration tool), and access wp_amelia_users table.
Please note that “wp_” is the default database prefix, but it is possible that you have a different one. So you’re looking for the table “your_prefix_amelia_users”.
When you access that table, find the name that is displayed in the dashboard, click on “Edit” in that row, and simply change the details there.
I am not able to change any of the details in the Amelia booking form, what should I do?
When you are logged into WordPress, and you already filled the details once, that data is already saved in the database, which is why the details field in the booking form are disabled and already filled. If you were to create another user with a different email and then login with that email address, you will able to make an appointment. Also, you can open your browser in Incognito mode (which means that you are not logged in – as your future clients) and you will see that you are able to enter your details.
From version 1.3.4 there is an option to check customer’s name for existing email during booking – now it is possible to allow customers to schedule the appointment with the same email but different first and last name.
This option is located in Amelia Settings / Roles Settings / Customer:
How can I hide some of the settings in the back-end?
We don’t have Back-end field where you can add your own CSS, but you can use this plugin: Add Admin CSS.
You will need to inspect the page, and find the correct selector, but we’ll provide some examples here.
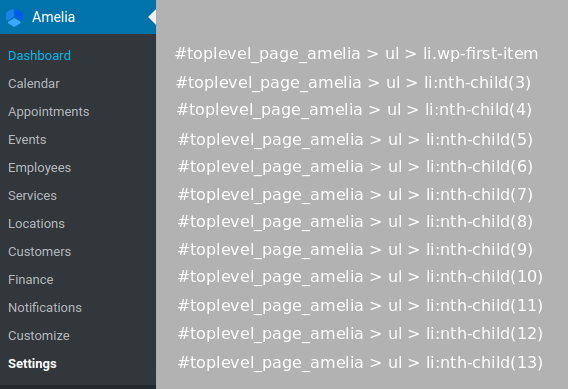
If you want to hide access to some Amelia tabs from the dashboard, you will need one of the following selectors:
#toplevel_page_amelia > ul > li.wp-first-item #toplevel_page_amelia > ul > li:nth-child(3) #toplevel_page_amelia > ul > li:nth-child(4) #toplevel_page_amelia > ul > li:nth-child(5) #toplevel_page_amelia > ul > li:nth-child(6) #toplevel_page_amelia > ul > li:nth-child(7) #toplevel_page_amelia > ul > li:nth-child(8) #toplevel_page_amelia > ul > li:nth-child(9) #toplevel_page_amelia > ul > li:nth-child(10) #toplevel_page_amelia > ul > li:nth-child(11) #toplevel_page_amelia > ul > li:nth-child(12) #toplevel_page_amelia > ul > li:nth-child(13)
Please keep in mind that they apply to the menu items in the following order:
If you rearrange the menu items, “#toplevel_page_amelia > ul > li.wp-first-item” will always be the first one on this list, “#toplevel_page_amelia > ul > li:nth-child(7)” will always be the 6th on the list, and so on.
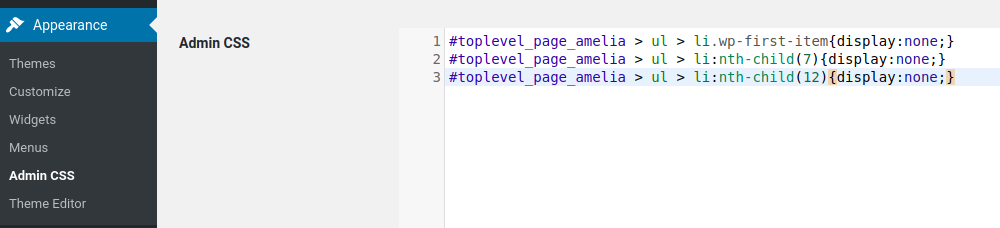
The “Admin CSS” settings are located in “Appearance” tab in your Dashboard. So, if we apply the “display:none” property to, let’s say, menu items 1, 6 and 11 (Dashboard, Services and Customize), we will have to do it like this:
And the result would be this:
This can also be applied to individual settings items, in Amelia Settings. For example, the default Amelia Settings page looks like this:
So if we want to hide “Payments”, for example, we would use this CSS: