Integrating Square Payments with Amelia allows you to offer seamless and secure payment options to your clients. Square is a widely trusted payment platform that supports a variety of payment methods, making it easy for your customers to pay for their appointments and events online. With this integration, you can streamline your booking process, improve customer satisfaction, and efficiently manage your payments all within the Amelia interface. This guide will walk you through the steps to set up and use Square Payments with Amelia.
| Country | Payment card |
| Australia | Visa, Mastercard, American Express, JCB, EFTPOS |
| Canada | Visa, Mastercard, American Express, Discover, Discover Diners, Interac, JCB, UnionPay International |
| France | Visa, Mastercard, American Express |
| Ireland | Visa, Mastercard, American Express |
| Japan | Visa, Mastercard, American Express, Discover, Discover Diners, JCB, Transportation IC, QUICPay, iD |
| Spain | Visa, Mastercard, American Express |
| United Kingdom | Visa, Mastercard, American Express |
| United States | Visa, Mastercard, American Express, Discover, Discover Diners, JCB, UnionPay International |
To find more details about Square’s Payments, please visit this page.
Connecting the Square Account
To set up Square Payments in Amelia, start by navigating to the “Settings” page and opening the “Payment” settings. Please note that you must be logged in as the account admin to access the Settings page. Scroll down to the “Square” section, expand it, and click on “Log In” to begin the integration process.
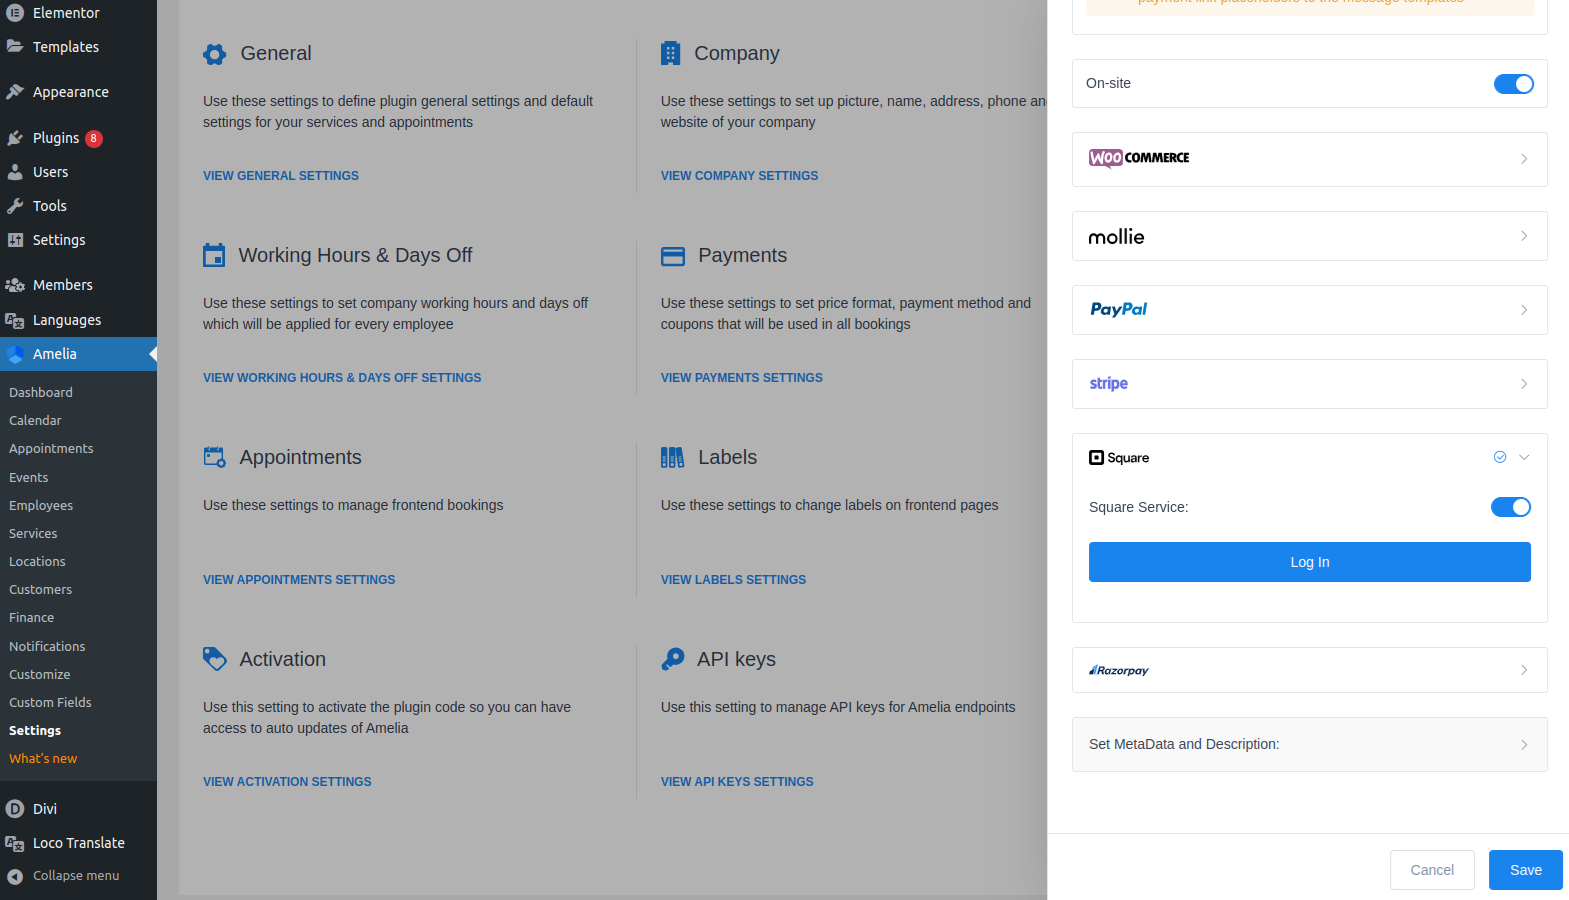
You will need to complete the OAuth process by logging into your Square account. Once your account is connected, you will be redirected back to the same page in Amelia. Here, you can choose a location for your payments and also have the option to “Log out” if needed. Remember to click “Save” on the dialog to confirm your settings.
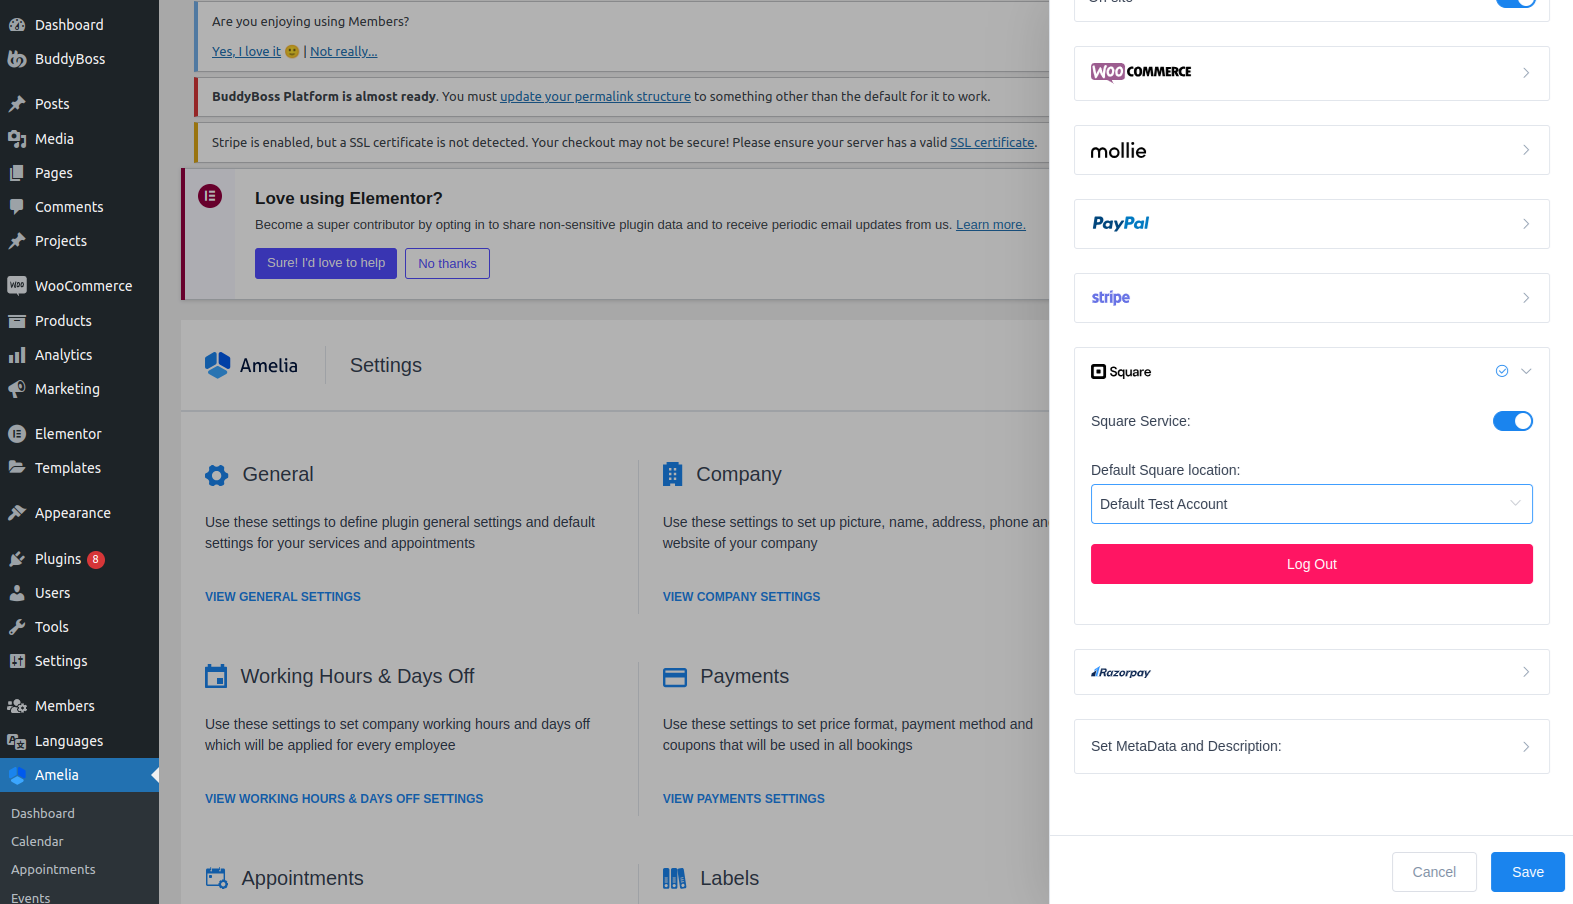
It’s worth noting that Square can be enabled simultaneously with “On-site” and “PayPal,” giving you flexibility in handling transactions.
Connecting a Square Location
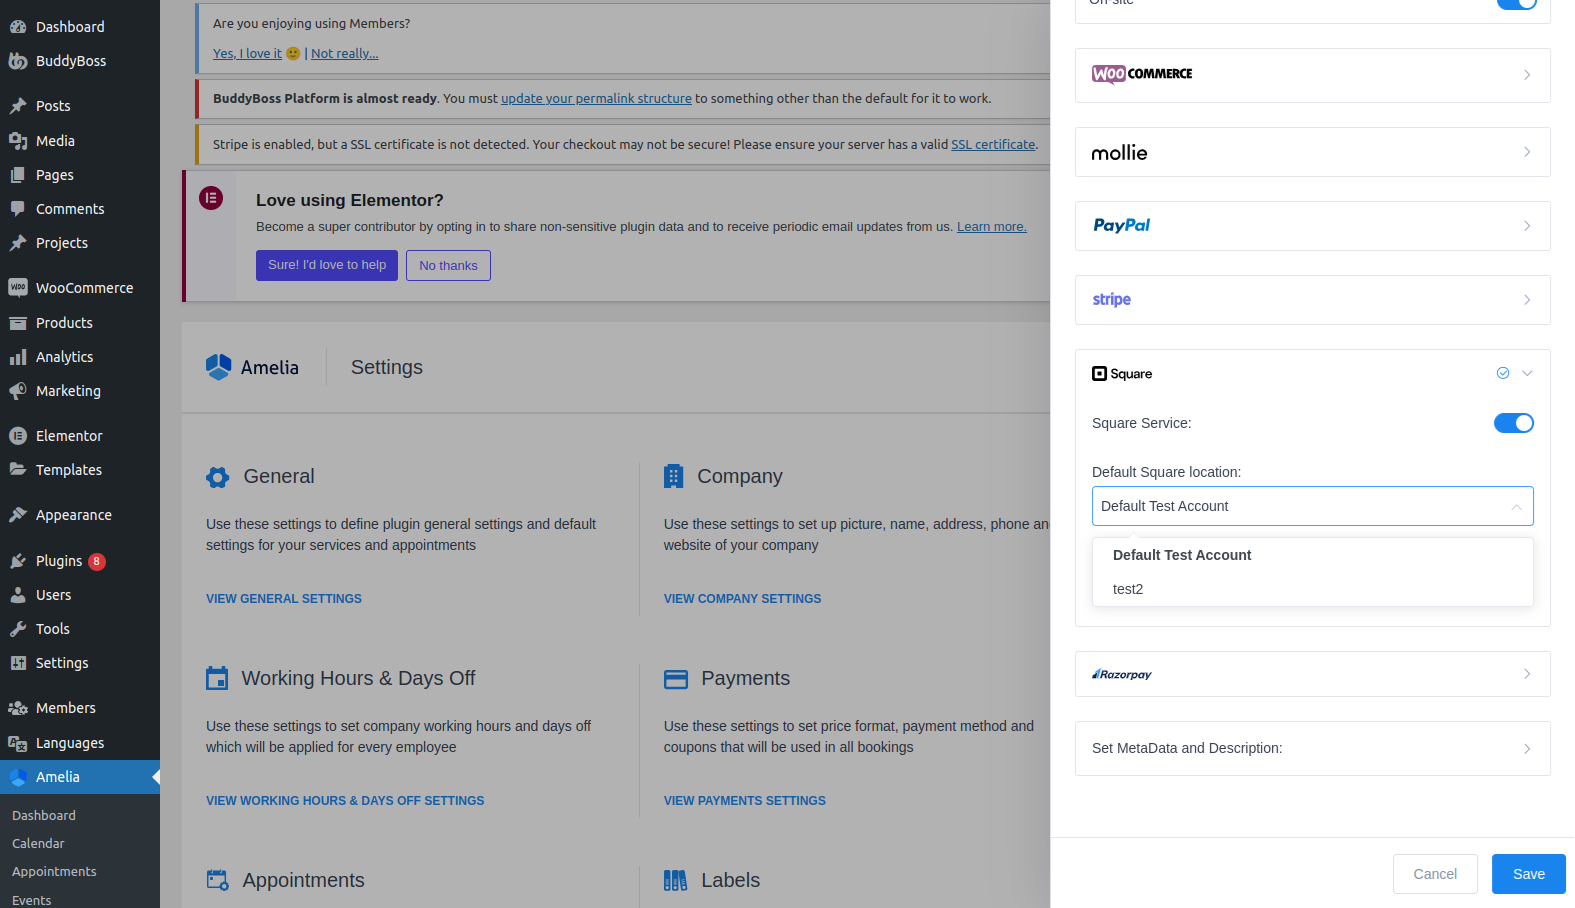
After logging in, you will see the locations from your Square account listed in the expanded section. Choose one default location that will be used for all your Square payments. Keep in mind that since different locations can have different currencies, and Amelia currently supports only one currency, you can only select one location. Once you have selected your default location, click “Save” in the dialog to confirm your choice.
Using Square as a Payment Method
Google Pay
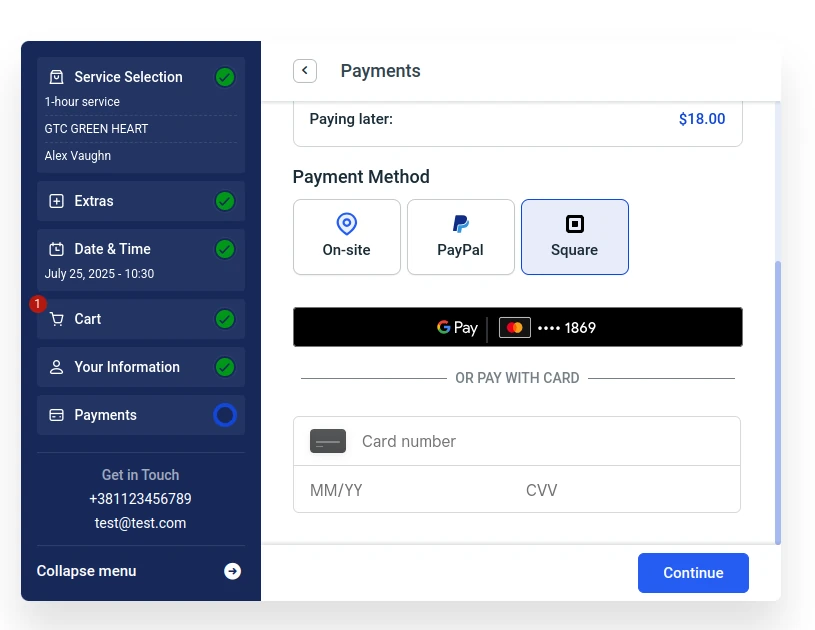
Amelia supports Google Pay when using Square as a payment method.
There are no additional settings required within Amelia – once Google Pay is enabled on your Square account, it will automatically appear as an option on the booking form.
All setup and configuration related to Google Pay must be done directly through your Square Dashboard.
For more details, please refer to Square’s official documentation on how to enable and manage Google Pay.
Apple Pay
From Amelia v8.6, you can use Apple Pay with Square.
To register your domain for Apple Pay, download the ZIP file below, extract it, and locate the file named apple-developer-merchantid-domain-association inside the extracted apple domain folder.
Next, create a new folder named “.well-known” in your website’s public directory, and copy the apple-developer-merchantid-domain-association file into it.
Once the file is in place, your final path should look like this:
https://example.website.com/.well-known/apple-developer-merchantid-domain-association

Refunding Payments Made With Square
To refund a payment, go to the “Finance” page while logged in as an admin. Locate the payment you wish to refund and click on “Details.” At the bottom of the details page, click on the “Refund” button. A popup will appear; click the “Confirm” button to proceed.
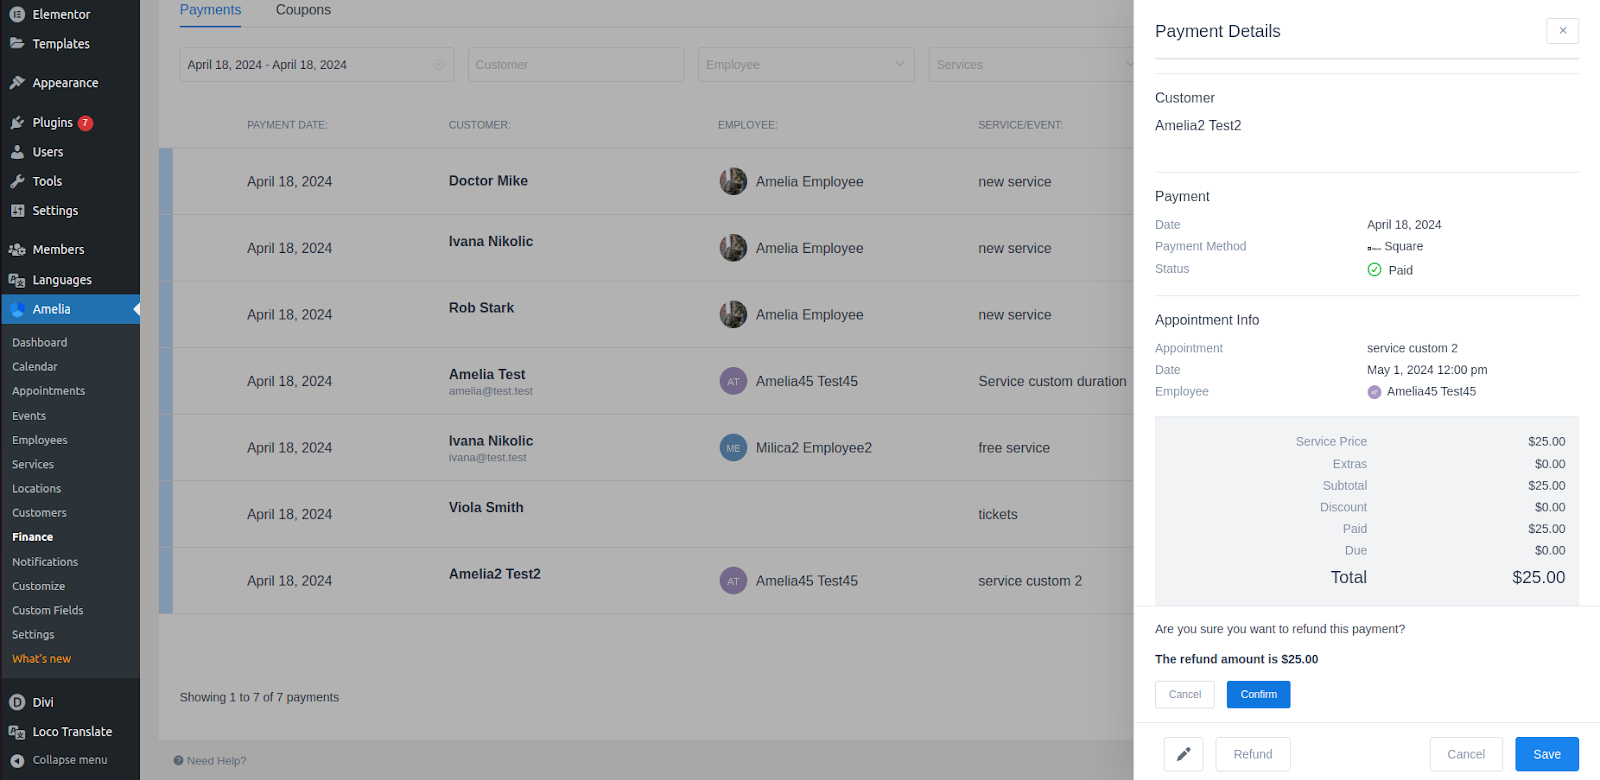
The payment will be refunded in Square and will display the “refunded” status in Amelia. Additionally, the Square refund webhook is implemented, meaning any payments refunded directly in Square will automatically have their status updated to “refunded” in Amelia.
Payment Links
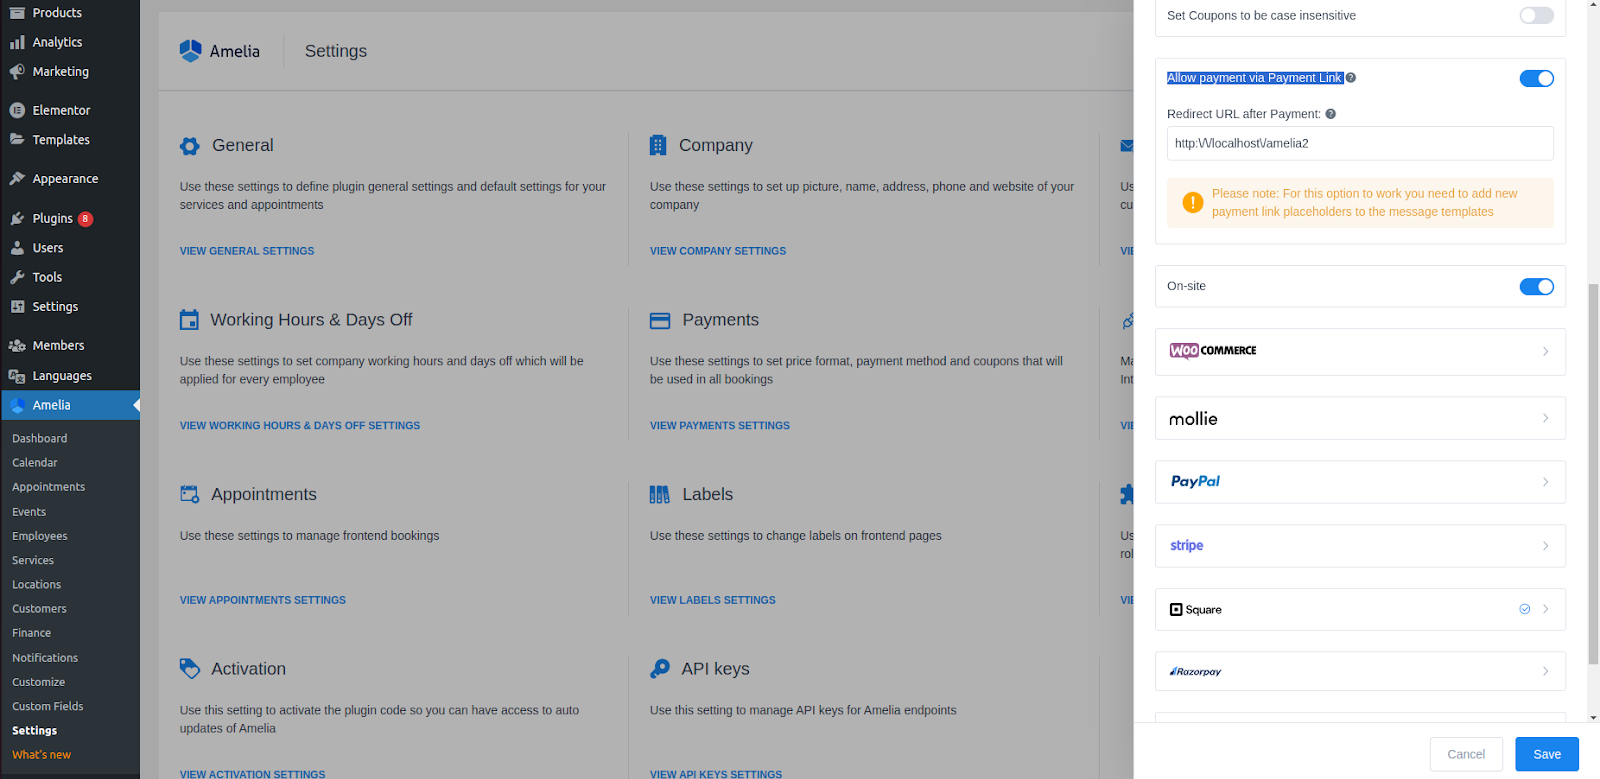
To test payment links in Amelia, navigate to the Settings page and open the Payment settings. Enable the “Allow payment via Payment Link” option and ensure that “On-site” is enabled alongside “Square.”
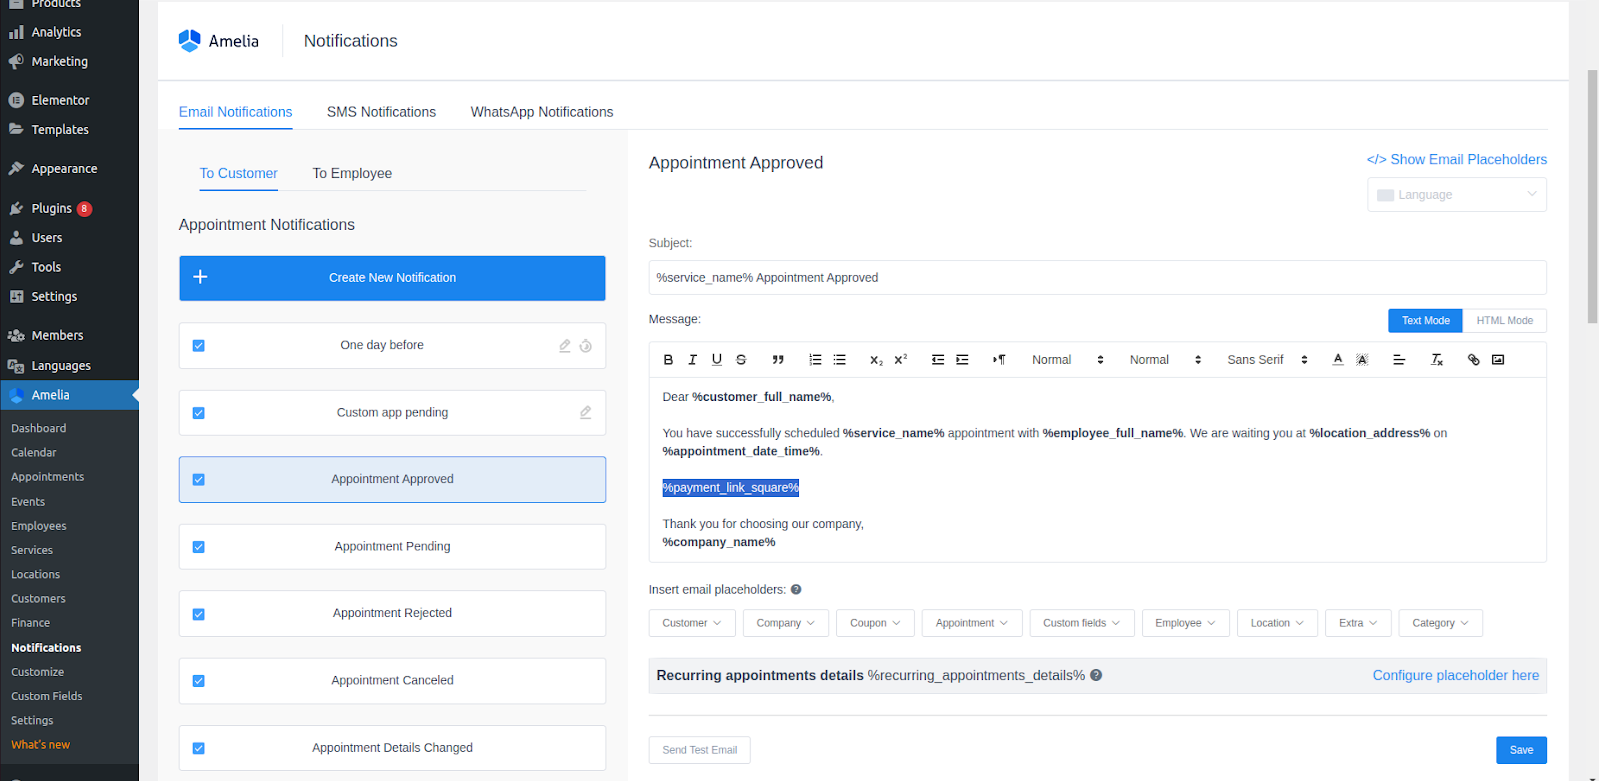
Next, go to the Notifications page and add the %payment_link_square% placeholder in the “Appointment Approved” notification.
Access the booking form page and select “On-site” as the payment method. You will receive an email with the payment link for the full appointment price. Complete the Square payment process using the link. After the payment, you will be redirected to the page set under “Redirect URL after Payment” in the Payment settings.
The payment on the Finance page will be marked as “paid,” and the payment will also appear in the Square dashboard.
If you follow this testing procedure, you’ll experience exactly how your customers will pay for appointments or events.
Customer Panel
In addition to using email payment links, your customers can pay using the Square payment method directly from their customer panel if they booked appointments and selected “On-Site” as the payment option.
If you haven’t already, create a page with the customer panel shortcode and add that URL to the “Roles” settings on the “Settings” page. Make sure the “Allow payment via Payment Link” option and “Square” are enabled in the “Payments” settings (as mentioned in the previous section).
Once customers book an appointment, they can access their panel either through the “Congratulations” step (the final step of the booking process) by clicking the “Customer panel” button or by directly visiting the Customer Panel URL.
If this is their first time accessing the panel, they will be able to either set up a password for their account or send themselves a unique login link, depending on how you configured the panel.
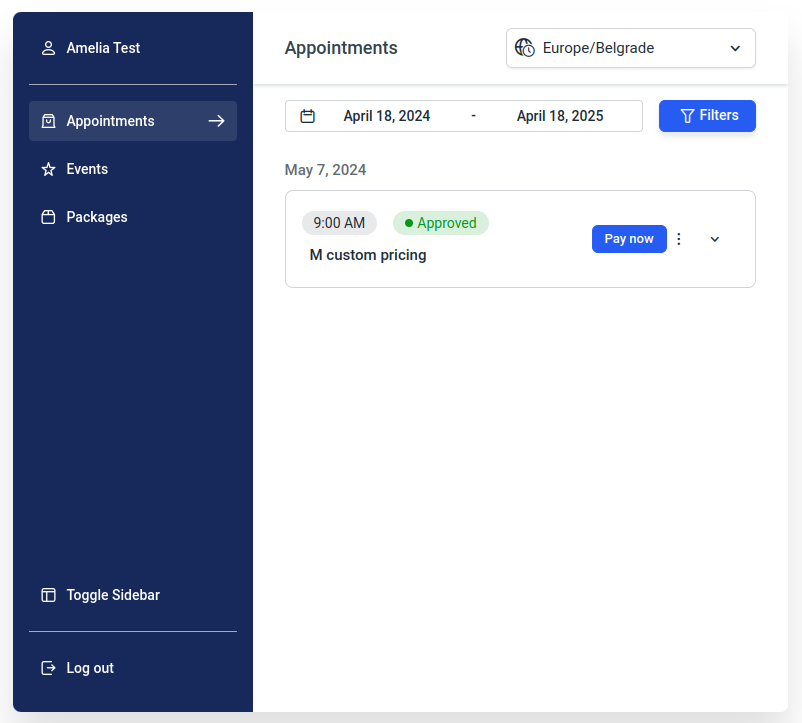
In the customer panel, they will find their booking and click on “Pay now.” They will be redirected to the Square checkout page. After completing the payment process, they will be redirected back to the panel, and the booking will be marked as “Paid.”
Integrating Square Payments with Amelia provides a seamless and secure way for your customers to pay for their appointments online. By following the steps outlined in this documentation, you can easily set up and manage Square payments, allowing for a smoother booking experience for your clients. Whether it’s through direct bookings, email payment links, or the customer panel, Square integration ensures that your payment process is efficient and reliable.