How does the Calendar work in Amelia
The Calendar page in Amelia is a back end scheduler that shows all scheduled appointments and events in one place. It allows you to view availability, manage bookings, reschedule appointments, and quickly access booking details without leaving the calendar.
The calendar supports multiple views, advanced filtering, and direct booking creation, making it the central place for daily schedule management.
How do I open the Calendar page?
To open the Calendar, go to your WordPress admin area and navigate to Amelia → Calendar. The calendar loads immediately with all scheduled appointments and events, along with controls for navigation, view selection, and filtering.

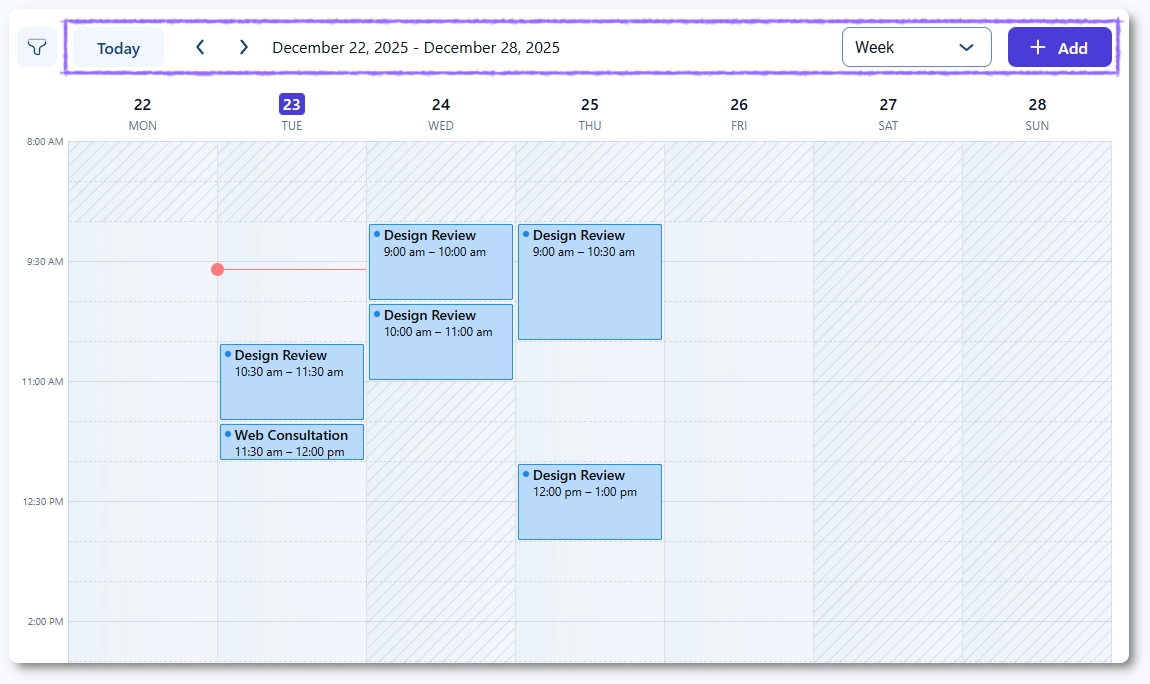
What do I see in the Calendar?
The Calendar displays bookings in a calendar grid, so you can immediately see what is scheduled and when. Appointments and events can be shown together, or you can hide one of them using the toggle on the left side (once you click the Filter button).
- Appointments and Events toggles control what is visible in the calendar.
- Bookings are shown with their titles and times, depending on the selected view.
- Clicking a booking opens its details panel.
- Blocked time periods are also displayed in the calendar and are visually distinct from regular appointments and events.
How do I use filters in the Calendar?
Use the filter icon to show or hide the filters panel on the left. Filters help you quickly find relevant bookings by narrowing the calendar display.
- Choose whether you want to display Appointments, Events, or both.
- Filter by Services, Events, Employees, and Locations.
- Use status filters such as Pending appointments and Full events (enabled by default) to control what appears on the calendar.
- Configure the title of appointment cards using the Appointment title option.

How do I control what is shown in the appointment title?
The Appointment title settings let you choose what information is displayed inside appointment blocks on the Calendar. This helps you adapt the calendar view to your workflow, depending on whether you need to see services, employees, or customers at a glance.
You can choose to display one or more of the following in appointment titles:
- Service name
- Employee name
- Customer name
These options affect only how appointments are labeled in the Calendar view. They do not change booking data or customer-facing information.
How do Calendar views and navigation work?
You can change how the schedule is displayed using the view selector in the top-right corner. Navigation depends on the selected view.
- Use the view selector to switch between Month, Week, Day, and By employee views.
- Use the left and right arrows to move backward or forward.
- Click Today to return to the current date.
The arrows move by the active view:
- Month: moves one month backward or forward.
- Week: moves one week backward or forward.
- Day and By employee: moves one day backward or forward.
The By Employee view works similarly to the Day view, but displays each employee in a separate column. You can use filters to display only specific employees. When multiple employees are selected, the calendar may become horizontally scrollable, depending on the screen size and the number of selected employees.
Appointment cards can also display additional information below the appointment title, depending on the selected filter options.
In the Week, Day, and By Employee views, appointments will also display the buffer time configured for the service. Buffer time is shown directly on the appointment card before or after the appointment duration, depending on the service configuration. Buffer time is not displayed in the Month view.

What happens when I click an appointment or event?
When you click an appointment or event in the Calendar, a details panel opens from the left side. From there, you can quickly review key information and manage the booking.
- Appointments open an Appointment details panel.
- Events open an Event details panel.
- You can view customers and their statuses, and access actions such as editing the booking.

You can also preview key details by hovering over a booking directly in the calendar.
How does the tooltip on calendar items work?
The Calendar includes a tooltip that appears when hovering over an appointment, event, or blocked time, allowing you to quickly view key information without opening the item.
When you hover over a reserved time slot, the tooltip displays different details depending on the item type.
Appointments display the appointment name, time range, customers, location, and the assigned employee. Events display the event name, date and time range, location, and the event organizer. Block time displays the name of the block and the corresponding date and time range.

The tooltip is available only on desktop devices. Since it relies on hover interaction, it is not supported on mobile or touch devices.
How do I add a new booking or block time from the Calendar?
You can add new entries directly from the Calendar in two ways:
- Click + Add to choose whether you want to create an Appointment, Event, or Block time.
- Click an empty time slot to open a creation popup with Appointment, Event, and Block time options.
- If you click and drag across the calendar, the Block time option will be preselected, with the selected range (date and/or time) already defined.
After selecting the type, you can enter the required details and save.
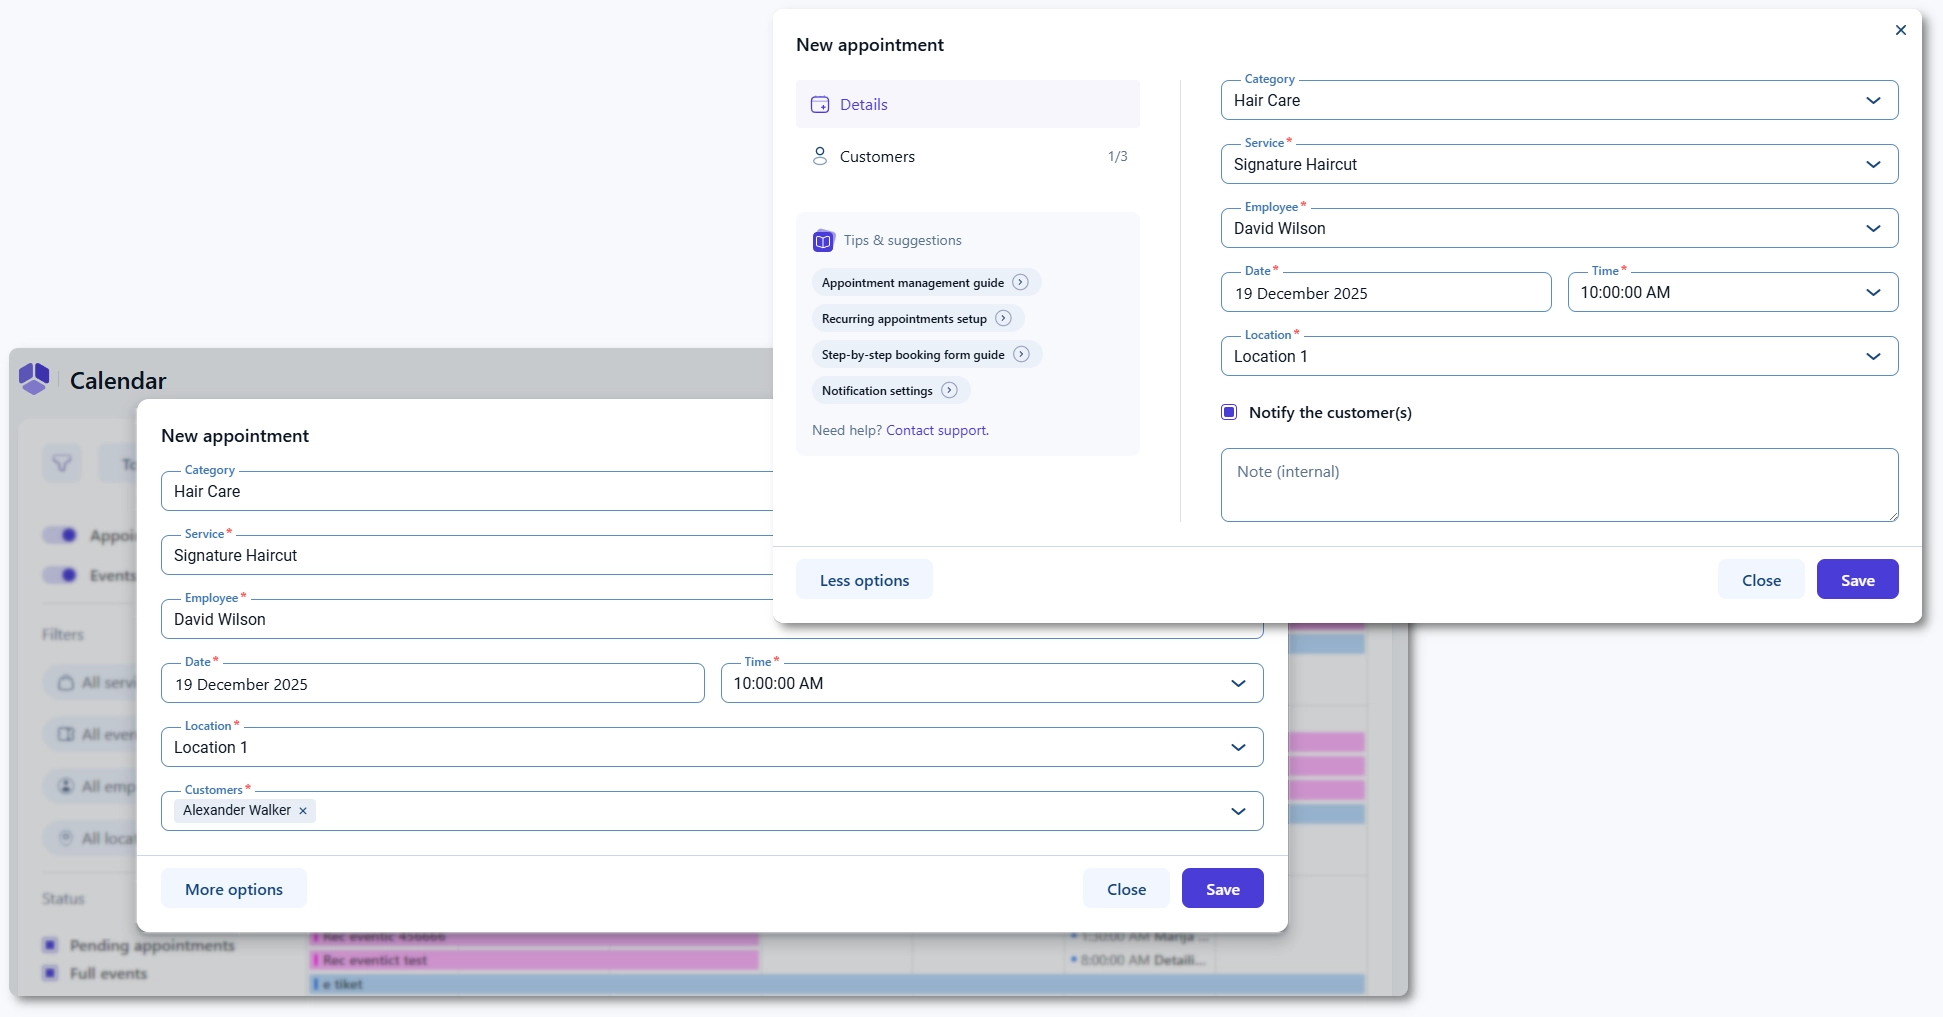
What does “More options” do when creating a booking?
When creating an appointment or event from the Calendar, you can start with the basic fields and then expand the form by clicking More options.
- More options opens the same creation flow you would use in Bookings or Events, but inside the calendar popup.
- This helps you complete more advanced settings without leaving the Calendar page.
How do I block time directly from the Calendar?
Blocking time directly from the Calendar allows you to quickly prevent new bookings for one or more employees without creating an appointment or event.
You can create a block time in two ways:
- Click on a time slot – opens a modal where you can choose between creating an Appointment, Event, or Block time
- Click and drag across time slots – automatically selects the Block time option and predefines the duration
When creating a block time, you can:
- Enter a name for the block
- Select the date or date range
- Define the time period
- Choose which employees are affected (all employees are selected by default)

How does block time work in Month view?
In the Month view, clicking a date or dragging across multiple days will preselect the date range. You can then define the From and To times.
If the end date differs from the start date, the To time applies to the end date. For example, selecting April 9th at 08:00 am and April 10th at 01:00 am will block time continuously from April 9th at 08:00 am until April 10th at 01:00 am.
If only a single date is selected, the available time options are limited to that day. Selecting a time earlier than the start time is not possible, as this follows the default time selection logic.
Block time is displayed directly in the calendar and is visually distinct from appointments.

How does block time work in Week, Day, and By employee views?
In Week, Day, and By employee views:
- Clicking a time slot preselects the date and From time, while the To time remains undefined
- Clicking and dragging sets both From and To times automatically, defining the duration of the block
In Week view, dragging across the calendar allows you to span multiple days, starting from the initial time slot and ending where the drag stops.
It is not possible to define the same time range (for example, 13:30 to 14:00) across multiple days using drag. For this use case, it is recommended to use the Month view, select the date range, and then define the time manually.

How do I reschedule an appointment using drag and drop?
You can reschedule appointments using a drag and drop action in the Calendar. Drag the appointment to a new time or date to update the schedule.
- Drag and drop is available for appointments.
- Events cannot be rescheduled with drag and drop.
This option is available only for appointments and events. Block time entries do not include a More options section.
Which date and time formats are used in the Calendar?
The Calendar uses the date and time formats configured in your WordPress settings. To adjust them, open your WordPress Date and Time settings and update the formats there. Amelia will then display those formats in the Calendar views and booking details.
What should I keep in mind when using the Calendar?
- Appointments can be rescheduled via drag and drop; events cannot.
- Filters are the fastest way to find bookings when you manage multiple employees, services, or locations.
- Clicking a booking opens the details panel, so you can review and manage it without leaving the Calendar.
- When you create a booking from the Calendar, More options expands the form to match the full creation flow.
- Block time can be created directly from the Calendar to prevent new bookings for selected employees.
- Hovering over a booking shows a quick preview of key details (available on desktop only).