Clients book appointments from their devices because it’s insanely convenient. Do you ever wonder how many more appointments you’d get with a high-converting WordPress booking form?
An online booking form provides a direct way to make an appointment and, best of all, it is available 24/7. It engages more potential customers and increases revenue.
Are you looking for a WordPress appointment plugin so that your clients can complete the booking process online?
This tutorial will show you how to create a booking form in WordPress site using the Amelia plugin.
Why You Need a Booking Form on Your WordPress Site
A booking form on your WordPress site is a game-changer for both you and your customers. Here’s why:
Convenience for users and businesses
A booking form allows your customers to schedule appointments or make reservations at any time, without needing to call or email. This means they can book services outside of your regular business hours, making your services more accessible and appealing.
Streamlined appointment scheduling
A booking form automates the scheduling process, reducing the back-and-forth communication often required to find a suitable time slot. Customers can see available times and choose what works best for them, and the system will automatically update your calendar. This not only saves time but also minimizes the chances of double bookings or scheduling errors.
Improved customer experience and satisfaction
Providing an easy-to-use booking form enhances the overall user experience. Customers appreciate the ability to quickly book appointments without hassle. Additionally, you can customize the form to gather all necessary information upfront, ensuring you’re well-prepared for each appointment and can provide personalized service. This attention to detail can significantly boost customer satisfaction and loyalty.
Professionalism and modernity
A well-designed booking form gives your business a professional edge. It shows that you are organized and up-to-date with modern technology. This can be particularly important in industries where first impressions matter, such as beauty, healthcare, or consulting services.
Increased efficiency and productivity
By automating the booking process, you and your staff can focus on other important tasks. Instead of spending time on administrative duties like scheduling and confirming appointments, you can dedicate more time to delivering excellent service. This boost in efficiency can lead to increased productivity and, ultimately, higher revenue.
Data collection and insights
A booking form can also serve as a valuable data collection tool. By analyzing booking patterns, customer preferences, and peak times, you can gain insights into your business operations and customer behavior. This information can help you make informed decisions, optimize your services, and develop targeted marketing strategies.
Enhanced marketing opportunities
With the right booking plugin, you can integrate your form with email marketing tools to send automated reminders, follow-ups, and promotional offers. This keeps your customers engaged and encourages repeat business. Additionally, satisfied customers who have a smooth booking experience are more likely to leave positive reviews and refer others to your business.
How to Create A Booking Form in WordPress? Step-by-Step Guide
1. Choosing WordPress plugin for booking form creation
Amelia is a powerful WordPress booking plugin that works flawlessly with WordPress sites of all kinds. It has a minimal, yet powerful appointment booking interface designed to ease your workflow, automate repetitive tasks, avoid double booking, and make appointment booking a breeze for your customers.
You can even have email notifications and SMS notifications so that nobody forgets about their appointment bookings.
In order to book an appointment, the complete user interaction takes a few clicks with this WordPress plugin. Moreover, with it, you can accept payments via PayPal and Stripe, perfect for those who want to pay in advance on the appointment form.
As a business owner, you can monitor KPIs in the WordPress dashboard and analyze other important data to keep a pulse on your business. Amelia is a straightforward, no-nonsense booking calendar plugin and an amazing option for those who want an around-the-clock solution for their WordPress site.
Amelia also has an Events Calendar module integrated within its features.
You can now automate your event bookings as well. To be more precise, it means that you will be able to schedule a single day, a multi-day, and also recurring events with Amelia.
Did we mention that you can manage multiple locations and that you have Google Calendar integration?
All of these features and much more are under only one license, no add-ons are needed.
To test things for yourself, I’d suggest checking out the demos and seeing how things look on the front end as well as in the back end.
This tutorial explains how to create a booking form template for the best results.
2. Installing and setting up the booking plugin
You will need a domain name and a web hosting service to set up a booking appointment website. A domain name is the website’s address, such as https://wpamelia.com/. A web hosting service stores website content files.
After you have set up your website, you can install your booking form plugin. Amelia offers four pricing plans:
- The Starter plan supports one domain
- The Standard version supports one domain
- The Pro plan supports 5 domains
- The Elite plan supports unlimited domains
Installing the Amelia booking plugin is straightforward. The installation will be a breeze if you have any experience with WordPress. That’s because it follows the same basic steps as all WordPress plugins.
After purchasing Amelia, download the .zip file from the “downloads” page. If you bought the plugin from the Amelia website, follow the TMS Store links. If you purchased it from CodeCanyon, use the links from CodeCanyon.
In the WordPress admin panel, go to Plugins. Click on Amelia, then press Activate. Now the plugin is installed and activated.
Amelia works right out of the box. It doesn’t require users to adjust every little detail before launching it. And it looks good with every theme.
Customization and technical knowledge are not required to install Amelia. Clients can easily book appointments with a booking form, and you can manage them from the backend.
3. Configuring your booking form with Amelia
Once Amelia is installed and activated, you can create your first booking form through the wizard which is something like a form builder, if you like. All you need to create a booking form is to input one employee and one service.
This tutorial will explain the easiest way to configure and set up a booking form. It won’t go into detail but will give you a good feel of how the plugin works. You can get additional help through the plugin’s documentation.
Enter company information
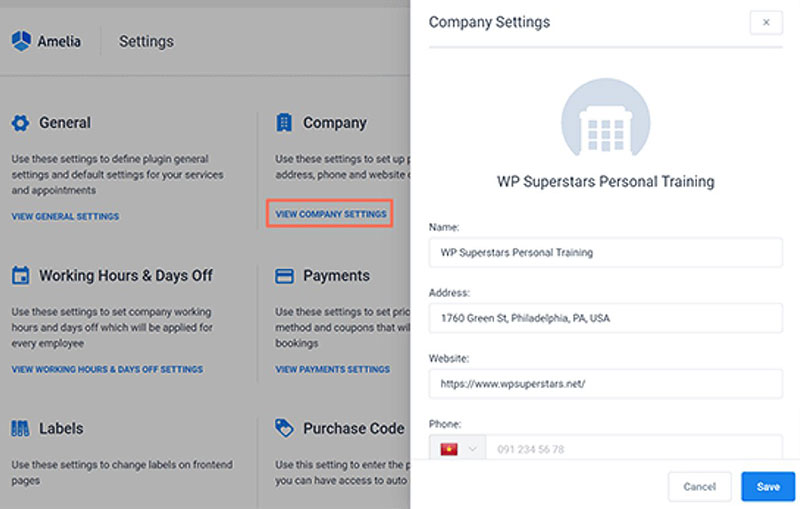
First on your to-do list in this form builder is to enter your company information. Insert your company logo, company name, website address, and phone number. Then click Save.
Add an employee
Next, start adding employees in the form builder. Employees can each offer different services and display their own work schedules. They can also personalize their settings.
If you are a solopreneur, simply add yourself as an employee. If you have several employees offering different services, add them to the plugin to receive booking requests.
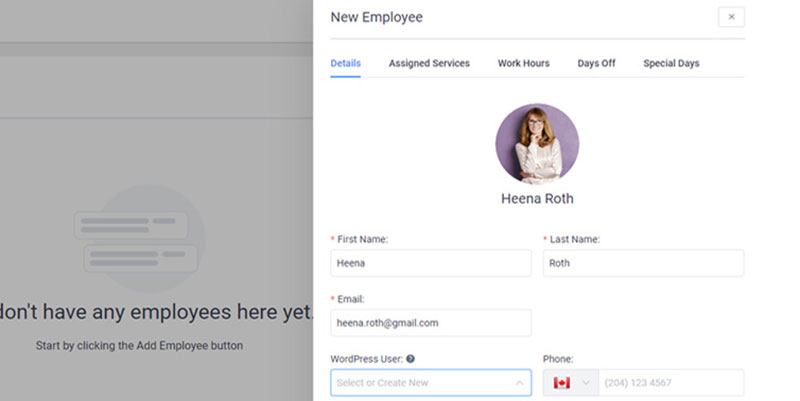
Go to the WordPress admin panel, click on Amelia, and select Employees to add an employee. Click the Add Employee button on the top right corner of the page.
The first tab asks for the following personal details about the employee:
- Picture
- First and last name
- Location (if there are multiple locations)
- WordPress user name (this is necessary if you want employees to manage their own bookings)
- Phone number
- Notes
The second tab from the booking form builder allows you to choose your employees’ services and the prices. Go to this tab and check the services. If you have not entered the services yet, you can complete this step later.
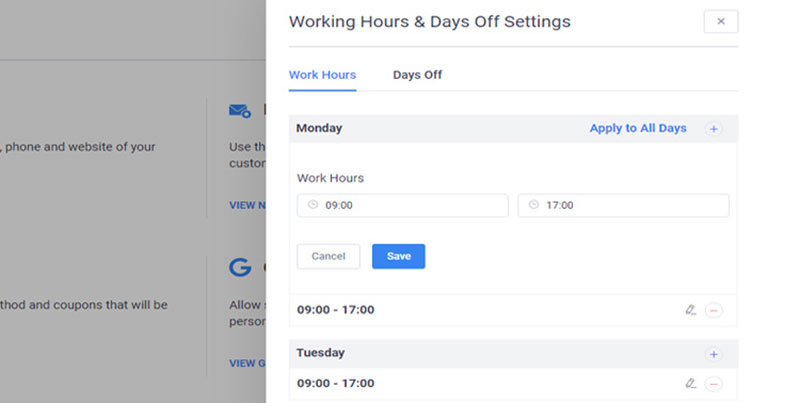
The third tab lets employees register their work schedules. The fourth tab lists days off, and the fifth tab notes special days.
After configuring all employee settings, click Save. Employees should now appear in the employee list.
Add a service
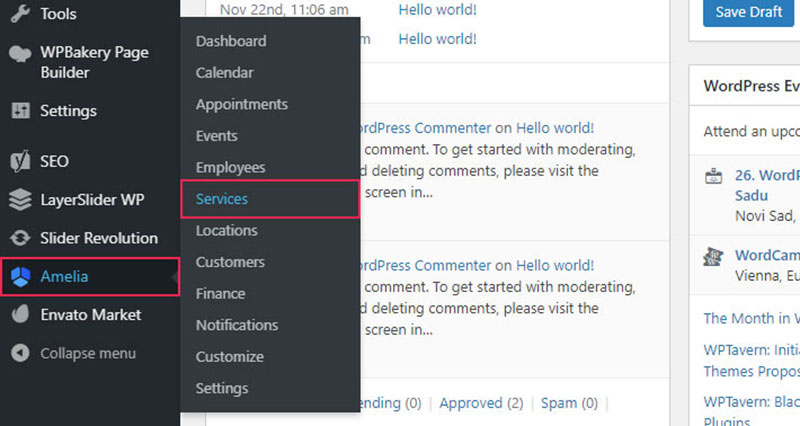
Next, add services. Simply go to the administrative panel, and click on Services.
On the services page, you can add categories. Click on Add Category, then enter a category name and click the Apply button.
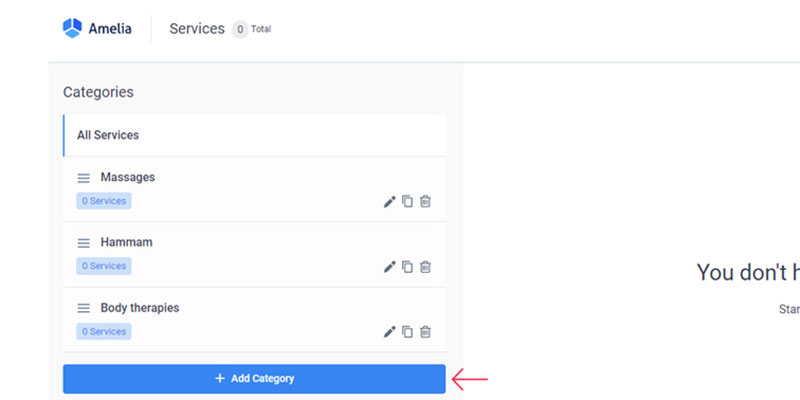
For example, a beauty salon can add a category for”Hair Stylist.” Or a cleaning company can add a category for”Rental House Cleaning.”

After adding a category, you can then add a service. Select the Add Service button in the top right corner of the screen.
After adding a new service, it will prompt you to fill out the following information:
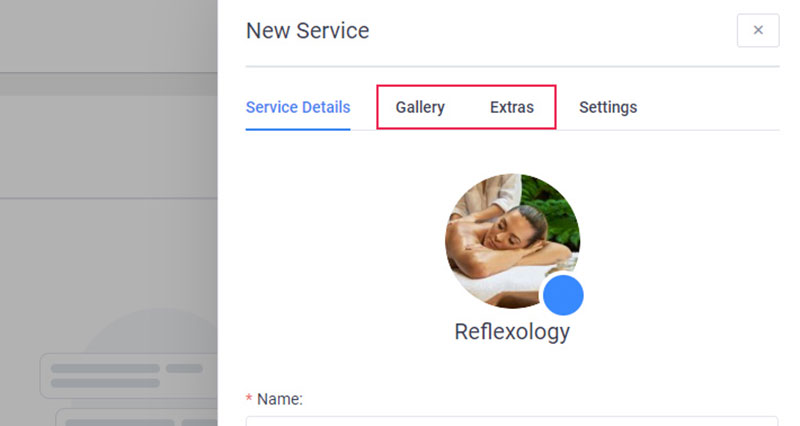
- Picture: select an image that represents the service
- Name: give the service a name such as “Men’s Hair Cuts”
- Category: select the category that this service belongs to
- Duration: how long a session lasts
- Price: the price for one session
- Buffer times: set buffer times before and after the session so that you are never overbooked
- Maximum and minimum capacity
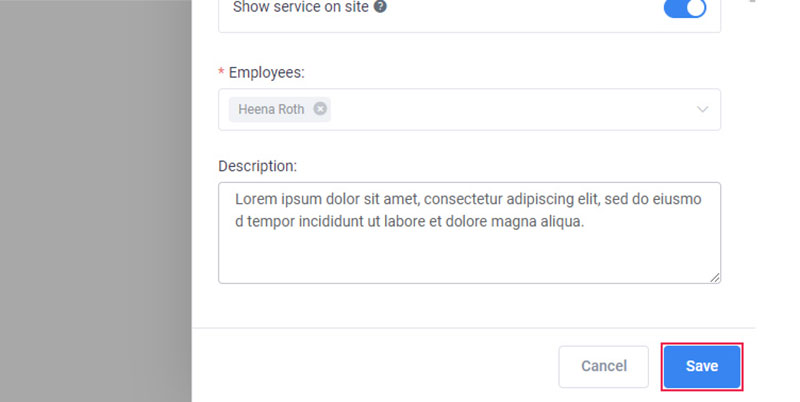
- Employees: select which employees offer this service
- Description
You can also enable or disable recurring appointments. After filling out the information, click Save. Now the service should appear in the service list.
4. Add a step-by-step booking form to your website’s front-end
You want to add an online form to the website’s front-end to allow visitors to book appointments. Amelia provides three different booking form viewing options.
They are:
- Step-by-step booking wizard
- Services catalog
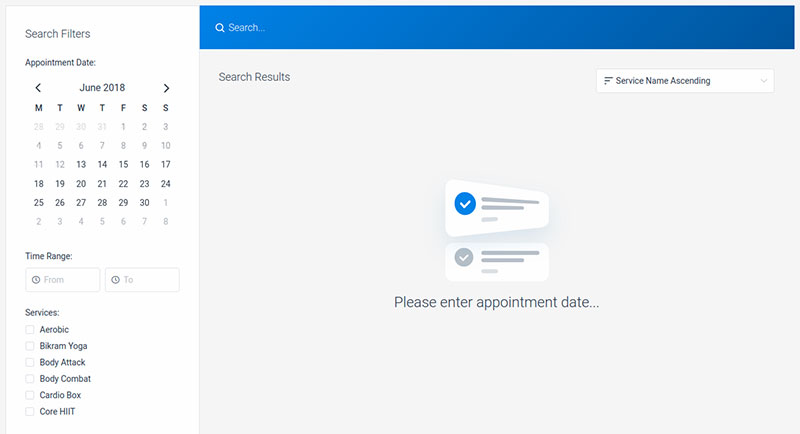
- Booking search view
This tutorial will discuss the step-by-step booking wizard. If you prefer to use a different viewing option, you can read how in the documentation pages.
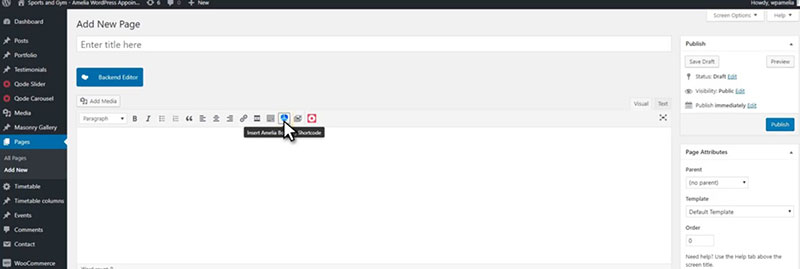
The first step in setting up the booking wizard is creating a new WordPress post or page. In the WordPress admin panel, click on Pages or Posts. Then select Add New. Enter the name of the new post or page.
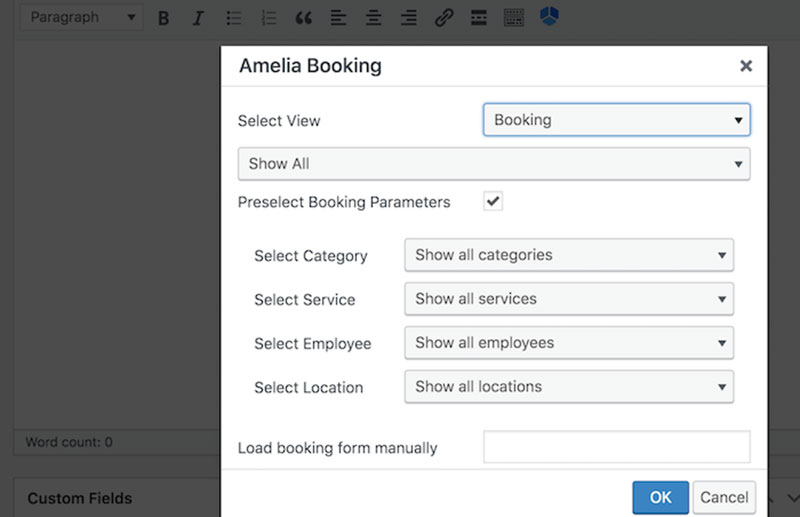
Select the Amelia icon in the editor toolbar. A pop-up will appear with a drop-down menu. Select Booking, then press OK.
The shortcode will appear in the textbox. Alternatively, you can manually enter the shortcode by typing: [ameliabooking].
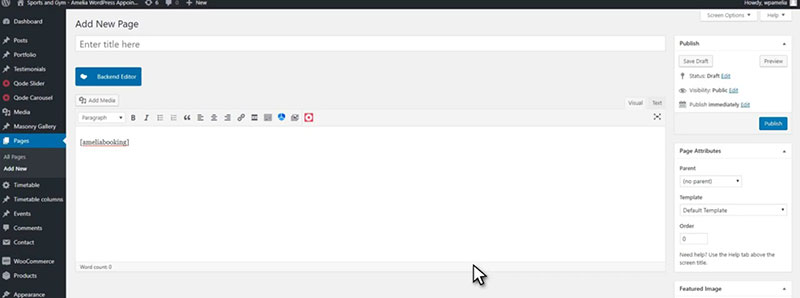
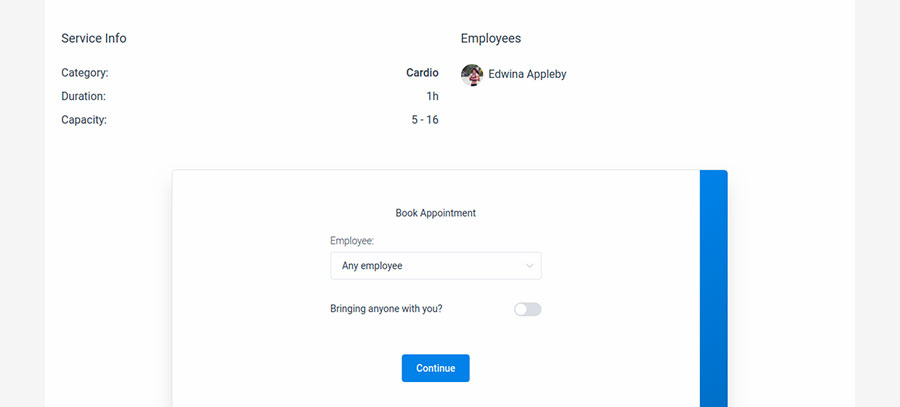
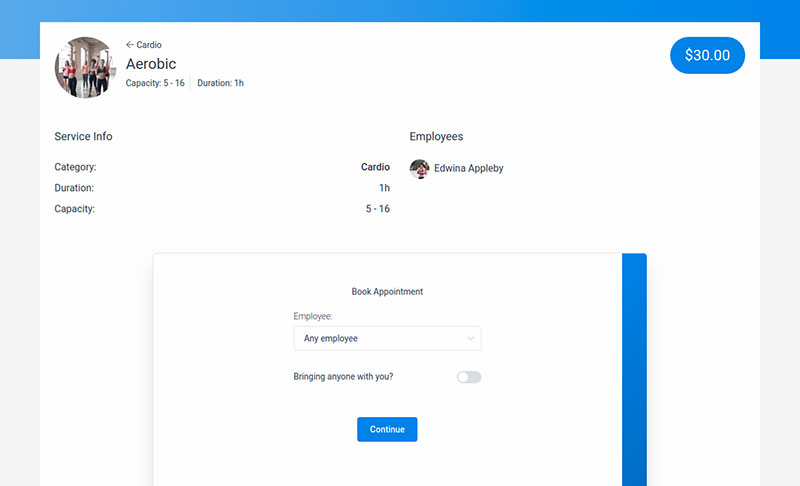
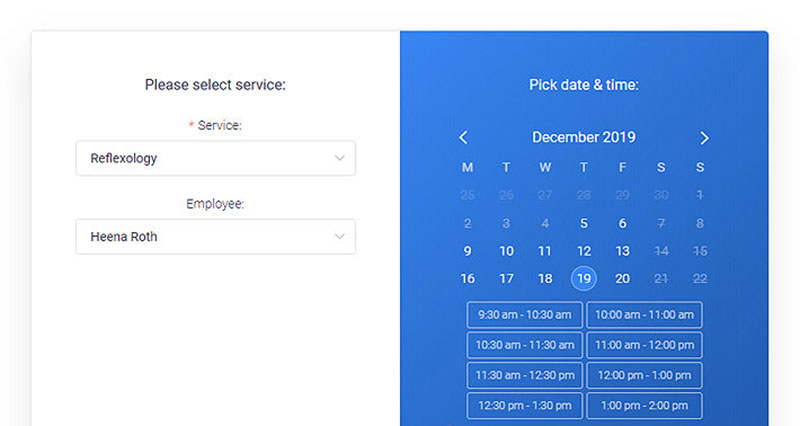
Next, click Publish. Preview the page on the front end to see how the booking form template appears. If you set the plugin up with multiple options, clients can choose a service, location, and employee.
Then viewers will see a calendar (that can sync with Google Calendar, don’t forget) and can choose the available date and time that is convenient. The third step in the process allows viewers to enter contact information, such as their name and phone number.
The result isn’t one of those classic booking forms that are bland and look like an absolute chore to complete. This appointment form looks modern and has provides a great user experience to those who use it.
5. Booking appointments

Now that your website has a booking form, clients can book appointments online in two different ways.
The first is through the front end of the website. Clients visiting your company’s website can use the booking form to schedule an appointment. They can also reschedule the appointment, cancel it, or request a different employee.
The second method is through the WordPress dashboard. Administrators and managers are the only ones that are managing booking requests this way. This feature is ideal for clients who prefer using the old-fashioned way of booking an appointment, and not through online forms.
For example, there are a lot of people who hate going through a trip registration form and filling in form fields and would rather talk over the phone with a manager.
Thus, this option gives companies greater flexibility to schedule more appointments. It gives you the ability to book appointments in person, by phone, and by text message.
For more information on booking appointments through the back end, go to the Amelia Users and Roles documentation page.
FAQs About WordPress Booking Forms
How to create a booking form on WordPress?
To create a booking form on WordPress, install and activate a booking plugin, then follow the plugin’s setup instructions to customize and publish your form.
Does WordPress have a booking system?
WordPress itself does not have a built-in booking system, but you can add one using Amelia’s booking plugin.
How do I add bookings to WordPress?
You can add bookings to WordPress by installing a booking plugin and embedding the booking form on your desired page or post.
How do I create a free booking website on WordPress?
To create a free booking website on WordPress, use a free theme and a free booking plugin like Amelia Lite.
How do I create a booking system for my website?
Create a booking system for your website by choosing and installing Amelia booking plugin, configuring the settings, and adding the booking form to your site.
What is the best free WordPress booking?
One of the best free WordPress booking plugins is the Amelia Lite, known for its simplicity and ease of use.
How do I add a booking widget to WordPress?
To add a booking widget to WordPress, use Amelia booking plugin that provides widget support and drag the widget to your desired area.
What information is required to be filled in a booking form?
Depending on the type of reservation being made, certain information must be provided on the booking form. A booking form would request personal information like a name, address, and phone number. But you can also use custom fields and to gather more info.
Conclusion on Creating a Booking Form
As you can see, Amelia is not complicated at all. You can effortlessly create a booking request form, schedule appointments, and accept payments online.
Amelia is one of the best booking plugins for those with little technical experience because it is easy to use and set up. On the other hand, it offers advanced booking options and is completely customizable for developers.
Some of its many advanced features include:
- Group appointments
- Multiple locations
- Individual employee breaks
- Service extras, and more
Obviously, if you want to go through a lot of pain in setting up old-style booking forms, there are plenty of booking form templates online.
Want to Increase Your Bookings?
If you enjoyed reading this article on creating a booking form, we’ve got more tricks up our sleeve that will help you increase your bookings:
- 11 Ways To Optimize Your Appointment-Based WordPress Site’s Performance
- How to Restore WordPress from Backup: Step-By-Step Guide
- PayPal Booking System: Everything You Need to Know
- Recurring Appointments Guide: Streamline Your Scheduling & Boost Performance
- Inspiring Booking Form Template Examples for Your Website
- Booking Form Examples Powered By Amelia Booking Plugin

Explore topics

Read Inspiring Customer Stories
Check out how our user set Amelia for his business