How to enable and configure Stripe payments in Amelia
Stripe integration in Amelia allows customers to pay for appointments, events, packages, and cart bookings using credit or debit cards directly on your site. Once enabled, Stripe securely processes payments without redirecting customers away from the booking flow.
For example, if you offer in-person or online services, customers can complete their booking and card payment in one step, improving conversion and reducing drop-offs.
The Stripe integration is available on the Standard, Pro, and Elite license plans.
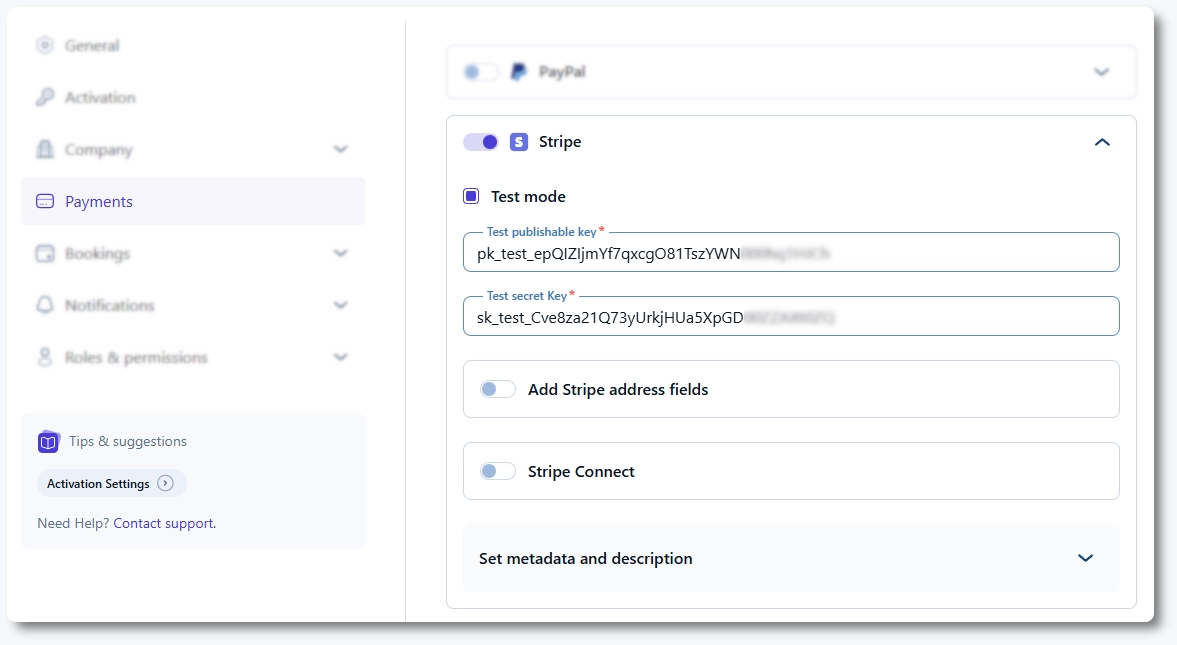
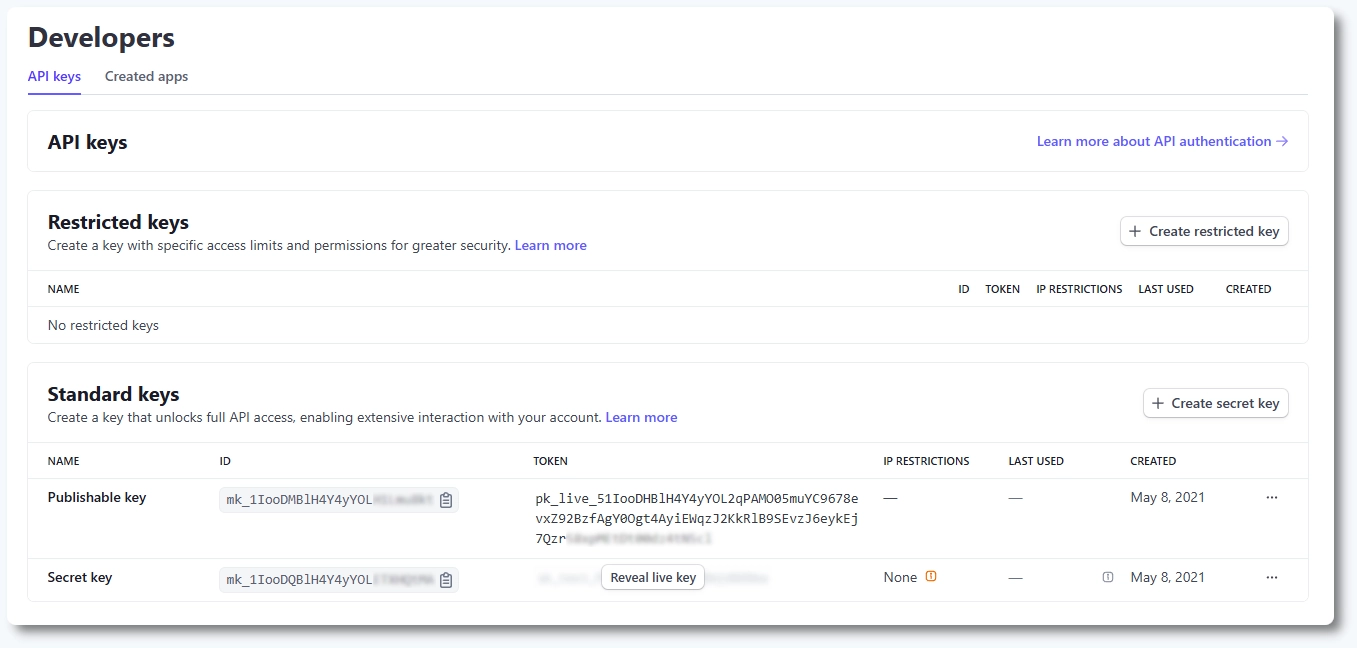
How do I enable Stripe integration in Amelia?
You can enable Stripe by activating it in Amelia’s integrations and then configuring it in the Payments settings.
Go to Features & integrations → Integrations and enable Stripe. Click Set up to open Amelia → Settings → Payments. Scroll down to the Stripe section and enable it using the toggle.
Once Stripe is enabled, it is automatically activated for all existing services, packages, and events. Even so, we strongly recommend verifying this by editing the items you want to offer Stripe payments for:
- Catalog → Services → Edit service → Settings
- Catalog → Packages → Edit package → Settings
- Events → Edit event → Settings
In each case, scroll down in the Settings tab and make sure the Stripe payment method is enabled.
What does “Add Stripe address fields” do?
The Add Stripe address fields option controls whether Stripe’s address fields are shown during checkout.
When enabled, address fields are pulled directly from Stripe and displayed while the customer enters their card details. This adds an extra layer of verification and may be required depending on your Stripe account configuration or regional compliance rules.
How do I configure Stripe test mode and live mode?
Stripe supports both test transactions and live payments, depending on whether Test mode is enabled.
If you enable Test mode in the upper right corner of your Stripe dashboard, generate and copy your Test publishable key and Test secret key into Amelia (make sure that the Test mode is also enabled in Amelia). These keys allow you to simulate payments without charging real cards.
To accept real payments, leave Test mode disabled and enter your Live publishable key and Live secret key. You can find all Stripe keys in your Stripe Dashboard under Developers → API keys.
Stripe Live payments require a valid SSL certificate on your website for PCI compliance. Additionally, Stripe Live does not process payments below $0.50, so services priced lower than this amount cannot be paid using Stripe in live mode.
What should I know when testing Stripe payments?
When using Test mode, Stripe validates cards based on country-specific rules.
We recommend using test cards that match your country, as many commonly used test cards are US or UK based and include ZIP or postal code validation. During testing, you can enter 3 to 5 digits to pass the ZIP code validation, but keep in mind that card behavior depends on the country associated with the card number.
If postal codes are not required in your country, real customers will not see this field during live checkout. Using country-based test cards provides the most accurate testing experience.
What is the “Set metadata and description” option in Stripe?
The Set metadata and description option lets you control what booking information is sent to Stripe with each payment.
Unlike PayPal, Stripe supports both metadata (key-value pairs) and a description. You can define multiple metadata fields and a separate description for appointments, events, packages, and cart payments.
Both metadata and descriptions support placeholders, allowing you to include dynamic information such as customer details, services, employees, locations, payments, extras, coupons, and custom fields. This makes Stripe transactions easier to identify and reconcile in your Stripe Dashboard.
Does Stripe send automatic payment receipts?
Yes, Stripe can automatically send payment receipts to customers who enter their email address during checkout.
This behavior is controlled entirely from your Stripe account. To enable it, go to your Stripe Dashboard → Settings → Business → Customer emails and turn on email receipts for successful payments and or refunds under the Payments section.
No additional configuration is required in Amelia. Once enabled in Stripe, receipts are sent automatically.
If you want full control over email content and layout, you can disable Stripe’s email receipts and rely on Amelia email notifications instead.
What should I keep in mind when using Stripe in Amelia?
- Always verify that Stripe is enabled on services, packages, and events after activating it globally.
- Use Test mode for testing and switch to Live mode before accepting real payments.
- Ensure your site has an SSL certificate before enabling live Stripe payments.
- Use metadata and descriptions to make Stripe transactions easier to identify.