How do customers browse and book events using the Amelia events calendar
The events calendar booking form displays all of your events in a monthly calendar layout so customers can easily scan dates, filter schedules, and book events directly from the calendar. It adapts automatically based on how your events are configured and provides a smooth, visual way for customers to explore upcoming activities.
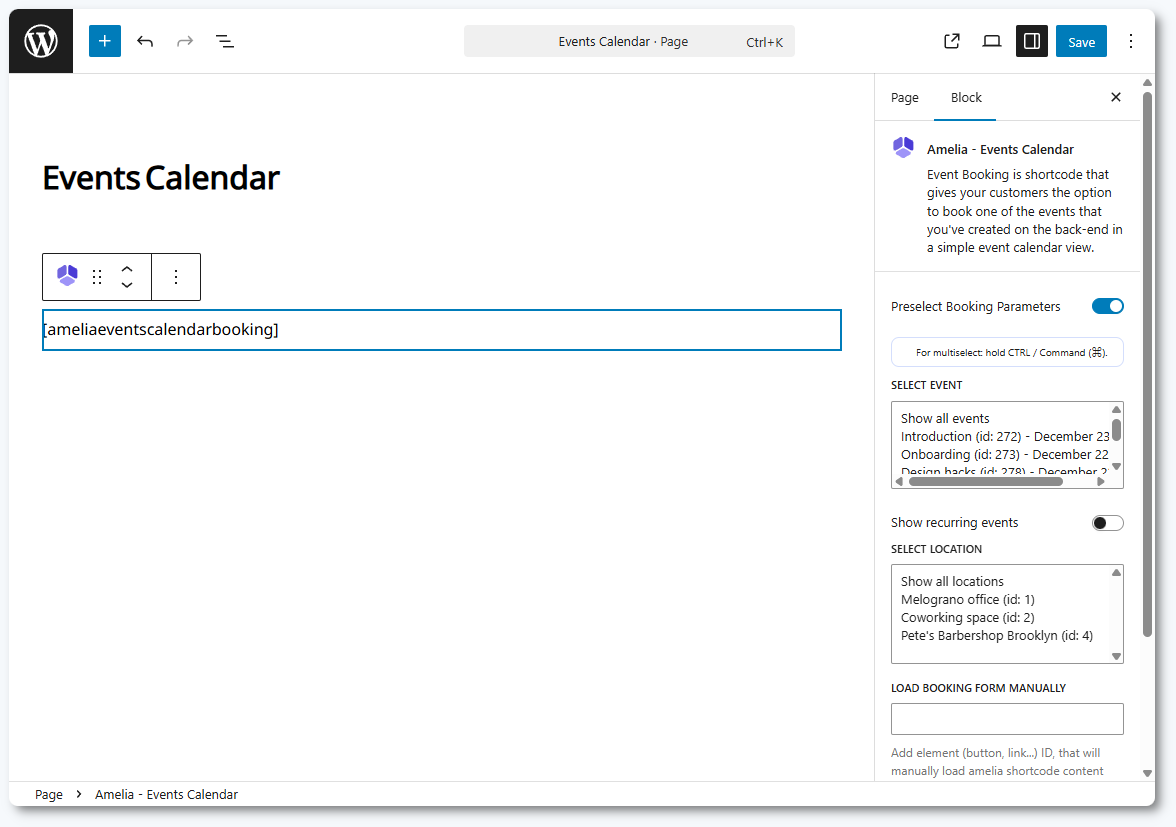
How do I add the events calendar to my website?
You can add the events calendar booking form using Gutenberg, Elementor, Divi, or by inserting its shortcode manually.
[ameliaeventscalendarbooking] displays the full events calendar.
[ameliaeventscalendarbooking event=1] displays only the event with ID 1.
[ameliaeventscalendarbooking event=1 recurring=1] displays the event with ID 1 including its recurring dates.
[ameliaeventscalendarbooking tag='workshop'] displays all events that use the “workshop” tag.
The builders mentioned above include Amelia blocks/widgets. Simply search for “Amelia”, select Events calendar, and publish the page. You can also preselect parameters such as a specific event, recurring events, a location, or a tag. These settings update the shortcode automatically in the editor.
Customers land on a monthly calendar that highlights all available events. They can browse by date, search for events by name, and apply filters depending on your setup.
The interface typically includes:
Today button to jump back to the current month
Month navigation arrows
Search box for event names
Filters for locations, hosts, status, and tags
The calendar displays events on their scheduled days. If multiple events occur on the same date, the first event is shown and the rest appear under a “+X events” label. Clicking a date or an event reveals the event details popup.
What information appears when a customer selects an event?
Clicking an event inside the calendar opens the same event details popup used in the events list booking form. The display and booking flow are identical, regardless of whether the customer comes from the list or the calendar view.
The popup includes:
Event name and booking status
Event gallery (if enabled)
Start and end dates
Remaining spots and total capacity
Location information
Tags assigned to the event
Description of the event
Full schedule for multi-day events
Hosts and staff descriptions
The Book event button appears at the bottom of the popup.
How do customers book events from the calendar?
After opening the event details popup, customers click Book event. If the event allows booking for multiple attendees, they first select the number of people they want to register.
If the event uses ticket types or custom pricing, the ticket selection step appears next. To learn more about configuring these, visit the event tickets documentation.
Once the attendee number or tickets are selected, the customer continues through:
Your information
Payment options (if enabled in Settings → Payments)
Every step after selecting the event mirrors the process used in the events list booking form. The interface and behavior are identical.
What happens after the customer completes the booking?
After completing the booking, customers see a confirmation popup showing event details and an option to add the event to Google, Outlook, Yahoo, or Apple Calendar.
If you’ve configured the Customer Panel, a link to it appears as well. Clicking Finish completes the process and refreshes the page unless you have defined a custom redirect URL in the event’s settings.
Note
The Add to Calendar options retrieve all event details and forward it to calendar the user selected in order to propose a Calendar event creation.
This action is not generated by the Google/Outlook/Apple Calendar integrations. It can be used without enabling these features.
What didn’t we include here and why?
To keep this page focused on the customer-facing booking flow, we did not include: