What details can I configure for an employee in Amelia
The Details tab is where you set the core information for each employee in Amelia. Here you define who the employee is, how they appear on the front end, and whether they can sign in to the Employee Panel or the WordPress back end.
Where can I find employee details?
Open the Employees page, then click + Employee or edit an existing employee. The Details tab is the first tab in the employee profile and it opens by default whenever you create or edit an employee.
Which fields are required for an employee?
To save an employee, the following fields in the Details tab are required:
- First name
- Last name
Photo and phone number are optional, so you can add them later if needed.
If you have more than one location configured in the Locations section of Amelia, you also need to choose a default location for the employee. This defines where the employee works by default before you fine-tune their schedule in the Work hours and Special days tabs.
How do location and default location work?
The Location field in the Details tab sets the employee’s default location. This is used when:
- Services are offered at specific locations
- You do not yet have detailed work hours configured for the employee
Later, you can override this default location for specific days or periods through the Work hours and Special days tabs if the employee works in more than one place.
How does the Show employee on site option work?
The Show employee on site toggle controls whether the employee appears on the booking forms and can be selected for appointments.
For newly created employees, this toggle is enabled by default. When it is disabled, the employee will not appear on the front end and will not receive new bookings. Enable Show employee on site so that their assigned services become available to customers on front end.
How does the WordPress user connection work?
The WordPress User connection links the employee profile in Amelia with a user account in your WordPress site. When an employee is connected to a WordPress user, they can log in and access the back end or the Employee Panel, depending on their role and your configuration.
To connect an employee to a WordPress user, use the WordPress User field in the employee’s Details tab. You can do this in two ways:
- Select an existing user who already has the Amelia Employee role.
- Click the “Create new” option in the dropdown to let Amelia automatically create a new WordPress user with the correct role.
Once the connection is made, the employee can log in using that WordPress user and access the back end and the Employee Panel based on their permissions.
- Avoid assigning multiple Amelia roles (such as employee, manager, and customer) to the same WordPress user, and do not add extra roles to administrator users. Each role has specific permissions, and mixing roles can lead to unexpected behavior.
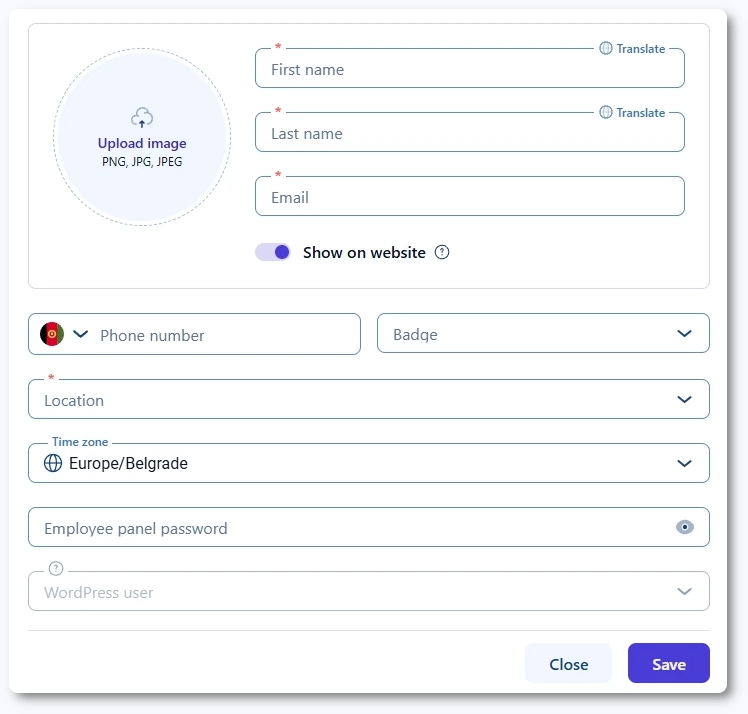
- When a WordPress user is created through the Employee profile, WordPress automatically sends an email notification to that user so they can set their password. This is default WordPress behavior and is not controlled by Amelia. If you need to manage or disable these emails, this can only be done using third-party plugins such as Manage Notification E-mails.
How does the Employee Panel password work?
The Employee Panel password field lets you set a password for the employee to sign in directly to the Employee Panel. After you enter a password and save the employee, Amelia sends an email to the employee with their access details, as long as the corresponding notification is enabled.
Before using this option, make sure:
- The Employee Panel is enabled in Amelia’s settings.
- You have created a WordPress page that contains the
[ameliaemployeepanel]shortcode and linked it in Settings → Roles & permissions → Employee. - The email notifications are configured in Settings → Notifications → Email, and that the Panel access email template is enabled in Notifications.
The employee can then use the email and password from the notification to access their panel.
Which optional profile fields can I configure?
Depending on your license and configuration, you may see several additional fields in the Details tab:
- Employee badge – a small label that highlights the employee in the Catalog booking form, for example “Exclusive” or “Top rated”. This helps you draw attention to specific employees.
- Timezone – lets you set a different time zone for the employee if they work in a different region from your WordPress site. If this field is left empty, the employee uses the site’s time zone. The overall time zone behavior is explained in the dedicated time zone documentation.
- Description – a short bio or introduction that appears on the Catalog booking form so customers can learn more about the employee.
- Internal note – visible only in the back end. You can use it to store internal information such as preferences, equipment details, or anything else that helps manage the employee.
Some of these fields, such as Timezone and Employee badge, are only visible if the corresponding features are enabled in Amelia.
You can update these fields at any time by editing the employee and saving the changes. The updated information will be reflected automatically on your booking forms and in the Employee Panel where applicable.