How do I customize the Customer panel
The Customer panel allows your customers to manage their own appointments, events, and packages, and it has its own design controls in Amelia so the panel can match your brand and front end booking forms.
The customization tools work similarly to other forms, with global styling in the Basic tab and detailed, step specific controls in the Advanced tab, but the Customer panel includes more views and popups because it covers profile management, schedule management, and account access flows.
For example, you can style the sidebar that lists sections such as Appointments, Events, and Packages, and separately customize popups for rescheduling or cancelling bookings.
Where do I access the Customer panel customization?
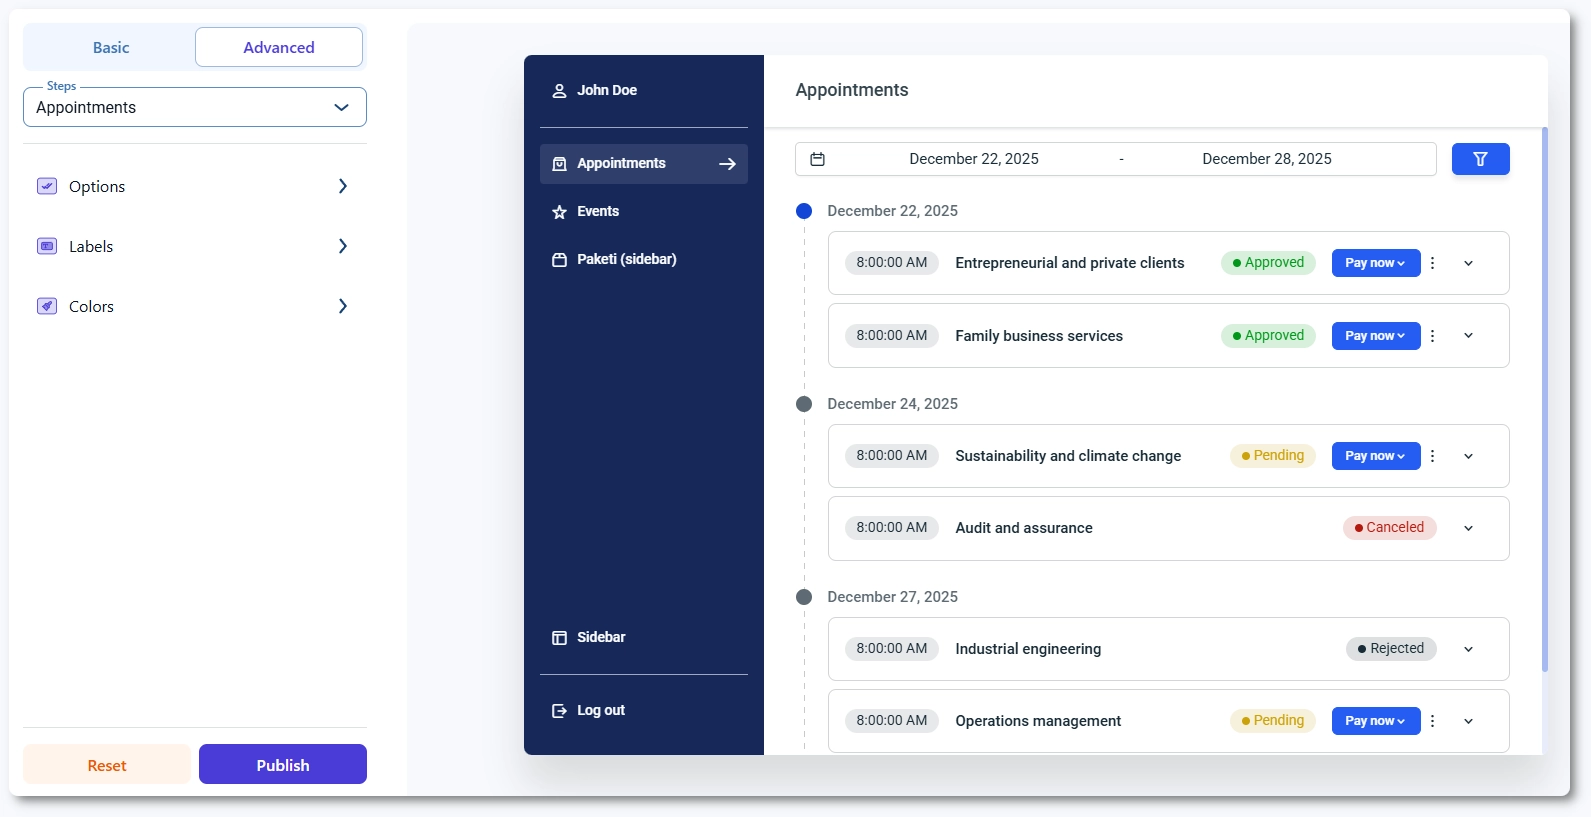
To style the Customer panel, open Amelia → Customize and select Customer panel from the list of form types.
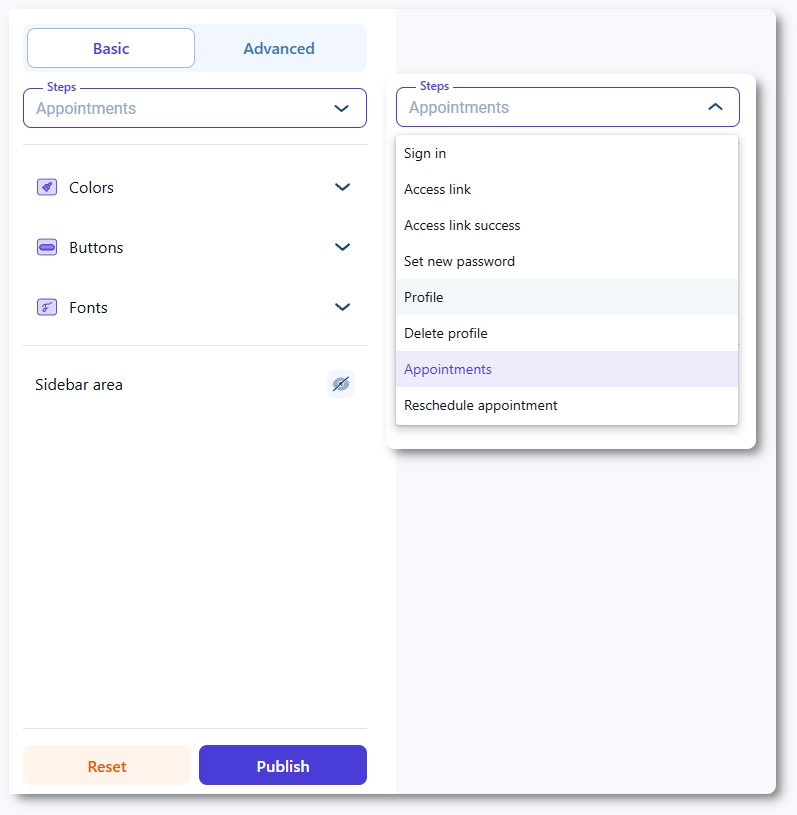
The preview on the right shows the panel layout, while the left side contains the Basic and Advanced tabs and the Steps dropdown. Use the Steps dropdown to switch between views such as Sidebar area, Sign in, Access link, Appointments, Events, Packages, and the different popups for rescheduling and cancellations.
Saving your changes updates the design across all Customer panel embeds on your site, and clearing cache helps ensure customers see the new styling immediately.
What can I configure in the Basic tab?
The Basic tab controls global styling for the entire Customer panel, including primary colors, typography, button styles, and general layout options.
These settings affect all steps and popups so you can quickly align the panel with your main booking forms and your website theme. You can adjust how the sidebar and content area look, define button appearance for actions like rescheduling or cancelling, and ensure text remains readable across all sections.
Because the panel contains many different views, defining your core design in the Basic tab is the best first step before making per-view adjustments in the Advanced tab.
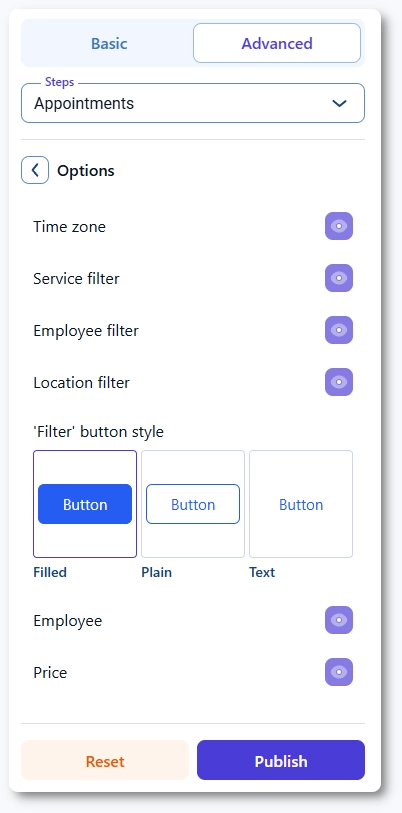
What can I configure in the Advanced tab?
The Advanced tab lets you fine tune each individual view of the Customer panel. It offers Options, Labels, and Colors for the selected step in the Steps dropdown.
Options control how elements behave and which controls are visible, such as buttons, columns, and icons. Labels allow you to rename titles, section names, column headers, button text, and system messages to match your tone. Colors let you adjust specific areas like the sidebar, card backgrounds, list rows, popups, and calendar elements used for rescheduling.
Each step has its own combination of these controls, depending on what it displays.
Which steps can I customize in the Customer panel?
The Customer panel includes multiple steps and popups that you can customize separately through the Steps dropdown:
- Sidebar area – controls the appearance of the main navigation on the left, including section labels, icons, and active states.
- Sign in – styles the login form customers use when accessing the panel with email and password.
- Access link – defines the layout and text of the screen customers see when they access the panel through email access links.
- Access link success – message shown after a successful access link login.
- Set new password – layout and labels for the password creation or reset view.
- Profile – controls the design of the profile page where customers edit personal details.
- Delete profile (popup) – popup styling and text used when customers request to delete their profile.
- Appointments – main appointments view with lists, filters, and action buttons.
- Reschedule appointment (calendar popup) – calendar and popup layout used when customers reschedule an appointment.
- Cancel appointment (popup) – confirmation popup styling for appointment cancellations.
- Events – event bookings list, similar to appointments but focused on event registrations.
- Cancel event (popup) – confirmation popup shown when cancelling an event booking.
- Packages – list of purchased packages and their status.
- Packages appointments – view showing appointments linked to a specific package.
- Book appointment (popup within a package) – booking popup used when creating a new appointment from a package.
- Cancel package (popup) – confirmation popup used when cancelling a purchased package.
Each of these steps can be customized separately so that navigation, content views, and confirmation dialogs all follow the same visual language while still reflecting their specific purpose.
What should I keep in mind when customizing the Customer panel?
- Keep the sidebar styling consistent so customers can quickly recognize the active section and navigate between appointments, events, and packages.
- Review the Sign in, Access link, and Set new password steps together to ensure access related messages and labels are clear and consistent.
- Test all popups such as reschedule, cancellation, and delete profile on both desktop and mobile to confirm that text and buttons remain visible and easy to tap.
- Align panel colors and typography with your front end booking forms so switching between booking and managing does not feel disconnected.
- Use Labels in the Advanced tab to clarify column headers and action button names, especially in lists with multiple actions.
- Clear any caching plugin or CDN cache after saving changes so customers immediately see the updated Customer panel design.