How do I set up Google Calendar integration in Amelia using the advanced method
The advanced Google Calendar setup allows you to connect Amelia with Google Calendar by creating OAuth credentials in the Google Cloud Console. This method is intended for users who need full control over authentication, branding, or organizational Google accounts. While the setup involves several steps, it is a one-time configuration and ensures reliable synchronization between Amelia and Google Calendar when completed correctly.
Google frequently updates and reorganizes the Google Cloud Console interface. While menu labels and navigation paths may change over time, the core configuration steps described below remain the same.
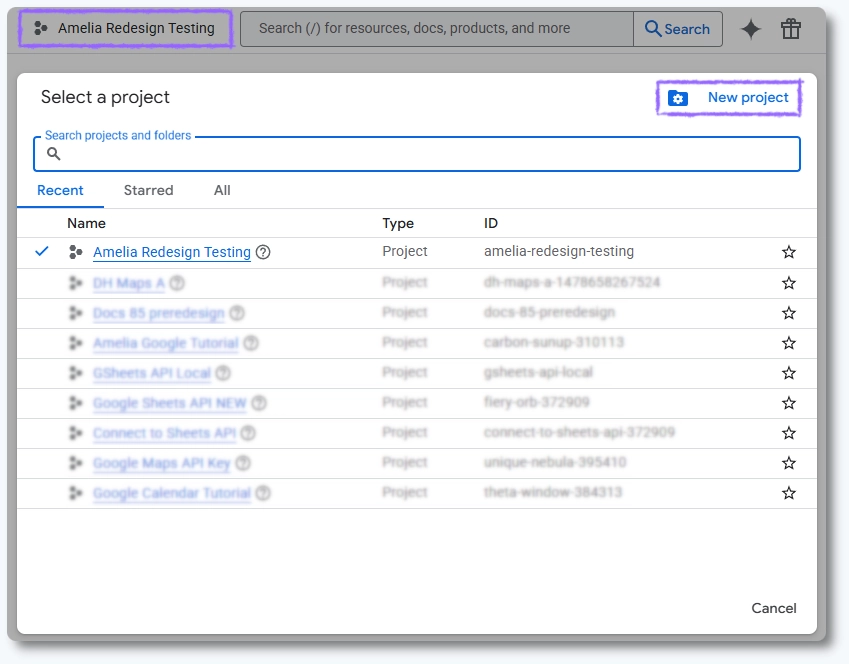
How do I prepare Amelia for the advanced Google setup?
Before starting the advanced setup, make sure the standard Google connection is not active.
If the Sign in with Google method was previously used, disconnect it first, as this method disables manual configuration by locking the Client ID and Client secret fields.
Once disconnected, open Amelia → Features & Integrations → Integrations → Google Calendar & Google Meet → Set up, and switch to the General tab.
This is where you will later paste the credentials generated in Google Cloud Console.
What needs to be configured in Google Cloud Console?
The advanced setup requires creating or configuring a Google Cloud project and allowing it to communicate with Amelia. Regardless of interface changes in Google Cloud Console, the setup always includes these core steps:
- Create or select a Google Cloud project
You can either create a new project or use an existing one. The project acts as a container for all Google APIs and credentials used by Amelia. - Enable the Google Calendar API
Inside the selected project, the Google Calendar API must be enabled. Without this, Amelia cannot create or manage calendar events. - Create OAuth 2.0 credentials
You must create OAuth credentials for a Web application. These credentials are used to authenticate Amelia when it communicates with Google. - Add the Redirect URI from Amelia
Google requires a redirect URL to confirm secure authorization. Copy the Redirect URI shown in Amelia’s Google integration settings and paste it into the OAuth configuration in Google Cloud Console. - Copy the Client ID and Client secret into Amelia
After creating the credentials, copy the generated Client ID and Client secret and paste them into the matching fields in Amelia’s General tab. - Publish the app
The OAuth app must be published so Google allows real users to authenticate. Unpublished apps may work only for test users or fail during employee connections.
How to I create a new Google Cloud Project?
- Go to the Google Cloud Console.
- Click on the Project Picker in the top left (next to the “Google Cloud” logo) or press CTRL+O.
- In the pop-up, click NEW PROJECT in the top right corner.
- SelectNo Organisation (if you’re using a free Google account) or your company profile (if you’re using Google Workspace).
- Enter the project name (e.g., Amelia GCal Integration) and click CREATE.
How do I enable the Google Calendar API?
- Once the project is created, click Select Project from the notification in the top right of the page (or open the Project Picker again with CTRL+O and select the project you just created).
- Open the menu (☰ in the top left, or just press “.” on your keyboard).
- Go to APIs & Services → Library.
- Type google calendar api in the search bar.
- Click Google Calendar API, then click Enable.
How do I create my OAuth Credentials?
- After enabling the API, click Create Credntials in the top right corner of the screen;
- Alternately, go to APIs & Services → Credentials and click the mid-screen + Create Credentials drop-down → OAuth client ID;
- Choose:
- Google Calendar API;
- User Data
- Click Next.
- Enter an App name (e.g., Amelia GCal).
- Choose your own email for both the User support email and the Developer contact information.
- Click Save and Continue.
How do I define the OAuth Client ID?
Don’t make any changes on the next step (Scopes) – just click on Save and Continue again. This will bring you to the OAuth Client ID:
- Under “Application type”, choose Web Application.
- Give it a name (e.g., Amelia GCal).
- Scroll down to Authorized redirect URIs, click + Add URI, and paste the Redirect URI from Amelia → Features & Integrations → Integrations → Google Calendar & Google Meet → Set up → General tab.
- Example:
https://yourdomain.com/wp-admin/admin.php?page=wpamelia-employees
- Example:
- (Optional but helpful) If you’re using the front end Employeepanel, click the + Add URI button and add the full panel URL (e.g.,
https://yourdomain.com/staff-portal/). Don’t forget the trailing/. - Click Create.
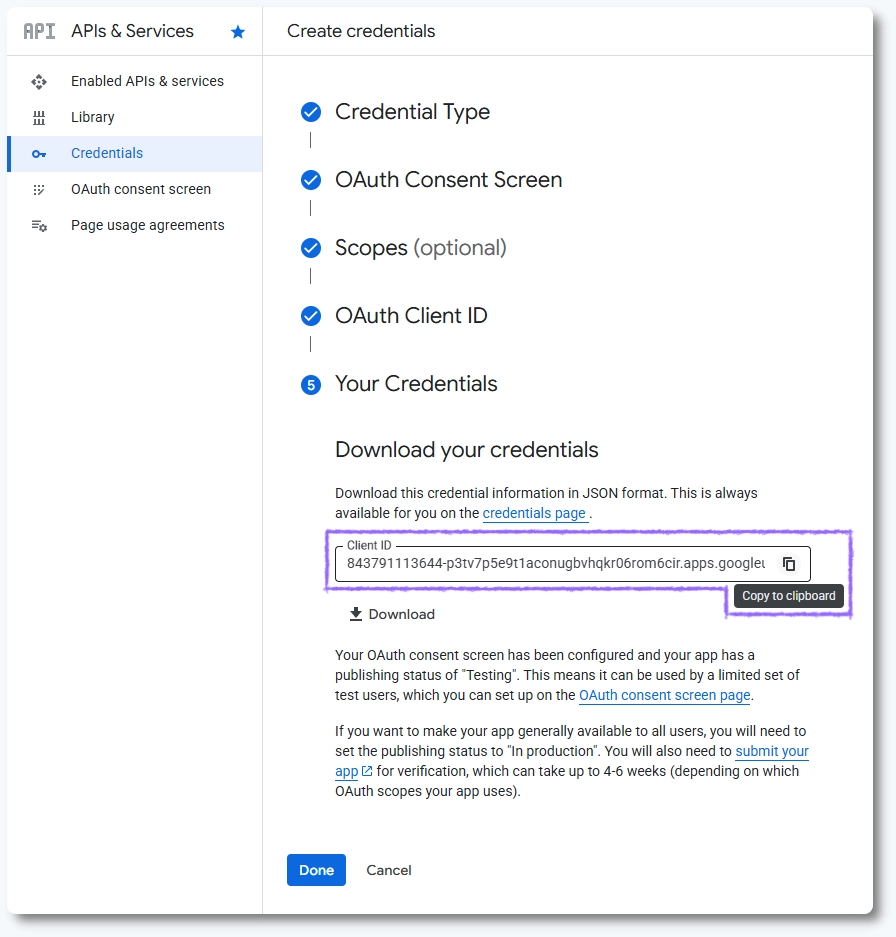
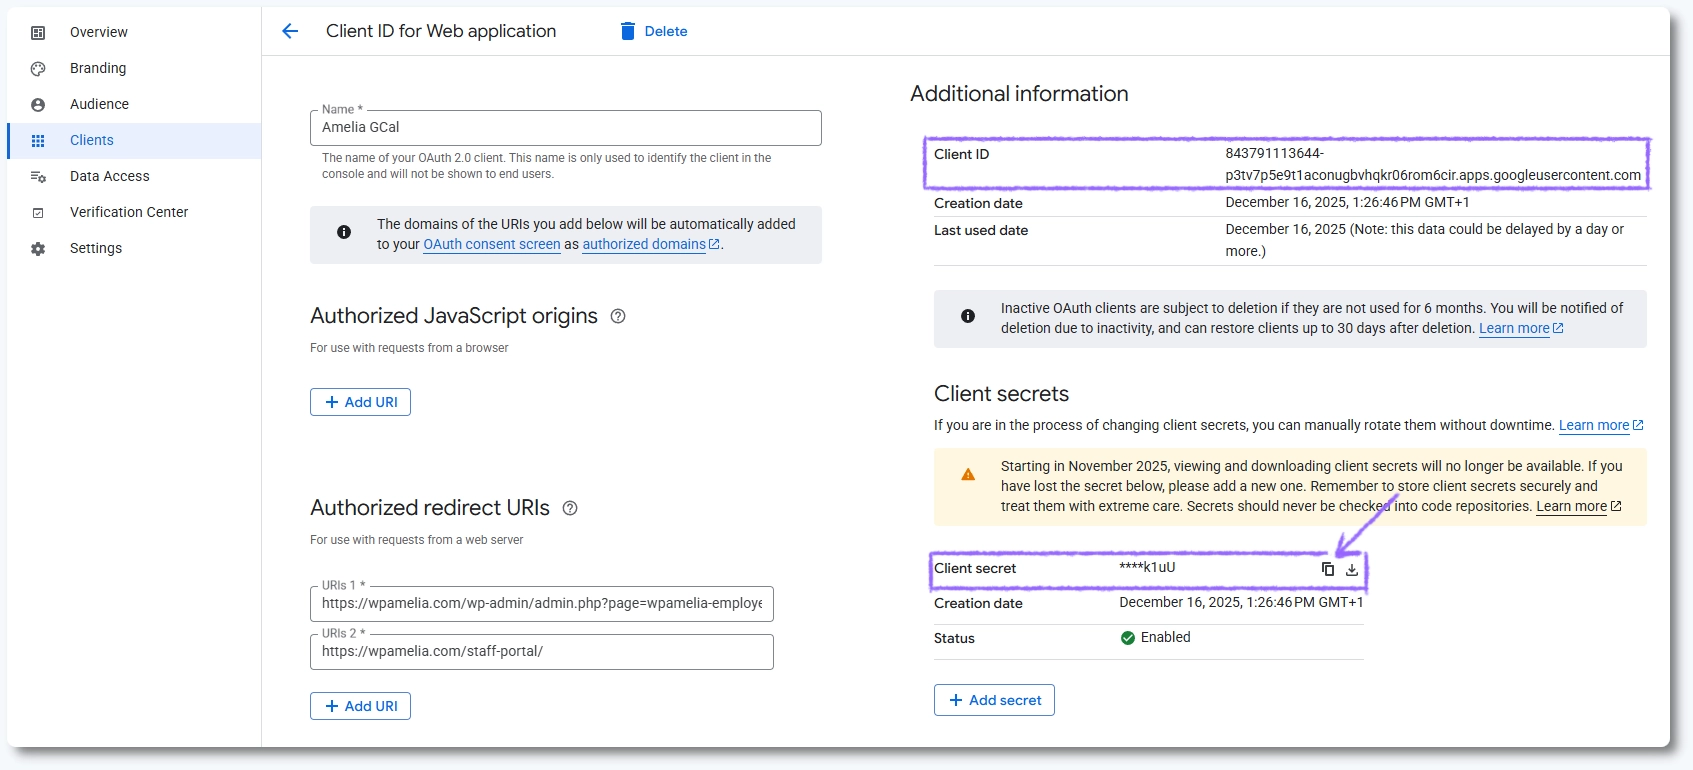
Make sure to add the Authorized Redirect URI, not the Authorized JavaScript origins (screenshot above).
Your website must use HTTPS (HTTP will not work).
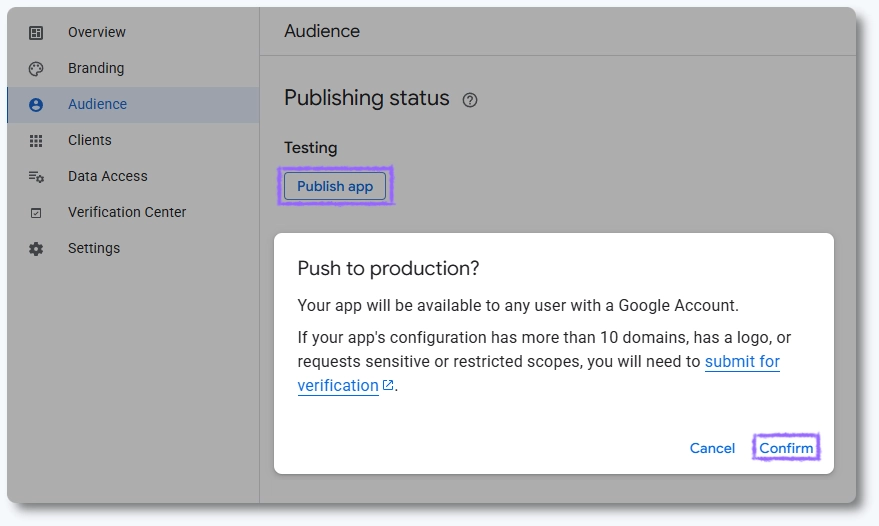
Do not leave the app in “Testing” mode. It will disconnect employees every 1–2 days. Make sure to publish it to Production.
How do I acquire my Client ID and Client Secret?
While still on the Credentials screen, copy the Client ID and paste it into the corresponding field in Amelia → Features & integrations → Integrations → Google Calendar & Google Meet → Set up → General, and then click Done (in Google Cloud console).
If you accidentally skip this step, you can still access the Client ID when fetching the secret:
- Open the menu (☰ in the top left, or just press “.” on your keyboard).
- Go to APIs & Services → Credentials.
- Under OAuth 2.0 Client IDs, click the name of your app.
- On the right, you’ll see your Client ID and a hidden Client Secret (click the copy button).
- Paste these values into the corresponding field in Amelia → Features & integrations → Integrations → Google Calendar & Google Meet → Set up → General.
How do I publish the app?
- Open the menu (☰ in the top left, or just press “.” on your keyboard).
- Go to APIs & Services → OAuth consent screen → Audience.
- Under Publishing Status, click Publish app.
- Confirm when asked “Push to production?”.
That’s it! Amelia is now connected to Google Cloud!
What should I keep in mind when using the advanced setup?
- The advanced setup is intended for users who require full control over OAuth credentials or branded Google authorization screens.
- The Redirect URI must match exactly. Any mismatch will prevent authentication.
- After the connection is established, employees can link calendars according to the rules explained in the Google Calendar settings article.
- This setup is a one-time configuration. You do not need to repeat it unless credentials are revoked or the domain changes.
- Advanced setup does not work on localhosts as Google prevents adding http:// in Redirect URI fields.