How to use the waiting list feature in Amelia
The waiting list helps you manage fully booked appointment slots by allowing customers to join a queue when a time slot is unavailable. When someone cancels, everyone on the waiting list receives an automatic notification, and the first customer to book the newly available spot gets it. This keeps your calendar full and removes the need for manual follow-ups.
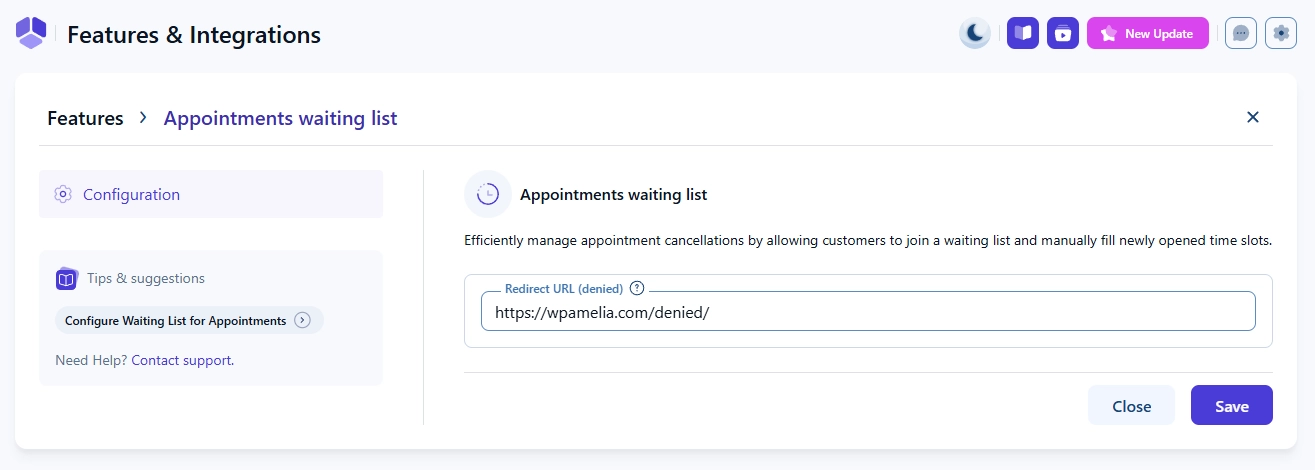
The appointments waiting list feature is available only in the Pro and Elite license plans.
How do I enable the waiting list for appointments?
To enable Appointments waiting list, go to Amelia → Features & Integrations → Features and activate the feature by clicking the Enable button.
Once enabled, the Set up and Disable buttons will appear. Clicking Set up will take you to the screen where you can define the redirect URL for cases when a customer attempts to book a time slot that has already been taken.
What is the redirect URL for denied bookings?
This URL is used when a customer tries to claim a newly available slot but someone else was faster. Instead of seeing an error, they will be redirected to a page you created, such as a simple message saying the spot has already been taken.
We strongly recommend creating a custom WordPress page for this.
Which notifications are used for the waiting list?
Amelia creates two new notification templates when the waiting list is active.
- Waiting list confirmation – sent to customers immediately after they join the waiting list.
- Waiting list availability – sent when an existing attendee cancels, making a spot available. All users on the waiting list receive this notification. Whoever books first gets the slot.
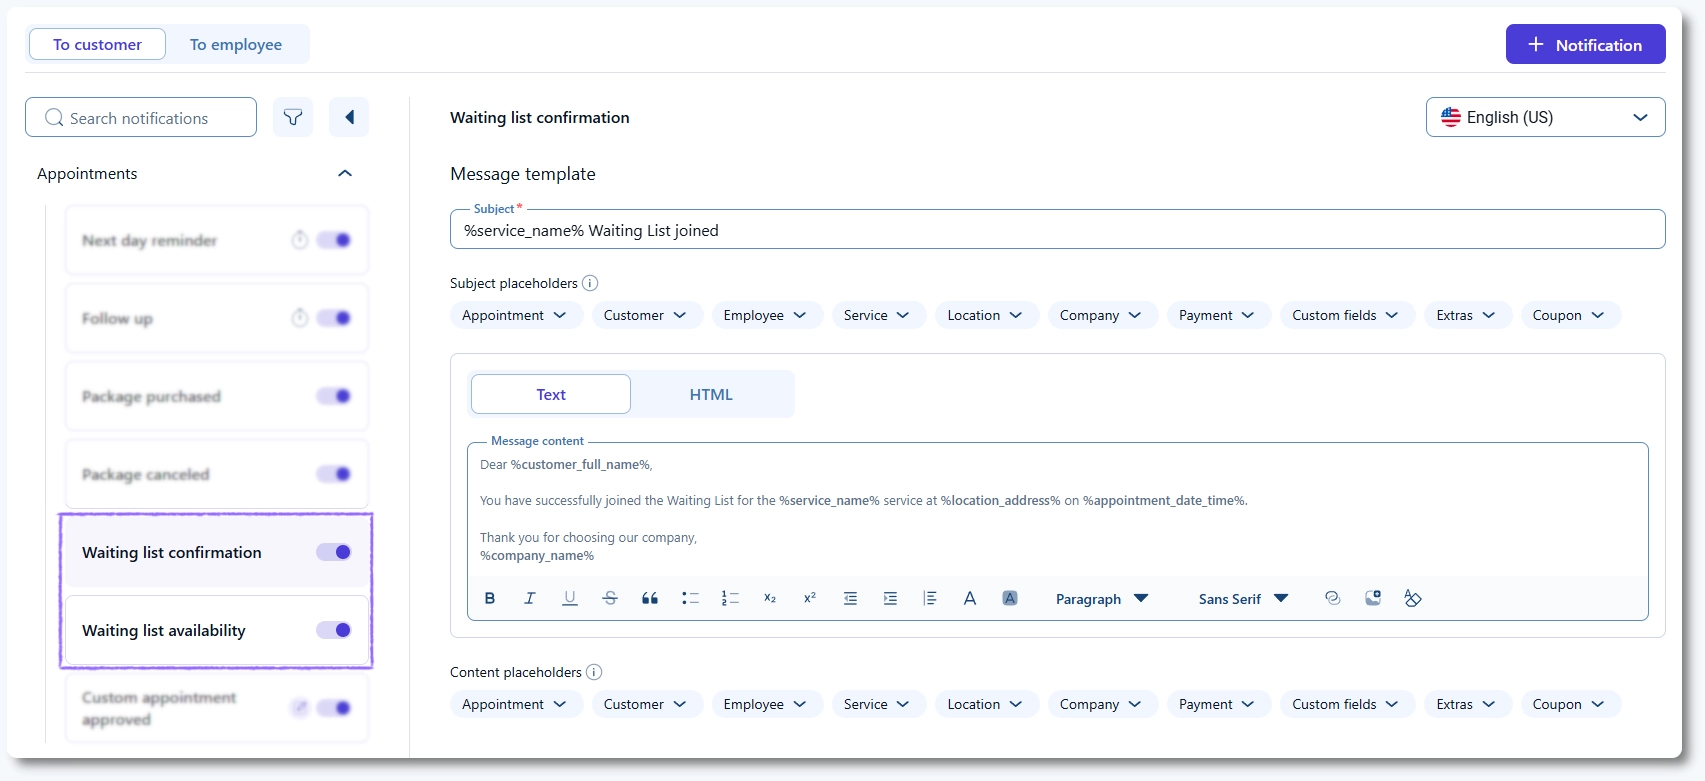
If you use online payments and have enabled the Payment via link feature, you can add a payment link to the Waiting list availability notification. This allows customers to pay for the appointment when they move from the waiting list to an approved booking.
These notifications are enabled by default, but you can edit their content the same way you edit any other Amelia email template.
How do I enable the waiting list for a specific service?
After enabling the waiting list globally, you need to turn it on for each service you want to include.
Open the Catalog page, edit the service, and access the Pricing & duration tab. Enable the Show waiting list after booking is full slider.
Once enabled, you can configure:
- Waiting list capacity
- Limit additional people
If the service’s Maximum capacity is set to 1, the Limit additional people option within the waiting list settings will not be shown.
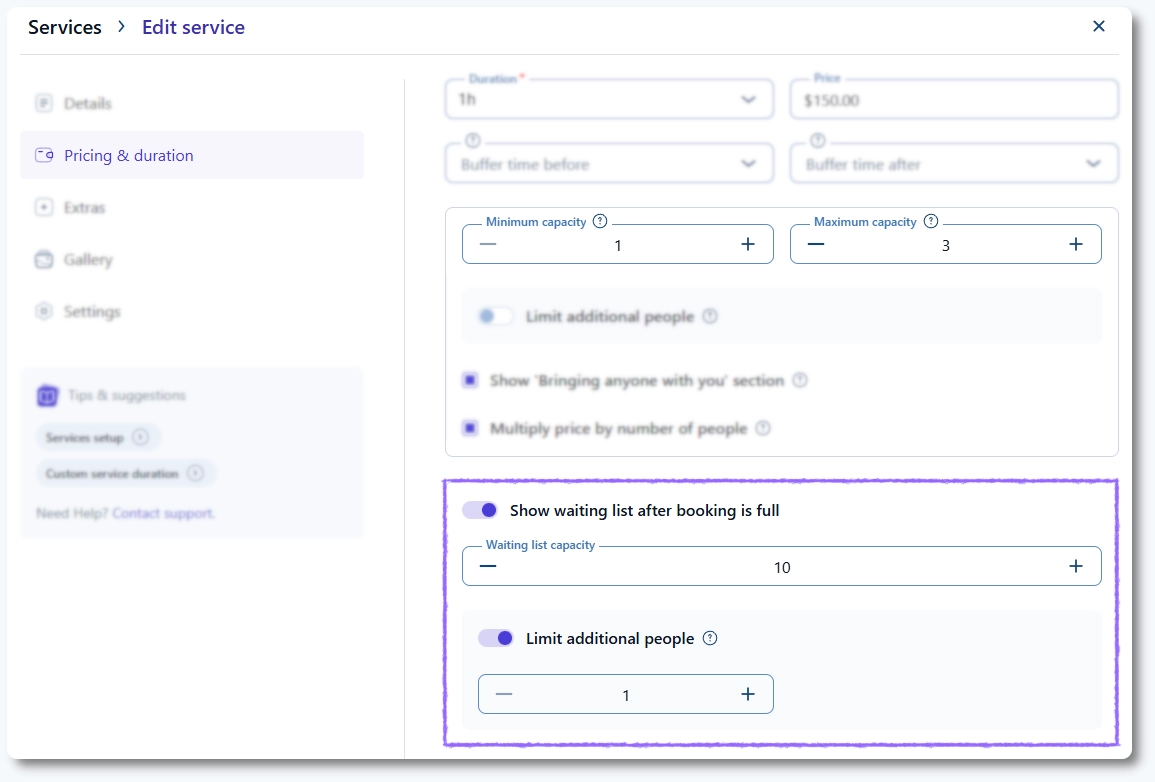
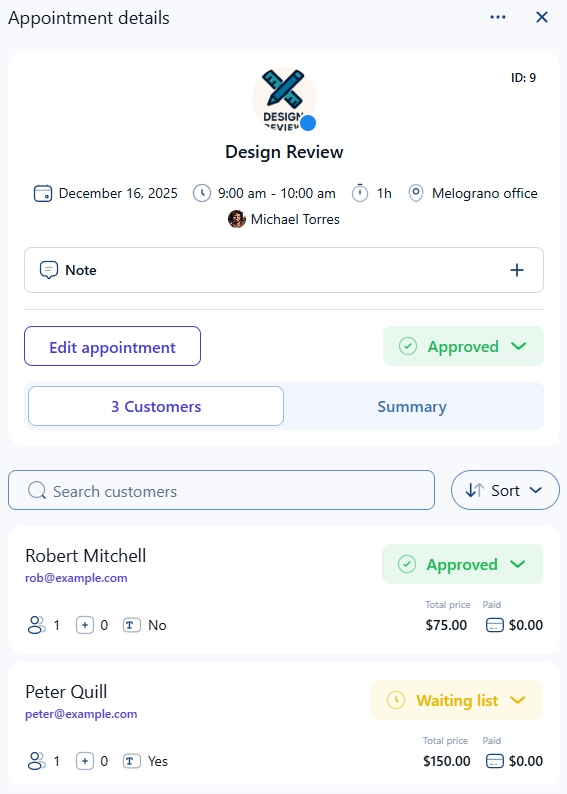
The service capacity and waiting list capacity are separate settings. Service capacity determines how many people can attend the appointment, while waiting list capacity defines how many people can queue for a spot once the service is full.
You can set a waiting list capacity that is higher than the service capacity. However, the Limit additional people option ensures that a single customer cannot add more people to the waiting list than the service can actually accommodate.
For example, if the service capacity is 3 and the waiting list capacity is 10, the Limit additional people value cannot exceed 2. This prevents any customer from booking more than the total possible group size of 3.
How does the waiting list work on the booking form?
On the front end, a full time slot will show a small clock icon and a label like Waiting list (3), depending on how many people are already in the queue.
If the customer selects this slot:
- They will not see the payment step
- They will see a confirmation message with their position
Example: You are on the waiting list with position #2
They will also receive the Waiting list confirmation notification if it is enabled.
When someone cancels, all customers on the waiting list receive the Waiting list availability email. The link in this email lets them confirm their booking for that specific time slot.
If someone else confirms first, the others will be redirected to your custom “sorry, this spot is taken” page.
What happens when a waiting list customer successfully books the spot?
When a customer claims an available spot, they move from the waiting list to the list of approved customers.
In Amelia Settings → Notifications → General, expand Redirect URLs, then switch to Employee.
Here you can set the Redirect URL for successfully approved booking. This is the URL to which the customer is redirected when they click on the email link and successfully move from the waiting list to approved customers.
They will also receive the Appointment Approved notification (or a custom Approved template you created).
How are waiting customers shown in the appointment?
Customers see the appointment listed as Waiting in their Customer panel.
In the back end, access Bookings → Appointments and simply click on the appointment card to bring out the Appointment details right side popup. Scroll down to see the list of customers where the Waiting list status will clearly be shown next to customers who are on the list.
Can customers be added to the waiting list from the back end?
Yes. Admins can open Bookings → Appointments and edit an existing booking. You can either create a new customer by clicking the + Customer button in the top right corner, or expand the Customers dropdown to select an existing customer.
If the appointment’s capacity is full and there are available spots on the waiting list, the newly selected customer will automatically be added with the Waiting list status.
This status cannot be changed to Approved unless another approved customer cancels or is rejected. Admins also cannot exceed the defined waiting list capacity.
Can admins move customers from the waiting list manually?
No. Admins cannot manually move customers from the waiting list to the appointment. The process is strictly first-come, first-served.
How can I customize how the waiting list looks on the form?
You can customize all visual elements through the Customize section.
Go to Customize → Step-by-Step, access the Date & Time Selection step, and then click on a date. You will see example time slots, including those with waiting list labels.
Use the Options panel to toggle visibility of the small clock icon or adjust labels.
In Global settings → Colors, you can change the colors of waiting list labels and icons.
What to keep in mind when using the appointments waiting list?
- The waiting list works only for standard appointment bookings.
- It does not work for recurring appointments.
- It does not work for packages.
- It does not work for cart purchases.
- Admins cannot manually move customers from the waiting list to the approved list.