Since the outbreak of the Coronavirus, online conferencing apps have gained a lot of popularity. Zoom is one of them. People need efficient programs to connect people online through a good and secure connection. Zoom does just that. Zoom does a great job in helping people work from home through conferencing.
Yet, there have been numerous reports regarding the security of Zoom meetings. Because of the “Zoom bombing” cases, Zoom developed and improved the security of their meetings through the Zoom waiting room. “Zoom bombing” refers to the unfortunate cases when uninvited people get access to other peoples’ meetings.
Most of them used this unjust privilege to either steal information or interrupt the session. Many of these “Zoom bombers” would shout racist and inappropriate things, just to get people riled up.
This was one of the reasons Zoom’s developers focused on improving the security of their users’ meetings and data. We will list some settings and host controls that you can use to secure your online meetings and manage participants better. Thus you can always use VPNs to change your IP address and hides your activity from third parties.
Skillful “Zoom bombers” will still find a way to disrupt your discussion.
This is an ultimate tool that the developers of the program implemented to assure more security for their clients.
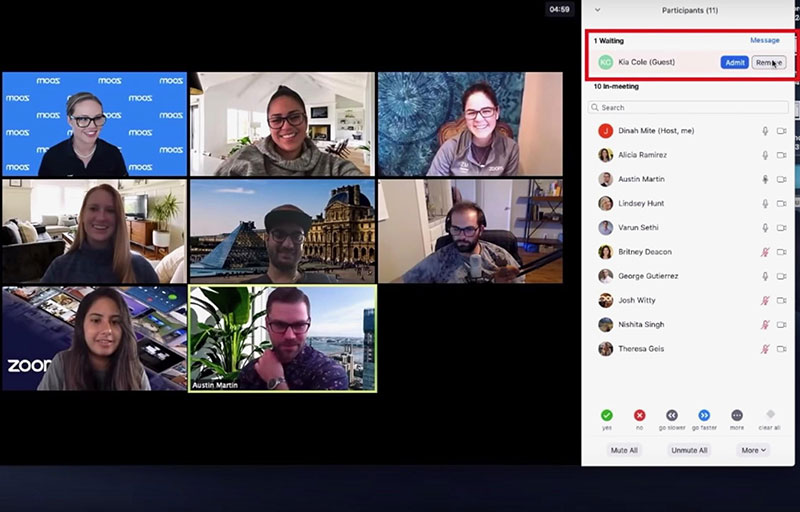
The Zoom waiting room feature allows the meeting host to see when a participant joins the meeting.
The meeting host can manage participants and either let them join the meeting or simply put them in the waiting room.
Zoom Privacy and Security Issues
Prior to taking any measure, we want you to understand why these privacy and security issues appear when using Zoom. First of all, Zoom is not a massaging app, such as WhatsApp or Facebook Messenger.
Your messages on these two apps are encrypted. This means that only end-to-end users can read them. For those companies, your messages are unreadable to anyone else. Zoom has used the “end-to-end encryption” phrase during its marketing campaigns but the Zoom platform doesn’t fully respect it.
One reason for this is the “record session” possibility. Everyone from your meeting can record and store the meeting in their private files. From there, individuals can use them in different ways.
These files can also be subject to a hacking attempt. Everyone in the meeting can see whether one of the members records the meeting or not. There will be a “Recording…” message on their pictogram. Since this feature is so accessible, nothing is really secure. The most efficient security measure is not to say anything you wouldn’t want to get revealed.

Another risky feature is the one that allows users to download their chat logs. Although it works only for each person’s private messages and public messages, you never know who will end up being able to see those logs.
These are only some of the reasons why you need to use the Zoom waiting room feature in your next session. The best thing about the Zoom waiting room feature is that you will see every participant at the door and can decide whether to open it for them or not.
Set up the waiting room option in Zoom
Secure your Zoom meetings by having your waiting room enabled. This isn’t one of those options that are complicated and hard to use. The waiting room option is super easy to set up and it will improve your security in a way nothing else will.
Once you have your waiting room enabled, the system is sending the participants to the waiting room.
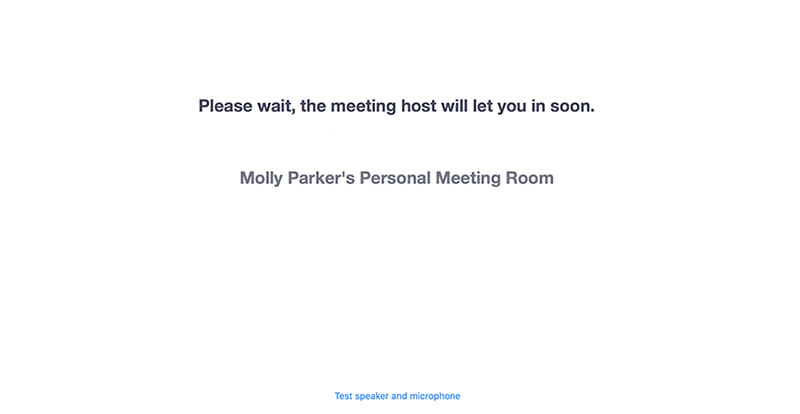
The waiting room participants will then see the “Waiting…” message until the meeting host is ready to send them to the main room.
The main advantage of this is that the members can’t see or hear each other in the waiting room.
This gives the meeting host enough time to ensure each member is a legitimate one. The settings menu allows each meeting host to strengthen the actions they can take inside the Zoom waiting room.
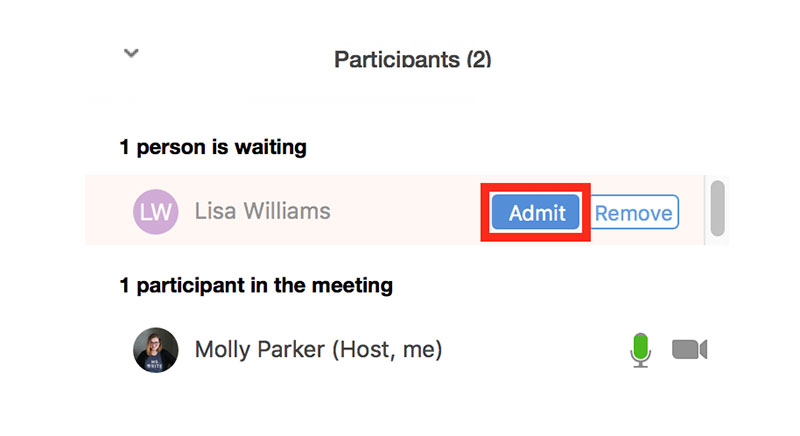
When all participants are in the waiting room, the meeting host can manage participants one by one or all in one shot.
Recently, Zoom has approved a policy that permits preregistered users, the ones you’ve been in contact with, to skip the waiting room step. This means they have more time to focus on the risky and strange members entering some meetings.
These are the steps you have to follow if you want to enable the Zoom waiting room feature for ALL USERS in the account:
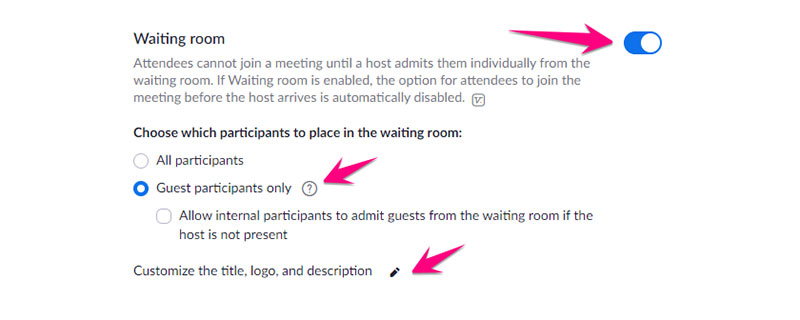
- Log into your administrator account on Zoom.
- Click on the “Account Settings” section from the Account Management menu.
- Scroll down to the waiting room part in the Meeting tab. The “waiting room” button has to be enabled. This is the moment when you can choose the categories of people you want to admit to the waiting room The possibilities are:
- All participants
- Guest participants only
- Lock the icon if you want this to become a mandatory option for all your users.
Here is what you have to do to enable the waiting room feature for only a specific GROUP:
- Log in as an administrator and make sure you have permission to edit the settings.
- Enter the User Management section and then the Group Management one.
- Write the name of the group you want to edit and click on “Settings”
- Scroll down to the In-Meeting (Advanced) part of the Meeting tab and search for the “waiting room” Enable the button.
- Make the selection of the categories you want to admit.
If you are an INDIVIDUAL USER, these are the steps you have to follow:
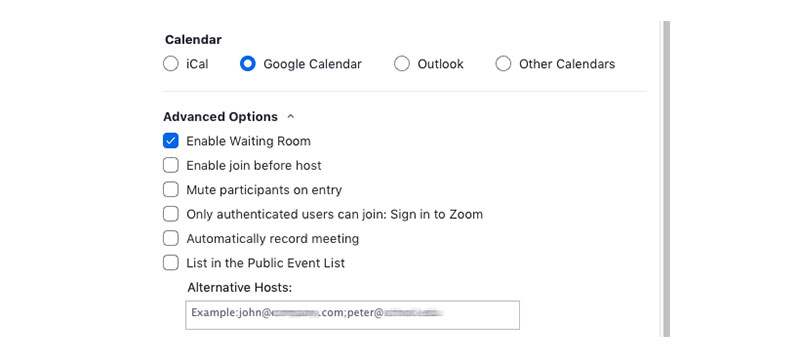
- Log into your administrator account on Zoom.
- Remain on the Meeting tab after clicking the “Settings” button on the left menu.
- Scroll down to the In Meeting (Advanced) The “waiting room” button has to be enabled.
Enabling the waiting room for a PARTICULAR MEETING requires an additional step. You have to activate this option for all meetings. This is how you do it:`

- Sign in to your Zoom account.
- Access the “Meeting” button on the left-side menu.
- Select a meeting you have or schedule a new one.
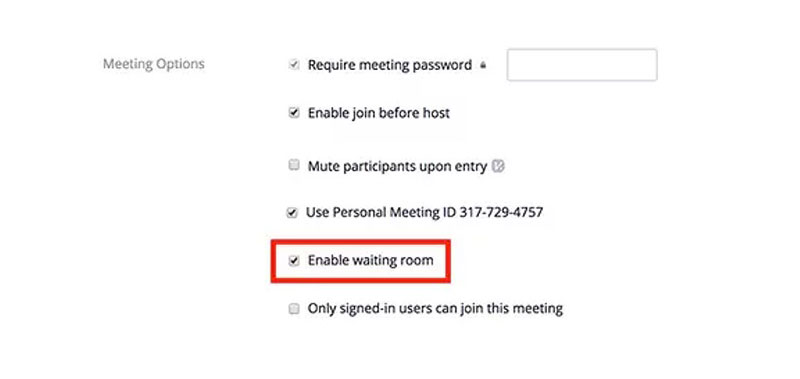
- In the Meeting Options tab, you’ll find the “waiting room” Enable it.
- Save the modifications.
Other Ways to Secure Your Zoom Meeting
Use a Password

Another way to keep mischievous members outside your meetings is by using a password. You send the 6-digit code only to the people you want to invite to your meeting. The ones that have the link but not the password won’t be able to enter the discussion. This is how you get rid of all strangers and disruptors.
Update Your Zoom Soft

Recently, Zoom is focusing a lot on improving its services. They bring important changes and improvements with every version. That’s why it’s important to download and install all updates the soft offers.
You won’t only solve some bugs and issues, but you will improve your security and lower the risks, too.
Lock Your Sessions

When all your invited members join the chat and the session, lock the meeting. This way, no other strangers will be able to enter your session. It will be like locking the school after the bell rang. This is not a punishment, but a security measure.
You can find the “Lock Meeting” button in the Participants pop-up menu.
Keep Your Meeting ID a Secret
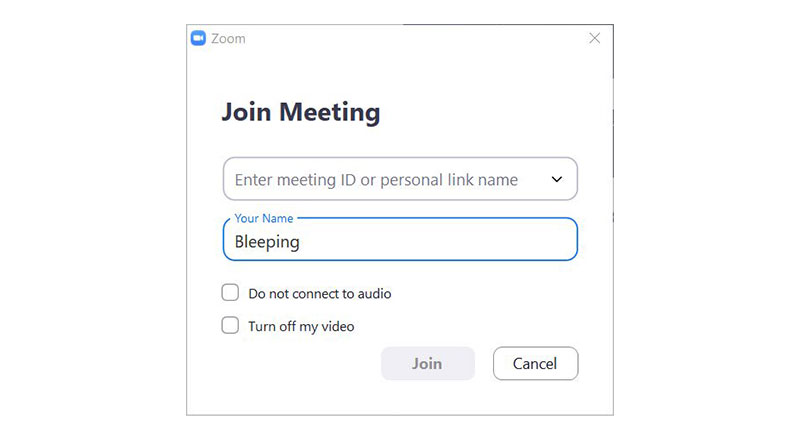
As a Zoom user, you should have a PMI (Personal Meeting ID). It can be very useful for defending against hackers. The ID shows the state of your meetings, whether you are scheduling or joining any.
This information can draw hackers’ attention.
Share the Invitation Links Only in Private Chats

Posting your Zoom meeting link on Facebook, for example, maybe the biggest mistake you can make in terms of Zoom meetings. Search engines will index your meeting and then display it when somebody searches for something similar.
That’s why you should send the invitation links only in private small groups or individual chats.
Integrate Zoom With Amelia
The Zoom mobile app can offer you the basic features you need to work remotely in an efficient way. But for a better experience, integrating Zoom with other apps is of great help.
For more advanced options and smoother collaboration, most users install plugins. This is why we want to recommend to you Amelia, a plugin created by us that will help the Zoom app perform better and assure great results.
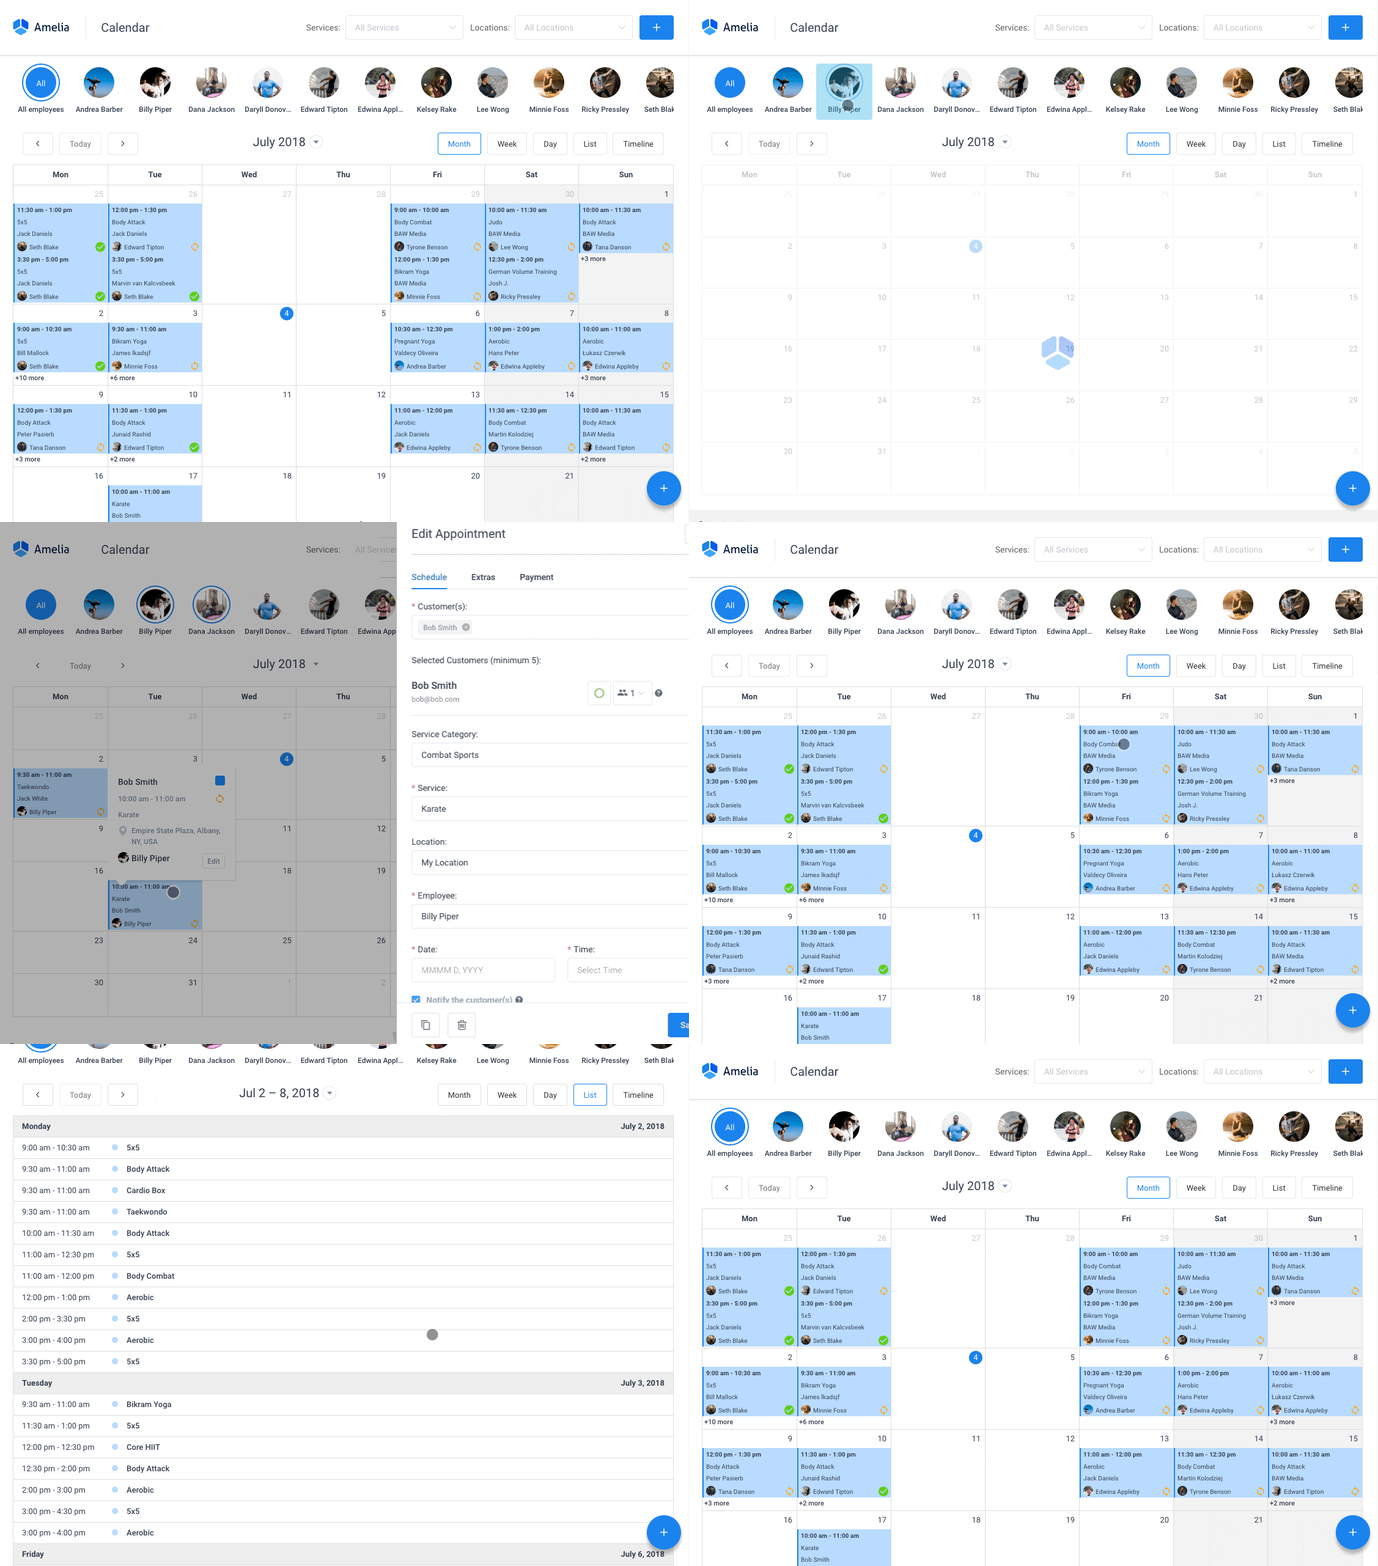
Amelia can work together with Zoom if you want to schedule a Zoom meeting.
This allows you to manage your scheduled time efficiently while sharing it with different working teams. It is quite easy to integrate this plugin in Zoom and these are the steps that you have to follow:
Amelia can work together with Zoom to schedule a meeting. This gives you the possibility to manage your time efficiently while sharing it with different working teams. It is quite easy to integrate this plugin with Zoom and these are the steps that you have to follow:
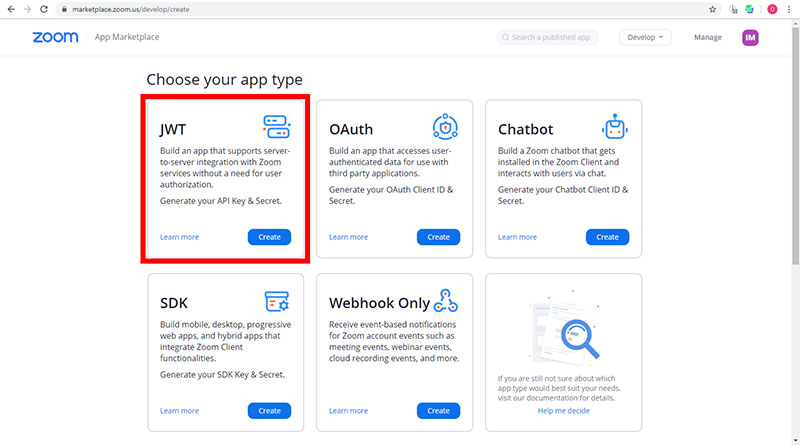
- Log into your Zoom account
- Access the Zoom Marketplace and create your application
- Choose the first type of app – JWT
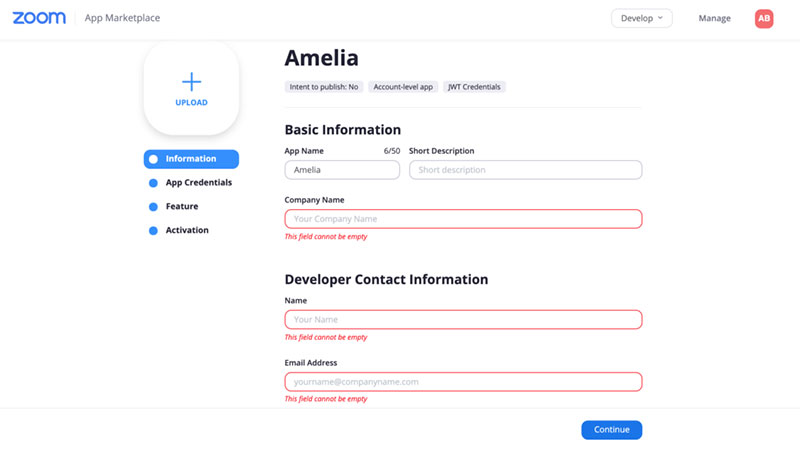
- Complete with basic information and app credentials
- Set Zoom options
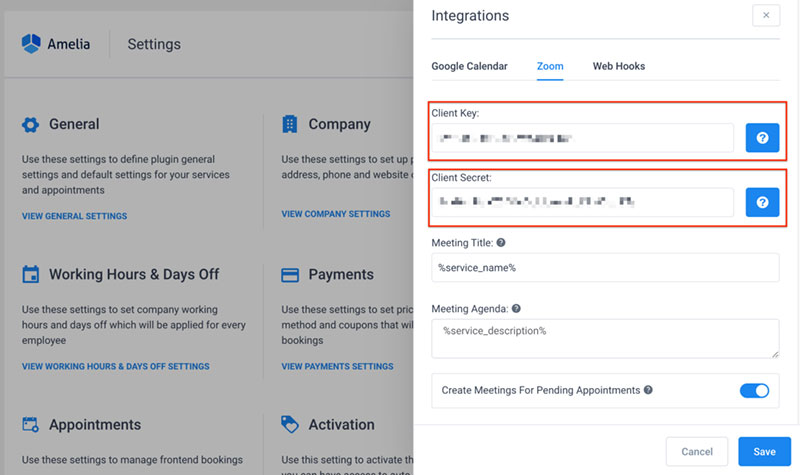
- Invite your employees and help them connect with the app
And that’s about it. You now have the Zoom integration active and your clients can create meetings through Zoom automatically when they book an appointment with you.
That’s an oversimplification of what you can do with Amelia, of course. This isn’t only about creating a personal meeting or a business one. It’s about automating your schedule so you can focus on the things that matter to you.
Some frequently asked questions about the Zoom waiting room option
What is the Zoom waiting room?
The Zoom waiting room allows the meeting host to control when a meeting participant can join the meeting.
How do I know if someone is in the waiting room on Zoom?
To find out if someone is in the waiting room on Zoom, select the meeting participants icon from your toolbar. Now, you can see who is waiting and who is already in the meeting.
Can the host hear you in the Zoom waiting room?
No, the host can’t hear you in the Zoom waiting room. While they are put in the waiting room, participants can only hear music, but they can’t chat with each other.
What happens if I don’t enable the waiting room in Zoom?
If you don’t enable the waiting room in Zoom, you have the potential of getting unwanted participants in your meeting.
How do you bypass the Zoom waiting room?
If you want to bypass the Zoom waiting room, go to the navigation menu and click Settings. Then, click the meeting tab, and under Security, click the waiting room toggle to enable or disable it.
If you enjoyed reading this article on setting up the waiting room option as a meeting host, you should check out this one about how to add Zoom to Google Calendar.
We also wrote about a few related subjects like how Zoom works, creating a Zoom meeting, how to change your background on Zoom, how to record a Zoom meeting, Zoom integrations, Zoom keyboard shortcuts, and how to schedule a Zoom meeting.
