As of February 2021, Facebook had over 2.8 billion users.
Photographers must take advantage of this powerful network to grow their businesses. It’s important to know, then, how to set up online booking for photography on Facebook.
Many new social media platforms are arising. But, businesses that maintain a Facebook page increase their online booking opportunities.
With so many Facebook users, it’s very likely that some of them will book an appointment through your page.
To attract more customers, it’s vital to use ads, posts, and other marketing activities. Failing to do so would have a negative impact on the business.
Having drawn more customers to their Facebook page, how can photographers then use it as a booking system? This is done via the ‘Book Now’ button.
This article discusses this further. It also outlines the core steps of how to set up online booking for photography on Facebook.
Understanding Facebook Appointments
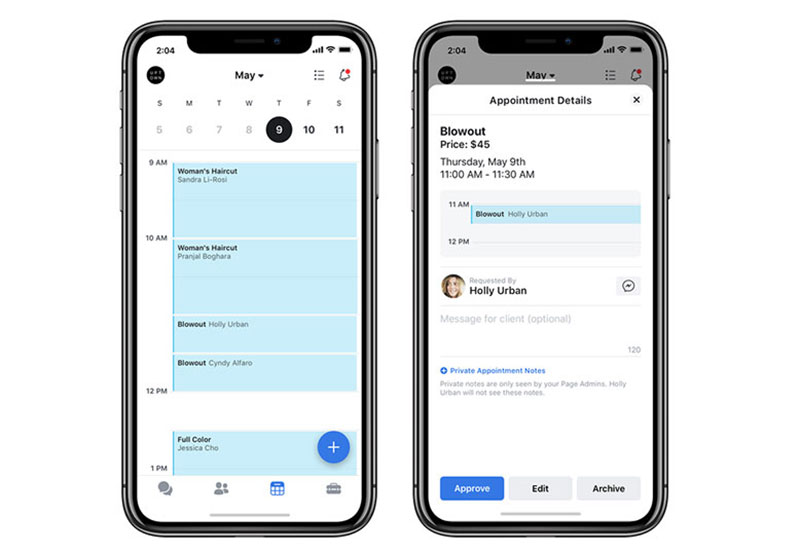
This is a service offered by Facebook that allows companies to add a “Book Now” button to their Facebook page. This in turn enables customers to make bookings via the company’s profile.
This tool was created for solopreneurs like photographers. How does it work?
To begin, the user selects a preferred weekly schedule. Then the app generates a calendar based on the selection made.
This also works for businesses that have various photographers with differing schedules.
In truth, Facebook acts as a scheduling software. It alerts users of bookings via Facebook Messenger.
Appointments On Facebook – How To Set Them Up
Editors, Page admins, and moderators can set up the appointment booking feature on a Facebook business page. To get started please note the following steps:
- Sign in to the Facebook account
- Go to the business page
- Select ‘Pages’ in the left menu of the News Feed
- Go to your page
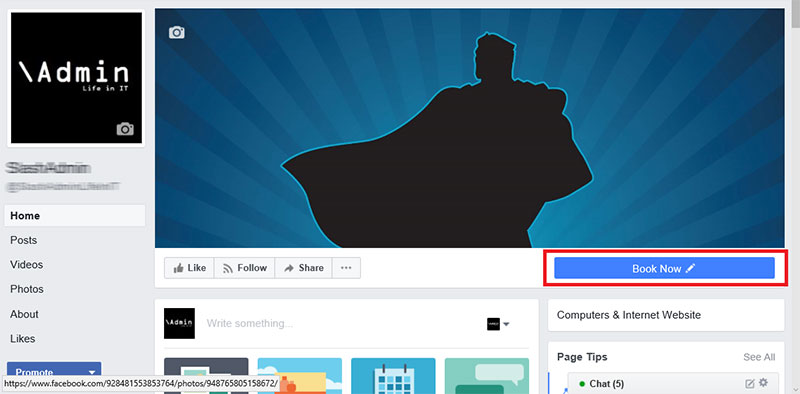
- Below the page’s cover image tap the blue call-to-action button
- Tap ‘Book Now’
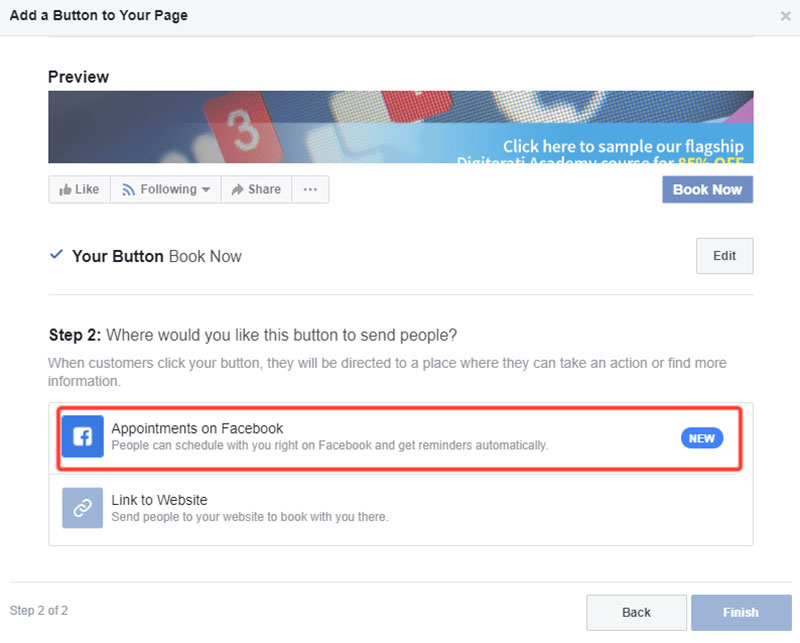
- Select ‘Appointments on Facebook’
- Then click Next
To show the available days and times of the photographer(s):
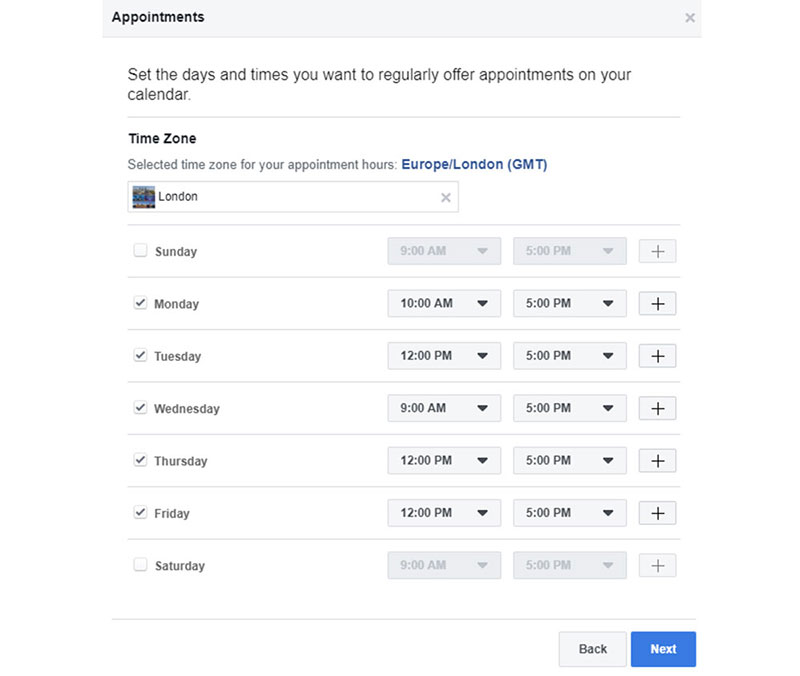
- Select a preferred weekly schedule on the calendar
- Click Next
- Choose the preferred setting for ‘advance notice’ and ‘appointment approval’
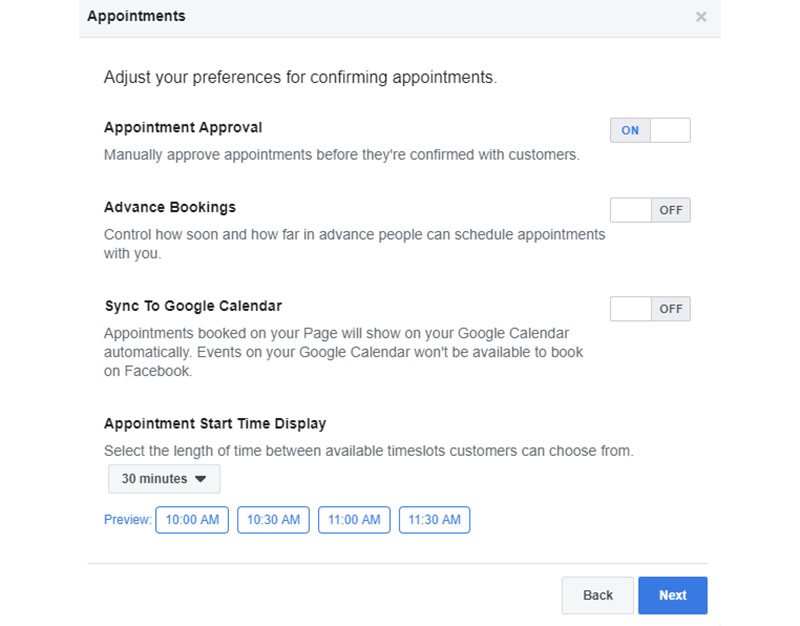
- Tap Next
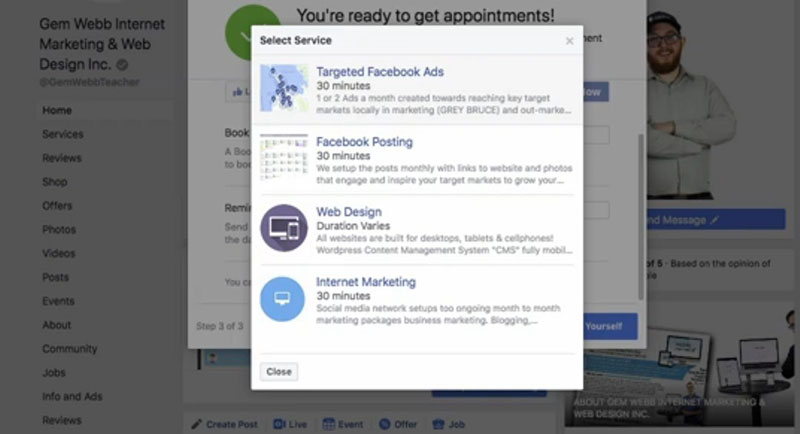
- Review the services. Otherwise, select ‘Not Now’
To list a service:
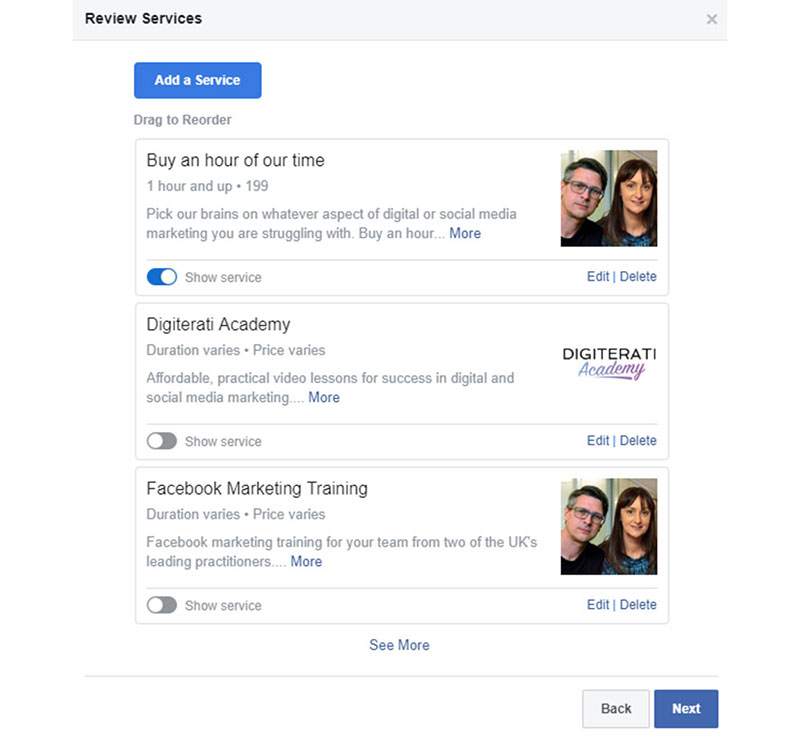
- Tap ‘Add a Service’
- List the services offered
- Then click ‘Done’
After these steps, the ‘Book Now’ button should be set up.
Now comes the need for promotion. For customers to use this feature they need to know about it.
Promote it through Facebook posts. Or invite followers from other social platforms to make a booking via Facebook.
Try running ads to the posts. For example, by pulling the post ID, businesses can retarget individuals in their funnel.
When a client uses the Book Now tool to schedule a time and date users will receive the request via Messenger. Confirm the booking and include contact numbers in the confirmation text box.
Appointment Settings – How To Edit
To edit the list of services, available days, and approval message settings:
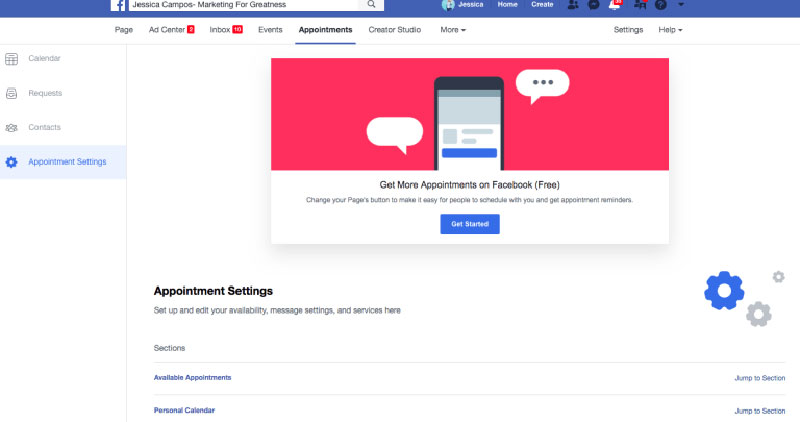
- Select ‘Pages’ in the left menu of the News Feed
- Go to your Page
- Tap ‘Appointments’ in the left menu
- Select ‘Appointment Settings’
From here, users can make changes to a variety of content. This includes the list of services, available days, appointment duration, and customer reminders.
Adding New Appointments To the Page

Users can choose to enable the ‘Show Available Appointments’ option. This allows customers to see available time slots and request a booking.
When using this feature it’s important to be diligent. Update it with every confirmed appointment to avoid any confusion.
If this feature is not enabled, customers must first find out which slots are available. They can then proceed with making a booking.
After confirming the booking via messenger, users manually add it to the ‘Appointments’ tab.
Manually Adding Confirmed Appointments
To manually add a confirmed appointment, please follow these steps:
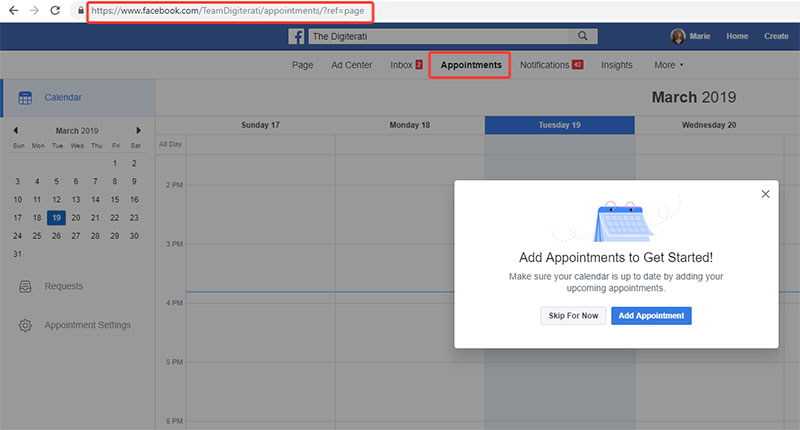
- Click ‘Pages’ in the left menu of the News Feed.
- Go to your Page.
- Click ‘Appointments’
- Tap the ‘+’ button at the bottom right
- Select ‘Create Appointment.’
- Input the details of the appointment
- Click ‘Create Appointment.’
Editing Scheduled Appointments
The need may arise to reschedule or cancel an appointment with a client. To do this:
- Click the ‘Appointments’ button at the top of the page.
- Make the needed edit(s)
- Click the ‘Message’ icon next to the customer’s name to advise of changes
How Facebook’s ‘Book Now’ Button Benefits Your Photography Business?
A strong online presence helps potential customers to find you and make bookings. It also generates demand for your photography services.
Facebook helps photographers to maintain such a presence and increase profits. Its booking tool also helps users manage appointments using their Facebook Page.
Other benefits of this booking system include:
- Customization: This means one can build a personalized menu of services.
- Availability: Customers can see workdays and business hours, even if they aren’t Facebook users.
- Calendar: All confirmed appointments are presented in a calendar format.
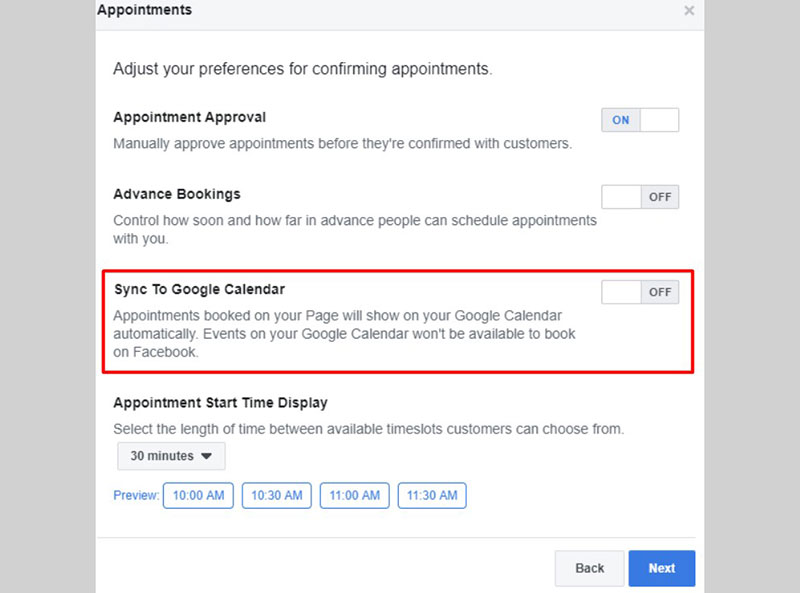
- Sync with Google Calendar: Sync all confirmed bookings to a Google Calendar.
- Communicate with customers: Use SMS and Messenger to send confirmation and reminder messages. This reduces no-shows while increasing return bookings.
Facebook’s ‘book now’ button connects users to a larger audience. It saves time by limiting the need for excessive, company-to-customer communication.
Additional reasons to use Facebook’s booking software is that it:
- Is free for businesses of all types and sizes.
- Saves time via its calendar syncing feature. It removes the need to manually enter bookings into a calendar.
- Re-engages existing clients by reminding them to book future sessions.
- Attract new clients by reminding existing ones to refer their friends.
How To Make Booking Appointments Easier For Clients
Facebook’s appointment scheduling software helps to draw customers to your photo business. But is there an easier way to achieve this?
One option is to use software that builds a customized booking web page and allows users to share a single event shortcode on their Facebook page.
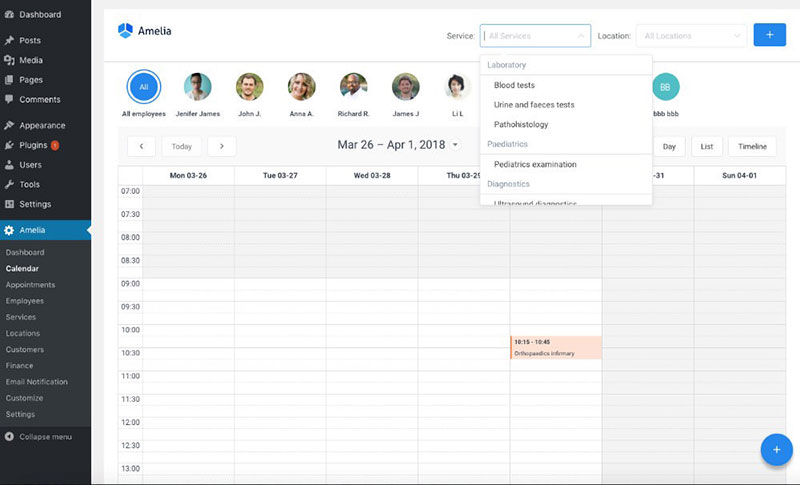
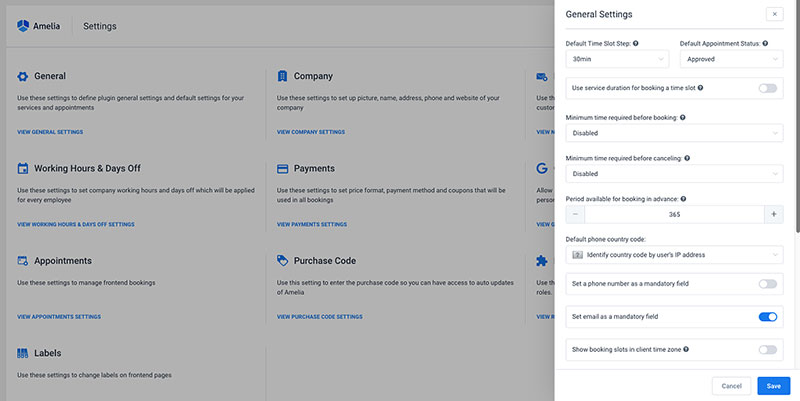
The Amelia WordPress plugin is such a tool. It combines all the benefits of the app and a webpage.
With Amelia, users can share session posts to their Facebook timeline. It advertises your services and makes it easy for a customer to start a new appointment.
Or simply share the booking page created with Amelia and make use of tons of other features. These include:
- A front-end booking experience that is configurable. It can show info for a solo photographer or info for many photographers in a company.
- An employee schedule management service.
- Customizable booking forms
- Payment acceptance services for appointments via Stripe or PayPal
- Coupons and discount offers
- Customers can schedule recurring appointments
Ending thoughts on how to set up online booking for photography On Facebook
To build a successful Photography business a strong online presence is necessary. With over 2.8 billion users, Facebook is a powerful tool that photographers can utilize.
Knowing how to set up online booking for photography on Facebook is essential. Then users can take advantage of this scheduling software service by Facebook.
The Amelia WordPress plugin combines all the benefits of Facebook’s booking software with your webpage. It advertises your services and makes it easy for customers to book appointments.
If you enjoyed reading this article on how to set up online booking for photography on Facebook, you should check out this one about photography booking apps.
We also wrote about a few related subjects like important features that an appointment booking app must have, get more clients on Instagram, the best group scheduling apps, the best appointment scheduling software, and top appointment reminder apps.

