Virtual events are not new. For years, many have enjoyed them in different forms. The COVID-19 pandemic has increased their popularity even further.
Likely, you have had a chance to take part in one of them. But if you want to organize them yourself, you need to make sure that you are using the right tools. The right tools will help you to achieve better results and higher attendee satisfaction.
Planning virtual meetings takes a lot of preparation and forethought. You need to think about many things, such as the tools you will use and how to raise money from them. Virtual events calendars can help you to remember every aspect of your event or meeting.
A virtual events calendar is a tool that you can add to your website. It raises awareness and spotlights your events. You can use it to tell your website visitors when and how an event will be held and to provide further details.
Just like the name suggests, a virtual events calendar helps you to organize your online events. It highlights the venues of your events and who is organizing them.
The Benefits of Using a Virtual Events Calendar
Comfort and Easy Access
A virtual event can take different forms, but it is usually a single meeting or a recurring event. They are always held online instead of at a physical location. Virtual events include:
- Live streams on social media
- Zoom meetings
- Conferences that people can watch and rewatch on YouTube
People can join and take part in these events from the comfort of their homes. Many see this as a major advantage for this type of event. You can integrate an IVR system for your virtual events’ setup and registration, thus avoiding the live agents’ guidance in that.
Another advantage of online over in-person meetings is that there is no limit to the number of people that can attend a virtual event, since they suffer no venue-capacity limitations. You can have as many people as you want, and you can bring different kinds of people together in one virtual place.
Help in Organization
Most of us are familiar with at least one of the events mentioned above. We know what they entail and how to join them. If you want to host a successful event, you may want some help in organizing it. Virtual events calendars provide just that.
Showcase Your Website
One added benefit of these event calendars is that they direct the attention of potential clients to your website. Likely, it will also make them more interested in other aspects of your work. This type of outreach is most effective in a group or community.
Adding the calendar to your landing page invites people to visit and explore other sections of the website. Use images and videos to grab the attention of potential attendees. That encourages visitors to attend your online events.
You can also add links to related blogs or an online shop to rouse the interest of your visitors. In the long run, showcasing your website in these ways will increase the traffic to your website.
Expand Your Circle of Friends
You can use the event calendar in other smart ways. You can, for example, ask visitors to register for the event. In that way, you get their contact and other relevant information. You can use the list of attendees to expand your client base.
Highlight Meeting Details
Another benefit of using a virtual events calendar is that you can use it to bring event details to people’s attention. A good WordPress plugin can help you to show past, present, and future events in a logical and attractive way.
There are many WordPress plugins that help you to organize your virtual events calendar. A good recommendation is Amelia. Its installation is very straightforward, and you can make changes to your events from the WordPress dashboard. You will find everything in one place, and you don’t need any coding knowledge to use it.
Add a Virtual Events Calendar to a WordPress Website
Adding a calendar to your website sounds difficult if you have little technical experience. However, the process is very simple if you have the right tools. The Amelia WordPress Events Plugin offers exceptional ease of use. With only a few clicks, you can have a virtual events calendar on your website.
After installing the plugin, you first need to create a new event. Go to the WordPress dashboard, then to the “Events” page, and click the “+” button. A “New Event” dialog box will appear.
Amelia offers a wide range of useful customization options. You can, for example, set up recurring meetings, manage the sale of tickets, and request RSVPing. All these options are part of the free version of the plugin.
In the event details, you can add location information, including Google Maps, as well as a search bar.
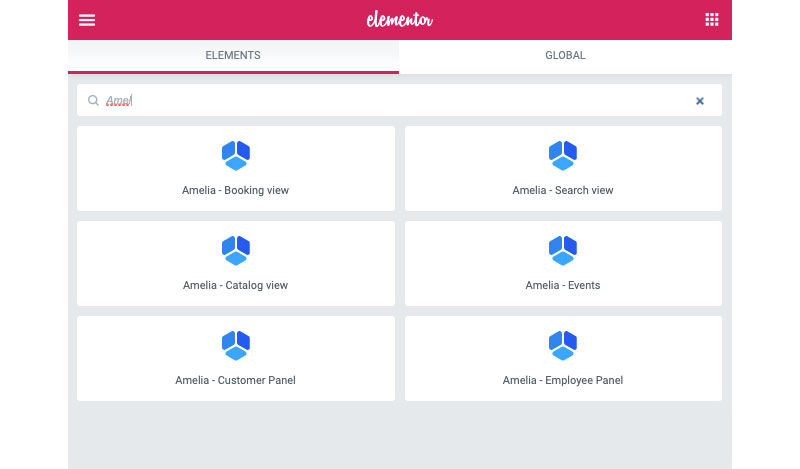
As mentioned above, you can use your events for marketing purposes too. Amelia offers integrated marketing solutions. It lets you share event details with a list of people via email. The Elementor Builder is compatible with Amelia’s calendar.

The plugin generates shortcodes. You only need to copy the code and paste it into the right place to add it to your website. The shortcode generator is part of both the paid and free versions.
A Detailed Look at the Options
- Details. These form the basic information needed for creating the event.
- Name. You can create a unique name for each event or meeting. This name will appear on the front-end booking list. This name is modal and thus required.
- Date. You can set the date and the time of the event. The plugin uses these details as part of the scheduling process. You need to set a starting date and time and an end date and time. For a one-day event, you need to fill in the same start and end date.
- Recurring. You can set when and how often you want the same event to repeat. You first need to tick the box “This is a recurring event.” Then you can then specify which event, how often, and how long you want it to repeat.
- Booking opens immediately, and booking closes when the event starts. You can set when you want to open and close booking. You can apply your selection to all the following recurring events.
- Maximum allowed spots. You can determine the capacity for the event. Once all spots are closed, the website calendar changes the event status to closed. People will then no longer be able to register for it.
- Allow bringing more persons. If selected, attendees can sign up for more than one person in the same registration.
- Allow the same customer to book more than once. Amelia leaves this option checked by default. That means that one customer can book more than once for the same event with the same email address.
- Select address. This is the address that people will see in the event list.
- Staff. You can choose to assign one of your employees to the event, although you don’t have to assign someone to each event. You can also assign more than one person to any of the events.
- Tags. You can set up tags for your events. The tag will also show on the website in the events list. This is practical, because it makes the events searchable and filterable. You don’t have to use this option, but it’s useful if you have many events or have similar events.

- Description. You can give any kind of detail that you want your customers to know. The description will also show in the events list. You can, for example, add notes, links, and an agenda.
- Pricing. You will find pricing details on the second tab of the “Options” You can manage event pricing and add payment details. You can use a fixed price or use different pricing categories. You can adjust pricing by the booking date range as well.
- Customize. The third tab contains the following options:
- Event Gallery. You can add pictures. These will appear in the events front-end list.
- Event Colors. You can set a color theme for your event. Viewers will see this in the event list.
- Show event on-site. Select this option when you are ready to publish the event on the virtual calendar on your website.
What Your Clients Will See

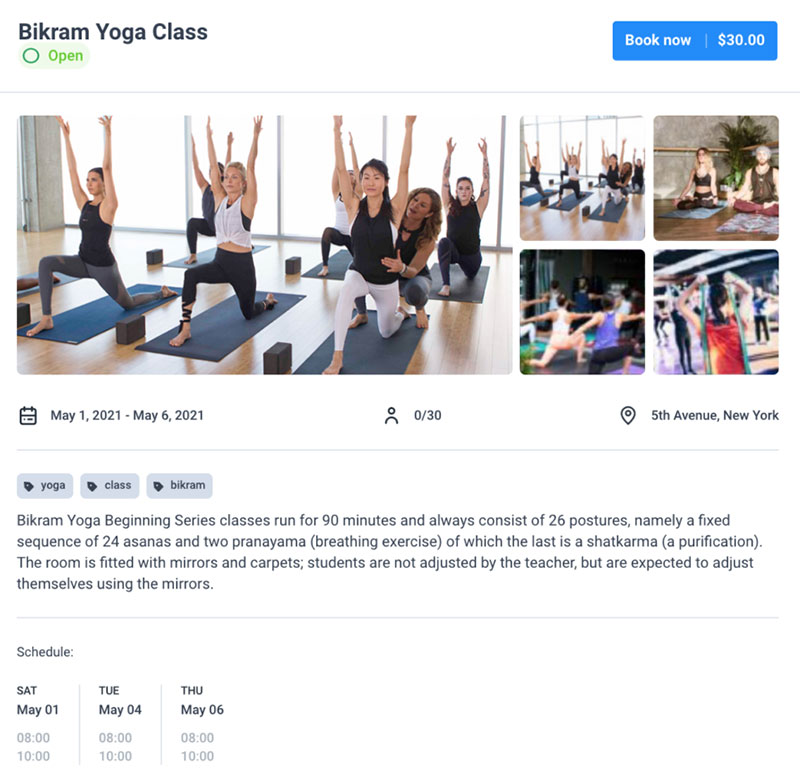
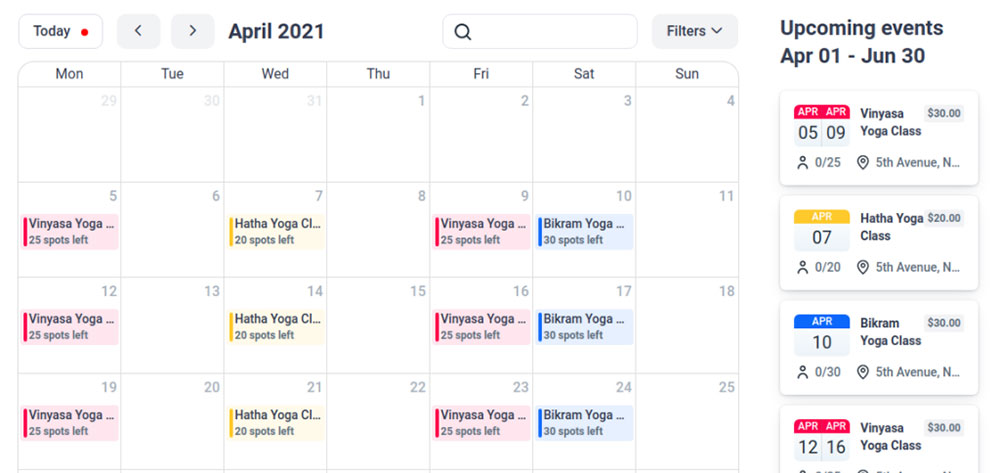
Your website visitors can see the entire calendar. They can see the events for the current month or see an entire list of upcoming events. They can click on the event that takes their interest. After clicking, they will see the event’s details and the option to register for it.
- Name.
- Status. The options include:
- Canceled
- Open for booking
- Closed for booking.
- Gallery. These are the pictures that you have added in the “Customize” By default, users will see the first four pictures. They can click the “+” button to see more pictures.
- Start and end date.
- The number of open spots and capacity.
- Location.
- Tags.
- Description.
- Schedule. This shows all the start and end times of the event.
- Hosts.
If you enjoyed reading this article on adding a virtual events calendar to your site, you should check out this one with virtual event survey questions.
We also wrote about similar topics like event WordPress themes, virtual event best practices, virtual events checklist, and the types of virtual events you can organize.

