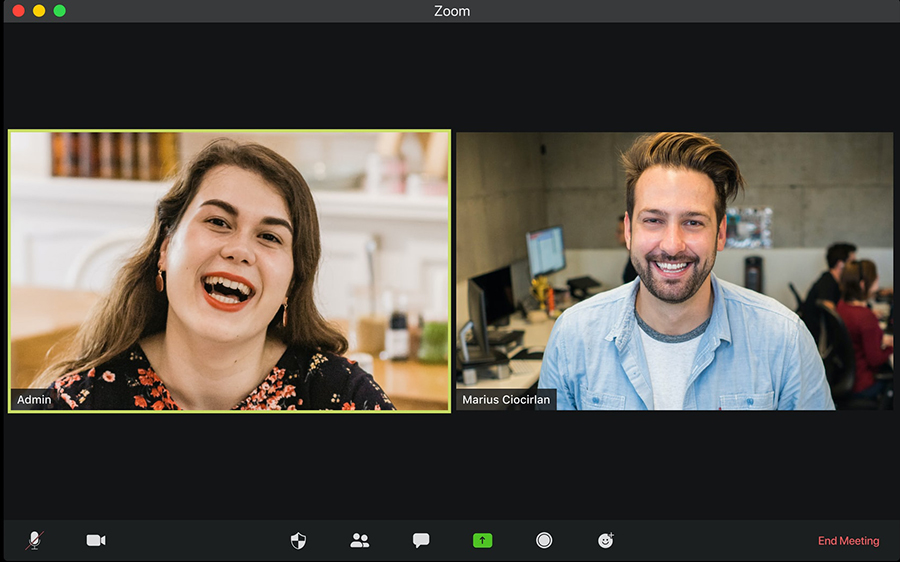
Around the world, an increasing number of meetings are being held on Zoom. Business meetings, interviews, and webinars now commonly take place on this virtual platform. Plenty of useful and valuable information gets exchanged during these gatherings, so knowing how to record a Zoom meeting might prove vital both to you and your colleagues.
Handwritten notes often miss important details, resulting in an imperfect record. With meetings held on a virtual platform, it is possible to record audio and video. Recorded meetings can then be revisited or shared with those who were unable to attend.
To learn how to record a Zoom meeting successfully, check out this brief guide we’ve prepared for you. You’ll find out:
- Can Users Record a Zoom Meeting
- How to Record a Zoom Meeting on a Local Hard Drive
- How to Record a Zoom Meeting in the Cloud
- How to Record a Zoom Meeting from an iOS or Android Device
- Zoom Recording Tips
Can Users Record a Zoom Meeting
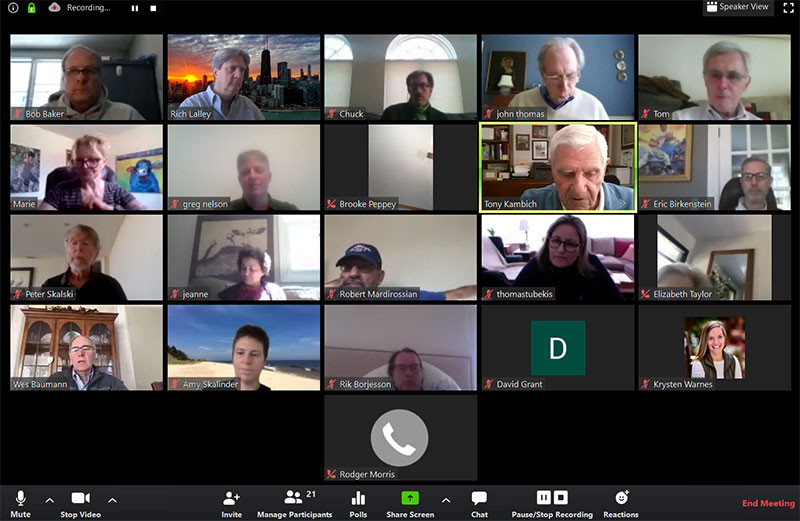
Can users record a Zoom meeting? Yes. Zoom recording options are available for both free and paid accounts.
Free accounts have some restrictions. Paid accounts give users more tools and recording freedom.
For free accounts, Zoom stores recorded meetings on the local hard drive of the user. Paid accounts get the option to save recorded meetings either on local hard drives or in the cloud.
Zoom also provides different layout options for meeting recordings to suit each circumstance. Local recordings, cloud recordings, and recording on mobile devices have different options too.
How to Record a Zoom Meeting on a Local Hard Drive
Both free and paid accounts have access to the local recording. The recording is saved to the computer.
The user has the option to share the file with others or upload the file to a storage service or a streaming service.
Limitations to local recording
Local recordings do not support the following features:
- Record using iOS or Android
- Include participant names
- Separate recording of the active speaker, gallery view, and shared screen
- Audio transcription
Enable settings to record Zoom meetings
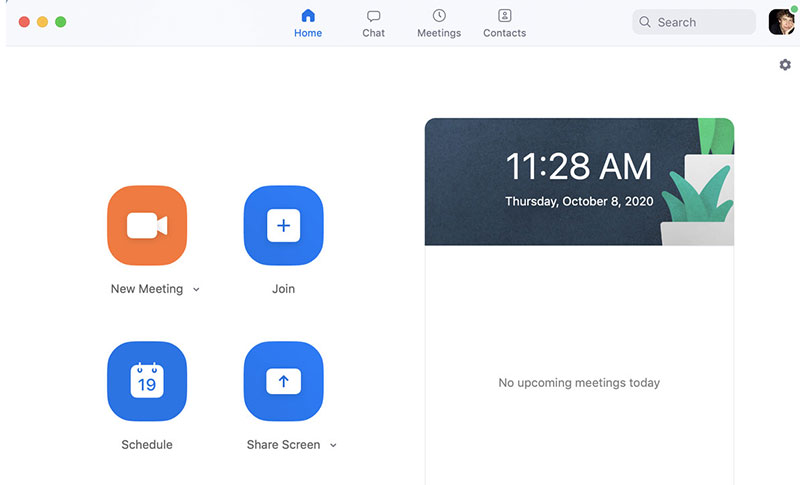
Zoom saves local recorded meetings in a default location. This is usually in a folder titled “Zoom” under Documents in the computer’s files.
To save recorded meetings in a different location, follow these steps:
- Open Zoom and sign in to your account. The Zoom Client will appear
- Click on the gear icon in the right corner to open the settings window
- Select the option Recording
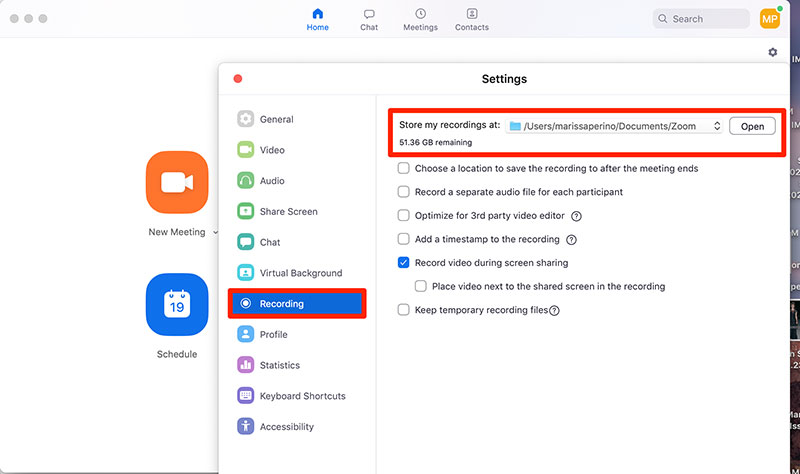
- Local recording settings will open. Under the Store my recording at field, click on Change.
- Then select the desired location to save recorded meetings
In this window, users can choose other settings for recording meetings. Users can choose to add a timestamp or they can record a separate audio file for each speaker in the meeting.
Options for recording screen sharing are also provided.
If using the Zoom web version, follow these steps to enable the recording option:
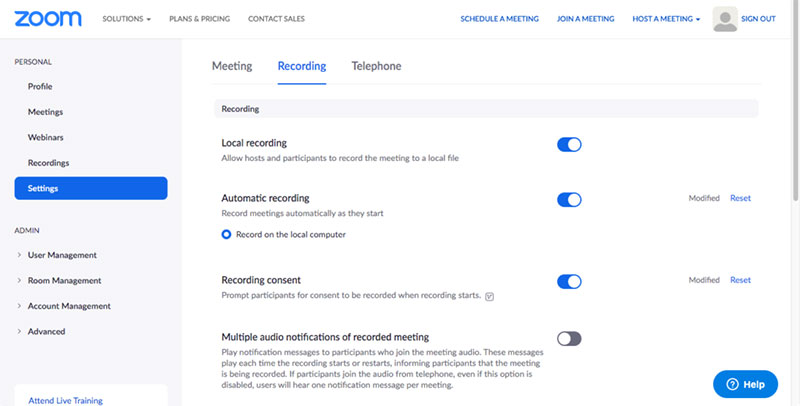
- Sign in to the Zoom web portal
- Go to the Personal menu located on the left-hand side of the screen
- Click on Settings
- Select the Recording tab
- Hit the toggle button next to the Local Recording. This enables the local recording feature
Individual groups created on Zoom also have the ability to record their meetings. To enable the screen recording feature for a group, do the following:
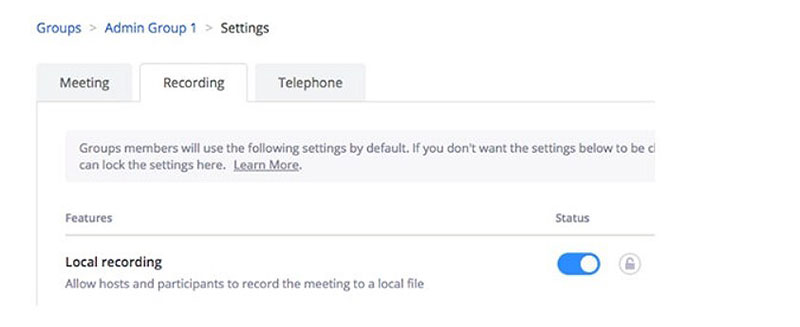
- Sign in to the Zoom web portal
- Click on User Management in the left-hand toolbar
- Select Group Management
- Scroll to a specific group
- Click on the settings tab for that group
- Click on the recording tab and enable local recording for that group
Start a local recording
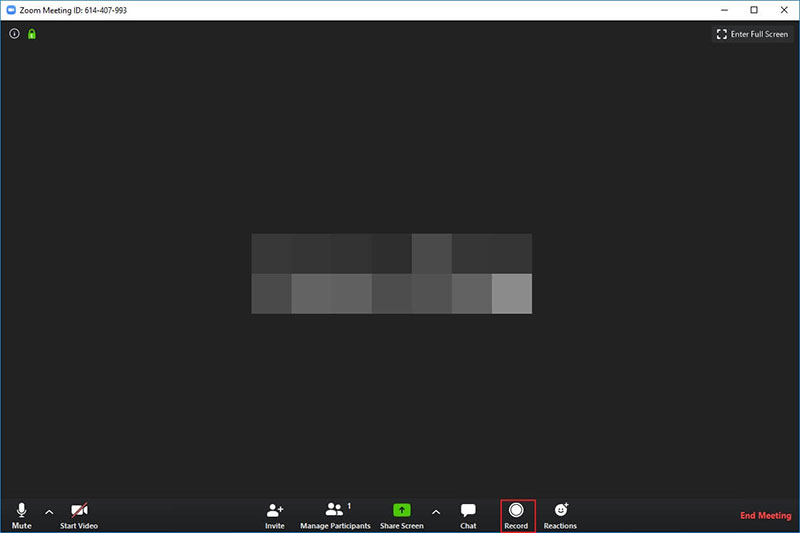
Hosts and co-hosts have the control to record meetings. Participants can record a Zoom meeting if the host gives them permission.
Local recordings are saved as MP4 files and audio recordings are saved as M4A files.
Recording layouts include:
- active speaker
- gallery view
- shared window
- shared screen with gallery view thumbnail
Here’s how to record a Zoom meeting on a computer:
- Press the Record button located in the toolbar at the bottom of the window. For free account users, it will record on the computer.
- Paid account users will see a menu with the choice to record on the computer or to the cloud. Select Record on Computer.
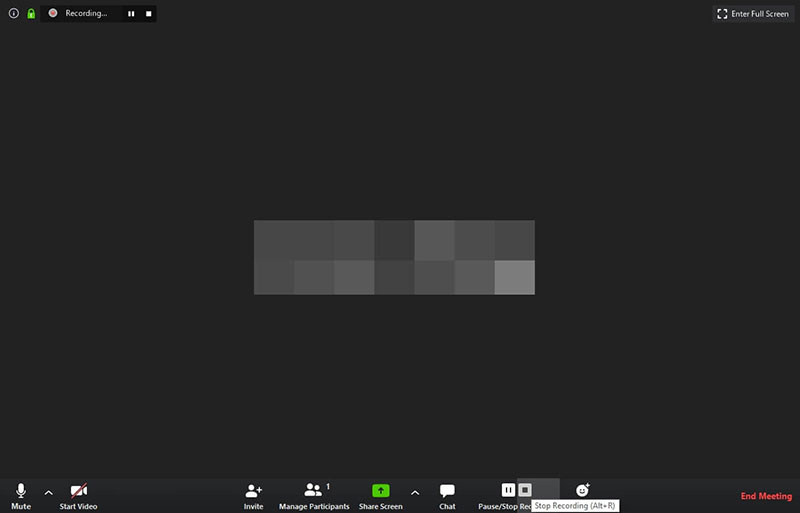
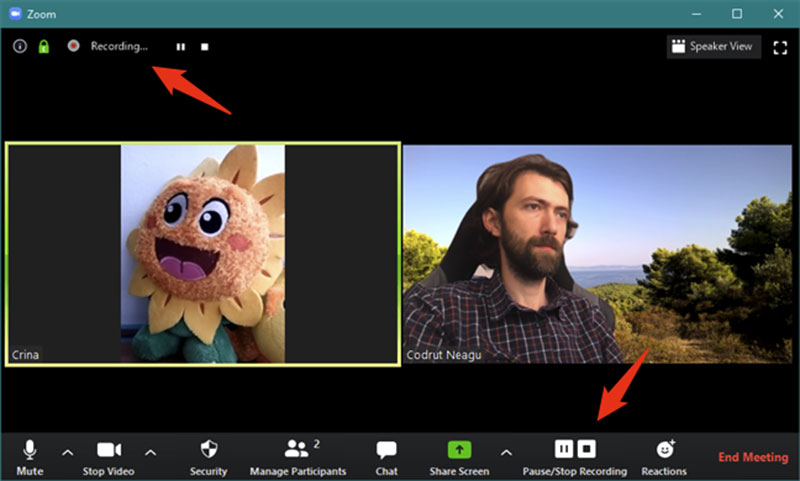
- A recording indicator will appear in the left-hand corner of the screen
- The toolbar will display a pause button and a stop button
- Under Participants a red dot indicates who is recording the meeting
- To stop the recording press the stop icon in the toolbar or end the meeting
- When the meeting ends Zoom will convert the recording and save it to the computer
After converting the recording, Zoom saves the recording in a file. The file shows the date, time, and Zoom account information.
The files saved include a video copy and an audio-only copy.
The video copy is usually named zoom_0. The audio copy will carry the filename audio_only.
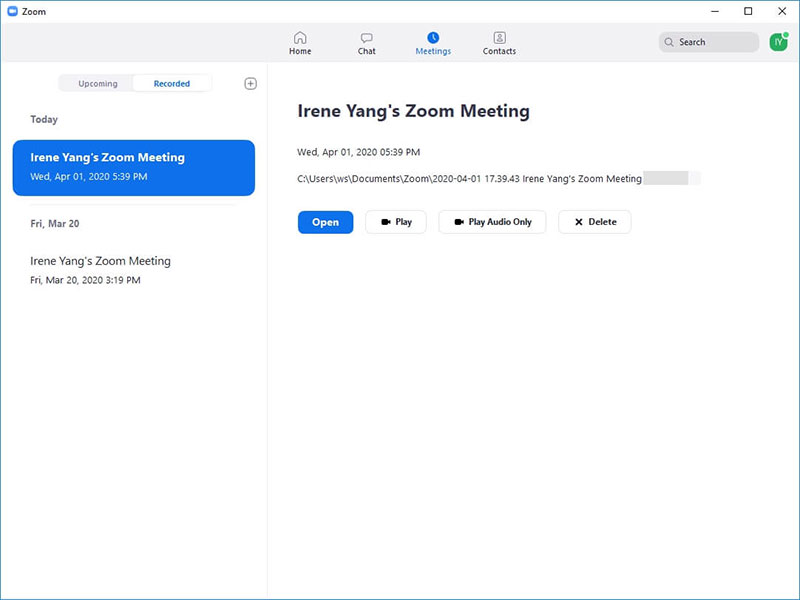
Users can access recorded meetings from both the computer file explorer and the Zoom client. To access through Zoom, go to the Zoom client and click on the Meetings tab that appears at the top of the window.
On the left side, switch the toggle from Upcoming to Recorded. All recorded meetings will appear with options to open, play, play audio, or delete.
How to Record a Zoom Meeting in the Cloud
Another option for users is to record and save meetings to the cloud. This is optimal for sharing the recordings with others.
Zoom cloud recording also provides useful features to businesses such as audio transcription. Only paid accounts have the option of cloud recording.
Pro, Business, and Zoom Room plans get one GigaByte of cloud storage. Education plans get half a GigaByte of cloud storage.
For more storage, users need to make an additional purchase.
Benefits of cloud recording:
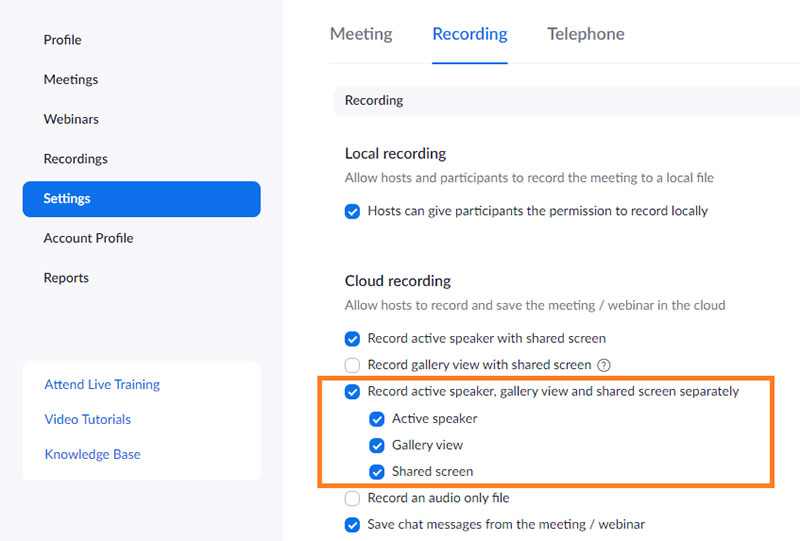
- Video, audio, and chat text recorded
- Start Cloud recordings on an iOS or Android device
- Download the files to a computer
- Share the files with a provided link
- Start recording the meeting even if the host is not there
- Add a timestamp
- Display participant’s names
- Receive a transcript of the meeting
- Layout options include:
- Active speaker
- Gallery view
- Shared window
- Shared screen with active speaker thumbnail
- Shared screen with large active speaker thumbnail
- Shared screen without thumbnail
Enable cloud recording
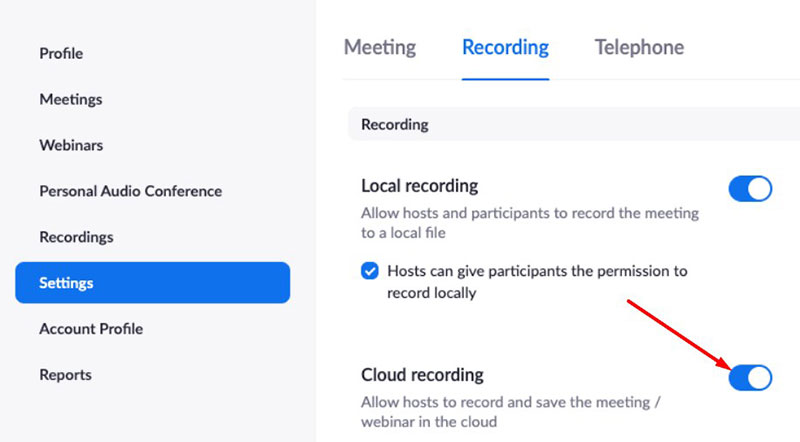
To enable cloud recordings follow these steps:
- Sign in to the Zoom web portal
- Click on Settings in the left-hand navigation toolbar
- Select the Recording tab
- Verify that Cloud Recordings is enabled. If not switch the toggle button to enable it
Start a cloud recording

Hosts and co-hosts can start a cloud recording. Participants must be a co-host to start a cloud recording, otherwise, they can start a local recording.
Here is how to record a Zoom meeting to the cloud:
- Start a Zoom meeting as the host or co-host
- Press the Record button on the toolbar
- A menu will appear with the option to record to the cloud or the computer. Select Record to the cloud
- Pause and stop icons will appear on the toolbar
- To stop the recording press Stop or end the meeting
- After the meeting ends, Zoom will process the recording. In general, the processing will take twice the amount of time of the meeting.
Because of a high volume of recordings, processing may take up to 72 hours.
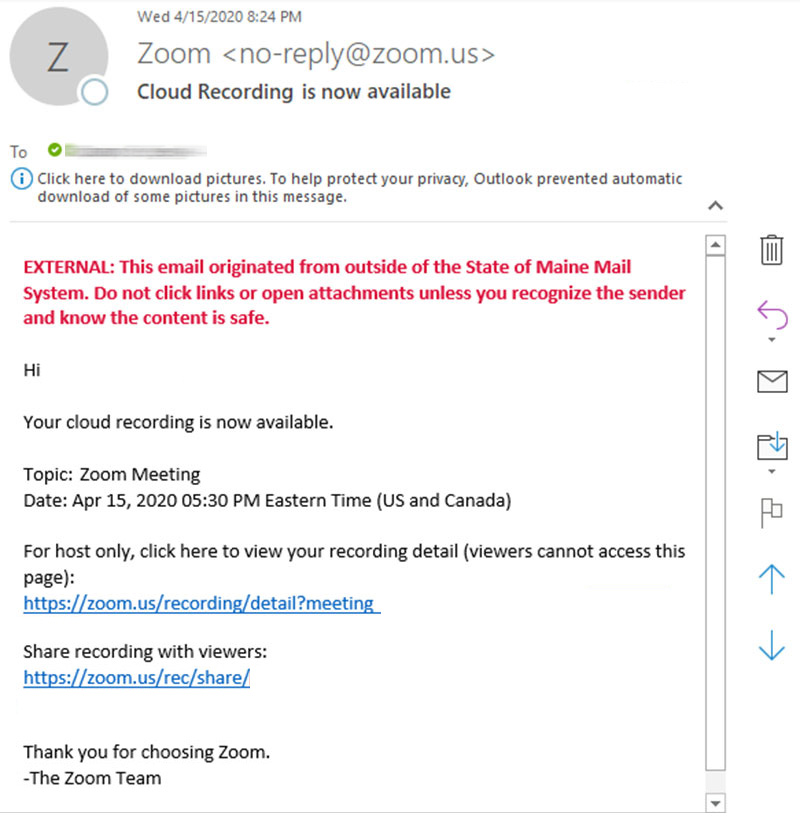
- When the files are ready, Zoom will send a notification email to the host. The email will include a link for the host to access the file and a link to share the file with others.
How to Record a Zoom Meeting from an iOS or Android Device
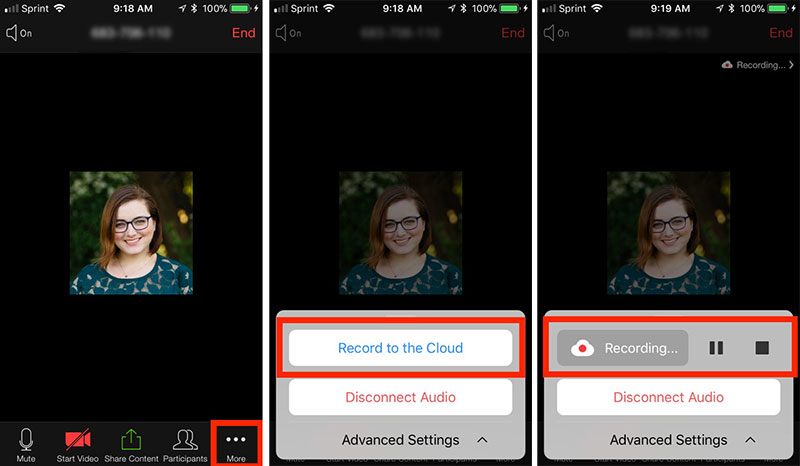
iOS and Android devices can record the screen of Zoom meetings to the cloud. Local recording is not possible for mobile devices.
Layout options for mobile screen recording include:
- active speaker
- shared screen with an active speaker
- shared screen without an active speaker
The meeting host can start a cloud recording on a mobile device. Follow these steps for both iOS and Android:
- Start a meeting as a host
- Click on the More option in the toolbar
- Select Record to the Cloud
- A recording indicator will appear at the top of the screen
- To pause or stop the recording press More and then click on Pause or Stop
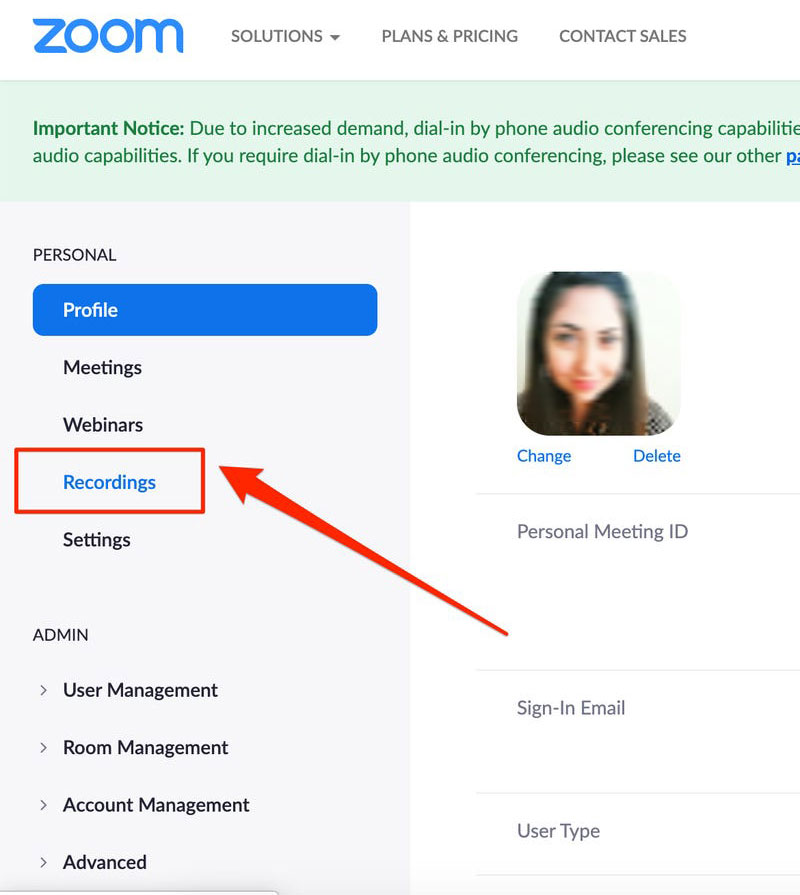
- After the meeting ends the recording will process and will be accessible in the Zoom web portal. Users can view them by signing into their Zoom account on the web portal.
Then select Recordings. All recordings will appear with the option to view or delete them.
Zoom Recording Tips
- Make sure to be well-lit with light illuminating your face. Either sit by a window to let sunlight in or turn on the lights
- Position the camera to capture from the shoulders and above. Try not to be too close or too far away.
- Make sure to have a fast internet speed for the best quality
- Look over the layout options for local recording and cloud recording. Choose the option that best suits the circumstances
- During the meeting, you can pause and resume the recording without interrupting the meeting
- Stopping the recording will not interrupt the meeting
- Ending the meeting will stop the recording and will start the rendering process
- Cloud recordings take longer to process than local recordings
- Cloud recordings are safe from computer crashes
Ending Thoughts
Following these simple steps to record a Zoom meeting will help both free and paid account users to record and save meetings.
Recording meetings is a useful tool for all types of businesses. Instead of using handwritten notes, businesses have a perfect record of the meeting.
This allows them to review the meeting for clarification or improvement. Or they can send the recording to those who were unable to attend.
Recording meetings on Zoom is a great business tool. Combined with other recording screen tools it helps companies thrive. In case you want to edit your Zoom recording, Veed or Clipchamp are tools that can help you.
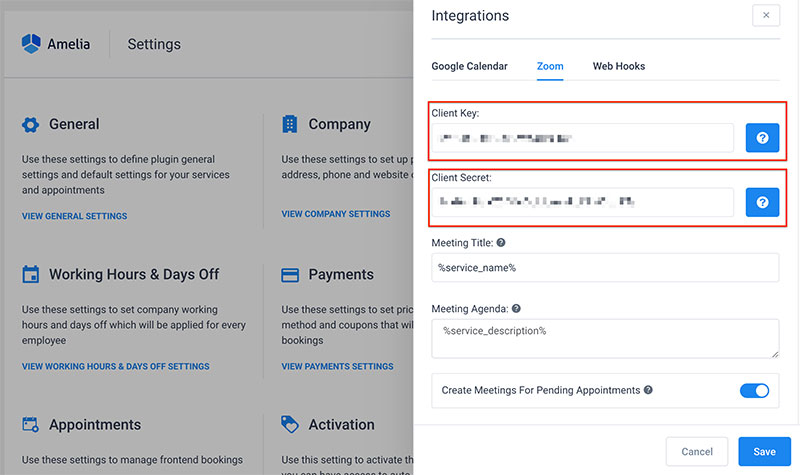
Another great tool that can help your business grow is Amelia. Amelia is an automated booking software with Zoom integration.
It simplifies the appointment booking process and schedules and manages Zoom meetings. With Amelia, each employee can have their own Zoom account to schedule and connect to meetings.
The combined functionality of Zoom and Amelia helps businesses expand.
FAQs about recording a Zoom meeting
1. How do I start recording a Zoom meeting?
The host or co-host can choose whether to record a Zoom meeting on their computer or on the cloud by clicking the “Record” button at the bottom of the screen. The meeting will then be captured on camera and stored in the designated place.
2. Can I pause or stop recording during the Zoom meeting?
Yes, by selecting “Pause” or “Stop” on the recording control panel, the host or co-host can pause or end the recording while the Zoom meeting is in progress. When the recording is stopped or started again, participants will be informed.
3. How do I access the recorded Zoom meeting after it has ended?
The recording will be processed and saved to the specified destination when the Zoom meeting has ended. The “Recordings” tab in the Zoom web portal or desktop software can be used by the host or co-host to access the recording.
4. Can I record a Zoom meeting on my phone or tablet?
By hitting the “Record” button and choosing “Record to this device,” Zoom meetings can really be captured on mobile devices. The recording will be stored locally on the gadget.
5. What is the maximum recording length for a Zoom meeting?
Depending on the type of account being utilized, a Zoom meeting’s maximum recording length can vary. The longest recording you can make with a free account is 40 minutes. Premium accounts are able to save records for longer periods.
6. How do I record only the audio from the Zoom meeting?
The host or co-host can choose “Record audio only” while starting the recording to capture only the audio from a Zoom conference. The video recording will be kept in one file, and the audio recording in another.
7. Can I choose where to save the recorded Zoom meeting?
Yes, by selecting the desired place upon initiating the recording, the host or co-host can decide where to save the recorded Zoom conference. You have the choice of saving to a local device or the cloud.
8. How can I ensure that the quality of the recorded Zoom meeting is good?
It is advised to have a steady internet connection, utilize a high-quality microphone and webcam, and reduce background noise to ensure that the quality of the recorded Zoom conference is satisfactory. Also, testing the recording options before the meeting is advised.
9. Do I need the host’s permission to record a Zoom meeting?
Indeed, it is typically advised to ask for permission from the host before recording a Zoom meeting. Under the Zoom options, the host can activate or prevent the ability for participants to record.
10. Can I record a Zoom meeting without the participants knowing?
It is impossible to record a Zoom meeting without the attendees’ knowledge because they are informed when the meeting is being recorded. If they do not want to be recorded, participants can opt to switch off their video or audio during the meeting.
If you enjoyed reading this article on how to record a Zoom meeting, check out our other Zoom-related articles:
- How to Change Your Background on Zoom
- How to Create a Zoom Meeting
- How to Add Zoom to Google Calendar
- How to Schedule a Zoom Meeting
