



WordPress speed optimization is the process of reducing your site’s load time, improving server response, and passing Google’s Core Web Vitals thresholds – so visitors stay, rankings improve, and conversions hold.
If your WordPress site is slow, you’re already losing – visitors, rankings, and revenue. Research shows that even a one-second delay in page load time can reduce conversions by 7% (1), and Google has made site speed a confirmed ranking factor through Core Web Vitals.
The good news: WordPress speed optimization is not a mystery. There’s a clear, repeatable process you can follow to diagnose problems, apply fixes one by one, and actually measure the impact of each change. That’s exactly what this guide walks you through.
By the end, you’ll know how to speed up your WordPress site the right way – starting with a proper audit, moving through hosting, images, caching, JavaScript, CSS, and Core Web Vitals, and finishing with a testing workflow that makes sure your improvements actually stick.
Let’s get into it.
Measure First: Run a WordPress Speed Test Before Touching Anything
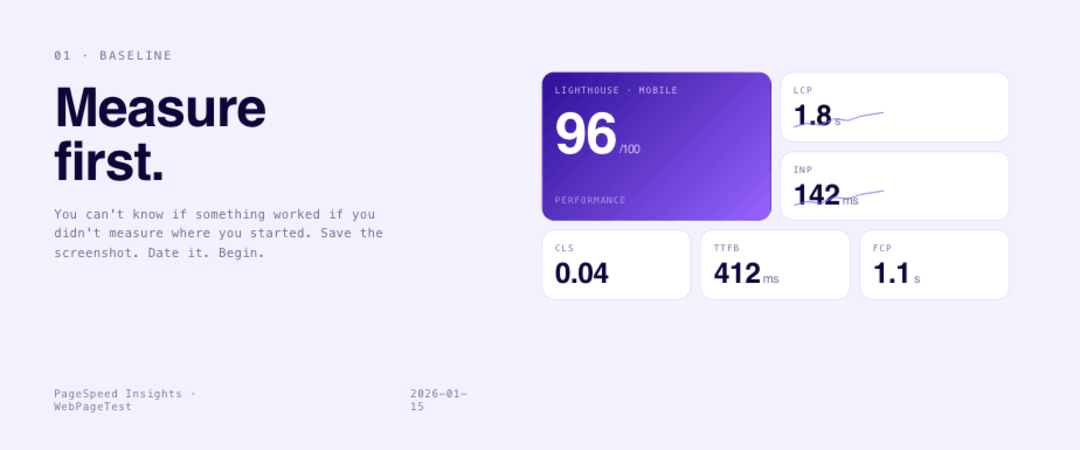
Before you change a single setting, you need a baseline. This is the most important rule in WordPress performance optimization – you can’t know if something worked if you didn’t measure where you started.
Run your site through both of these tools before making any changes:
- Google PageSpeed Insights – gives you both lab data (Lighthouse) and real-world field data from actual Chrome users. Use this as your main benchmark.
- WebPageTest – more technical and more powerful. The waterfall view shows you exactly what loads in what order, which makes it invaluable for diagnosing render-blocking resources.
What metrics to actually focus on
When your test finishes, don’t just stare at the overall score. Here’s what the individual metrics mean and what you’re aiming for:
What metrics to actually focus on for WordPress speed
| Metric | What It Measures | Target |
| LCP (Largest Contentful Paint) | How fast your main content loads | ≤ 2.5 seconds |
| INP (Interaction to Next Paint) | How quickly your page responds to clicks | ≤ 200ms |
| CLS (Cumulative Layout Shift) | Whether things jump around while loading | ≤ 0.1 |
| TTFB (Time to First Byte) | How fast your server responds | ≤ 800ms |
| TBT (Total Blocking Time) | How long the main thread is blocked | ≤ 200ms |
| FCP (First Contentful Paint) | When the first visible content appears | ≤ 1.8 seconds |
If your TTFB is above 800ms, your server is the problem – not your plugins or images. If your LCP is above 2.5 seconds, you likely have an unoptimized hero image or a render-blocking resource above the fold. Knowing which metric is broken tells you exactly where to focus.
A Lighthouse Performance score of 90+ is considered “Good.” For mobile, 75+ is a realistic and competitive target for most WordPress sites – and it’s worth bookmarking that number as your baseline before any optimization work begins.
One important thing to understand about these two data types
PageSpeed Insights shows you two types of data: field data (from real Chrome users) and lab data (a simulated test). Field data is what Google actually uses in its ranking algorithm. Lab data is what you can control and test in real time.
You want both to be green – but if you have to prioritize, fix the field data first.
Before moving on: Screenshot your results and save them. Name the file with the date and page name (e.g., homepage-pagespeed-before-2026-01-15). You’ll thank yourself later when you’re trying to prove that your changes worked.
Start With Your Hosting – The Foundation Everything Else Builds On
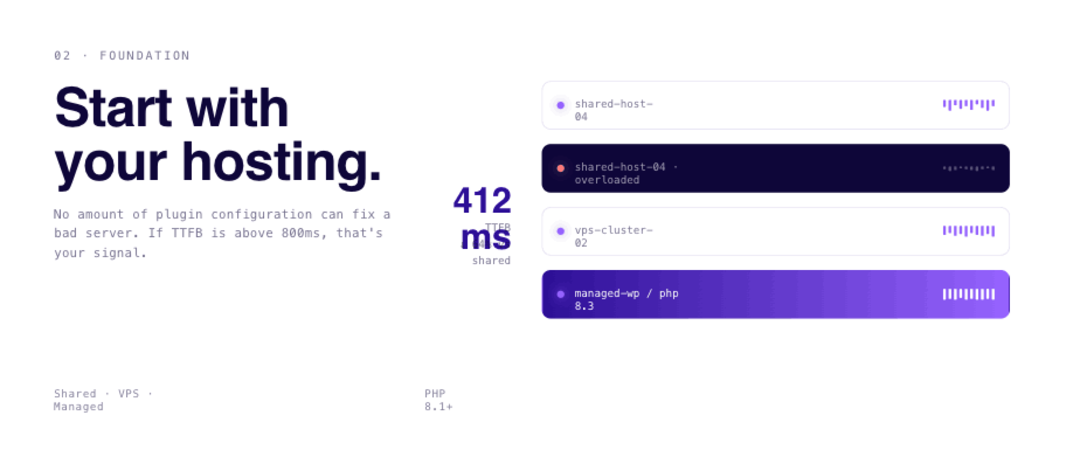
No amount of plugin configuration can fix a bad server. If your hosting is slow, your TTFB will be high, and everything downstream – LCP, FCP, the user experience – suffers.
Your TTFB result from PageSpeed Insights tells you a lot. A TTFB above 800ms is a clear signal that you need to look at your hosting environment before anything else.
Hosting types and what they mean for performance
Shared hosting is the most common cause of slow WordPress sites. When you’re on a shared server, your site competes for CPU and RAM with dozens or hundreds of other sites. On high-traffic days – especially someone else’s high-traffic days – your server might deprioritize your requests entirely.
If you’re on shared hosting and struggling with speed, the single highest-leverage thing you can do is upgrade.
VPS (Virtual Private Server) hosting gives you dedicated virtual resources. You’re still on a physical machine with other tenants, but your slice of CPU and RAM is reserved for you. Performance is dramatically more consistent.
Managed WordPress hosting (Kinsta, WP Engine, Cloudways, Rocket.net) takes this further by optimizing the entire server environment specifically for WordPress – with built-in caching, CDN integration, and PHP configuration tuned for WordPress workloads. The cost is higher, but the performance floor is much better.
Other server-side factors to check
- PHP version – Make sure you’re running PHP 8.1 or higher. Older PHP versions are significantly slower. You can check and update this from your hosting control panel.
- HTTP/2 or HTTP/3 – These protocols allow parallel loading of multiple files over a single connection, which is much faster than the older HTTP/1.1. Most quality hosts enable this by default, but it’s worth confirming.
- GZIP or Brotli compression – Text-based files (HTML, CSS, JS) should be compressed before being sent to the browser. Ask your host if this is enabled, or check via WebPageTest’s “Compression Savings” section.
Choose a Lightweight Theme and Audit Your Plugins
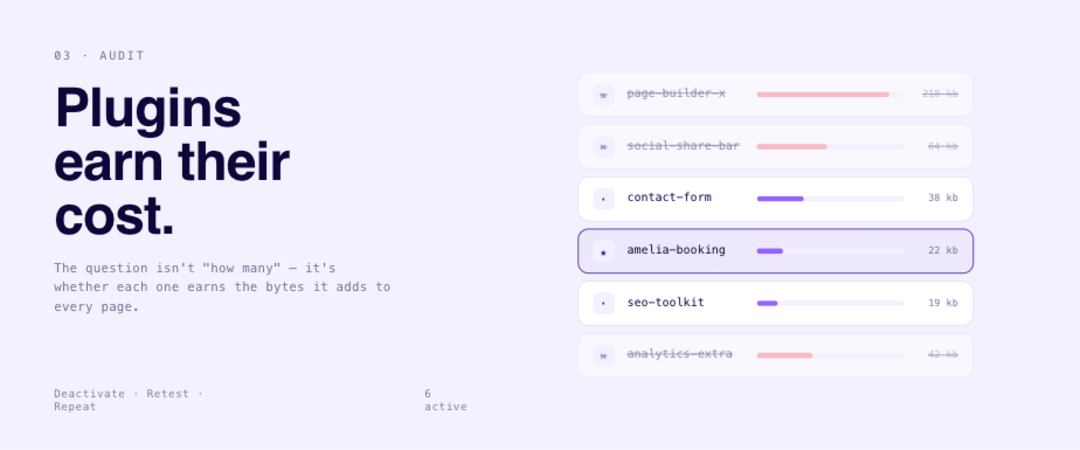
After hosting, your theme and plugins are the biggest contributors to page weight and load time.
What makes a theme “fast”
A performant WordPress theme does a few specific things:
- It loads only the scripts and styles that the current page actually needs. A theme that dumps its entire stylesheet on your blog post is not a fast theme.
- It uses native WordPress features instead of reinventing them with custom JavaScript.
- It has a modular architecture – features are modules you can turn off, not bundled code that always loads.
Well-known lightweight themes include Astra, GeneratePress, Kadence, and Blocksy. If you’re using a heavy page builder theme with a massive CSS file and dozens of JavaScript libraries, switching themes alone can dramatically improve your scores.
How to find plugin bloat
Every plugin you install can add HTTP requests, database queries, and JavaScript to your pages. The question isn’t “how many plugins is too many” – it’s whether each plugin earns its performance cost.
Here’s how to audit your plugins:
- Make a list of every active plugin.
- For each one, ask: what does this do, and is there a native WordPress feature or a lighter alternative that does the same thing?
- Deactivate plugins one at a time and re-run your speed test after each deactivation. If your score improves noticeably, you found a culprit.
Watch out especially for plugins that load scripts on every page even when they’re only used on one (contact form plugins are a common offender). Tools like Perfmatters let you disable specific plugin scripts on specific pages, which is one of the most targeted ways to reduce unnecessary JavaScript.
Not all plugins are performance liabilities – a well-built WordPress booking plugin like Amelia, for example, loads its scripts only on booking-enabled pages and adds no overhead to the rest of your site. The distinction is between plugins that respect your performance budget and those that don’t. Auditing them with a speed test is the only way to know for certain.
Master Your Above-the-Fold vs. Below-the-Fold Loading Strategy
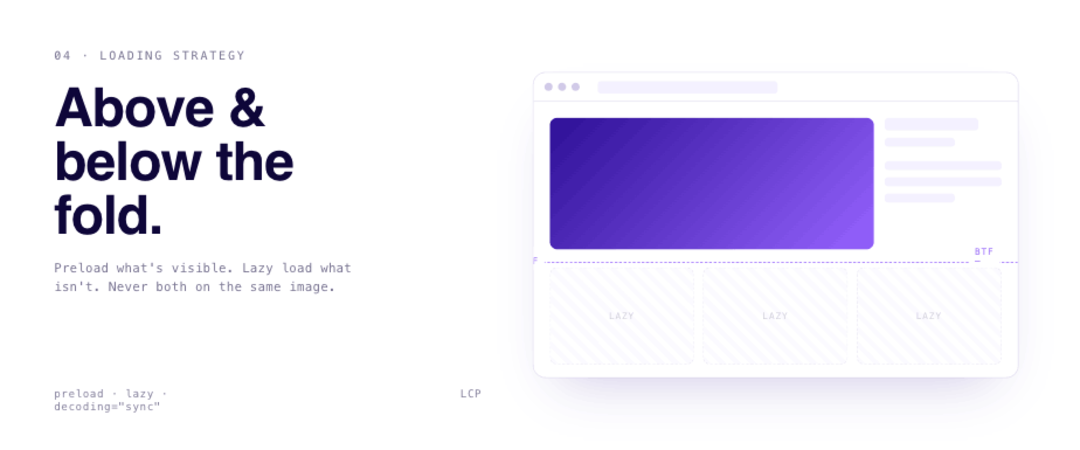
This is one of the most impactful – and most overlooked – performance concepts in WordPress. How your assets load depends heavily on where they appear on the page relative to what’s visible when the page first loads.
What “above the fold” (ATF) means for performance
Above the fold refers to everything visible on screen before the user scrolls. For performance, ATF elements are critical because Google’s LCP metric measures how fast your largest visible content element appears. If your hero image, banner, or logo is slow to load, your LCP score takes a direct hit.
The rule for ATF assets: preload them. This means telling the browser to fetch them as early as possible in the loading sequence, before it even encounters them in the HTML. This applies to:
- Your hero image
- Promotional banners
- Logo and icons in the header
- Critical fonts used in above-fold text
You can verify which elements are actually above the fold on mobile by looking at the screenshot in PageSpeed Insights. It shows exactly what the browser “sees” on first paint.
One thing we’ve seen repeatedly when optimizing WordPress sites: accidentally applying both preloading and lazy loading to the same image. This happens more often than you’d expect – especially after plugin configuration changes, or when switching from one caching plugin to another – and it causes the browser to load the image twice. We spotted it on a booking plugin demo site where the hero image was being fetched twice: once via a preload link tag added by WP Rocket, and once more as the native browser discovered the <img> tag with no loading=”lazy” override. Check the Network tab in Chrome DevTools to confirm each asset loads exactly once.
Lazy load everything below the fold (BTF)
Everything below the fold should be lazy loaded – meaning the browser defers loading it until the user scrolls toward it. This dramatically reduces the initial page weight and lets the browser focus on rendering what’s actually visible first.
This includes:
- All images and icons below the fold
- Videos and iframes (YouTube, Vimeo, etc.)
- Background images in sections further down the page
- Any interactive widgets that aren’t immediately visible – including booking forms, event calendars, and scheduling widgets such as those built with a WordPress event plugin
Most WordPress caching and optimization plugins handle lazy loading for images. Make sure yours is turned on.
The decoding attribute: a small detail with a real impact
For images, the decoding attribute tells the browser how to prioritize decoding:
- ATF images: Use decoding=”sync” – the browser decodes the image immediately, which improves LCP.
- BTF images: Use decoding=”async” – the browser decodes in the background without blocking rendering.
This is a relatively small tweak, but it consistently improves LCP scores on pages with large hero images.
A note on videos and GIFs
Videos are one of the most common performance problems on WordPress sites. Never load an actual video player (iframe or <video> tag) above the fold on page load. Instead:
- Replace the video with a lightweight image placeholder (WebP, under 100KB, preloaded if ATF)
- Add a play button overlay to make it look clickable
- Load the actual video only when the user clicks
For YouTube embeds specifically, use a lazy-loaded facade. The thumbnail should be a WebP image preloaded if it’s ATF.
If you have different assets for mobile and desktop (for example, a GIF on desktop but a static image on mobile), make sure the device-specific asset is only loaded on the right device. Having both in the HTML – even if one is hidden via CSS – means both assets are downloaded.
Optimize Every Image on Your WordPress Site
Images are typically the largest contributor to page weight, and they’re the single most common cause of poor LCP scores. The good news is that image optimization is one of the easiest wins available to you.
The 100KB rule
Every image on your site – before any plugin compression – should be under 100KB. This is the standard to aim for before you upload anything to WordPress.
If you’re uploading a 2MB hero image and relying on a plugin to compress it down to something reasonable, you’re working against yourself. Compress and resize images before they enter WordPress, then let the plugin handle the final conversion and additional optimization.
Convert images to WebP
WebP is a modern image format that delivers significantly smaller file sizes than JPEG or PNG at comparable visual quality. For most images, you’ll see 25–35% size reduction compared to JPEG.
You don’t need to do this manually. Plugins like ShortPixel, Imagify, or the image optimization built into WP Rocket or NitroPack handle WebP conversion automatically. Enable it in your chosen plugin and make sure your server is configured to serve WebP to browsers that support it (all modern browsers do).
Always set fixed image dimensions
One of the most common causes of a high CLS score is images without defined width and height attributes. When the browser loads your page, it doesn’t know how much space to reserve for an image until the image file starts downloading – so it collapses that space, and everything below it jumps down when the image loads.
The fix is simple: always define width and height attributes on every image. Your developers should set these for every image for every screen size during development. This is non-negotiable for good CLS scores.
Write SEO-focused alt text and titles
Image alt text and titles aren’t just accessibility features – they’re ranking signals. Each image title and alt text should describe the image meaningfully and, where natural, include a relevant keyword.
Good title: Amelia Booking Plugin Dashboard
Bad title: screenshot-1234.png
Good alt text: Overview of Amelia’s booking plugin dashboard showing upcoming bookings for a spa business
Bad alt text: booking plugin screenshot
Keep alt text to approximately one sentence. It should describe what’s actually in the image in a way that would make sense to someone who can’t see it.
Fix Render-Blocking JavaScript and CSS
Render-blocking resources are scripts and stylesheets that force the browser to stop building the page until they’ve fully downloaded and executed. They’re one of the most common causes of poor TBT (Total Blocking Time) and delayed LCP.
Both PageSpeed Insights and WebPageTest will flag these directly. WebPageTest’s waterfall view is especially useful – you can see exactly which files are blocking the rendering of everything below them.
JavaScript: async vs. defer
When you have render-blocking JavaScript, you have two options: async or defer. Knowing when to use each matters.
Use async when:
- The script doesn’t depend on any other scripts
- Execution order doesn’t matter
- Typical examples: Google Analytics, third-party chat widgets, standalone tracking pixels
Use defer when:
- Scripts depend on each other and need to run in a specific order
- The script should execute after the HTML is fully parsed
- Typical examples: most scripts in the <head>, jQuery-dependent plugins
The key distinction: async scripts execute as soon as they’re downloaded (potentially out of order), while defer scripts wait until HTML parsing is complete and execute in document order.
Never use a plain <script> tag in the <head> without defer or async – it will block rendering every time.
For third-party scripts specifically (live chat, advertising, social embeds), consider adding a delay of a few seconds before they load. These scripts are almost never needed for the initial page render, and delaying them can meaningfully improve your TBT score.
CSS: critical vs. non-critical
CSS can be just as problematic as JavaScript for render-blocking. Here’s how to handle it:
For critical CSS (styles needed to render above-fold content):
- Use rel=”preload” as=”style” to start downloading the file as early as possible
- The browser will automatically switch to applying it as a stylesheet once loaded
- This gets your critical styles fast without blocking rendering
For non-critical CSS (styles only needed below the fold or in secondary states):
- Load asynchronously using the media=”print” trick with an onload handler
- Or load it after the page is interactive
Other CSS best practices:
- Minify all CSS files to remove whitespace, comments, and redundant rules
- Remove unused CSS – many page builders and themes load entire stylesheets for features your site doesn’t use. Plugins like PurifyCSS or the built-in unused CSS removal in WP Rocket can help, though test carefully as aggressive removal can break things.
- Don’t put too much CSS in the <head>. Every kilobyte in the head delays the first paint.
Set Up Caching and a CDN
Caching is one of the highest-leverage optimizations available in WordPress. Without caching, every page request triggers PHP execution and a database query. With caching, the server serves a pre-built static HTML file – dramatically reducing server response time.
How WordPress page caching works
When a visitor lands on a cached page, WordPress serves them the pre-generated static HTML version instead of rebuilding it from scratch. This bypasses PHP and database queries entirely, which is why TTFB drops so significantly with caching enabled.
Most caching plugins also handle browser caching (telling the visitor’s browser to store static assets locally for a period of time) and cache preloading (automatically generating cache files for your most important pages before anyone requests them).
Which caching plugin to use
The right choice depends on your hosting environment and technical comfort level:
- WP Rocket – The most beginner-friendly option. 80% of optimizations are active immediately on installation. Works on all hosts including managed WordPress hosts like Kinsta. Includes minification, lazy loading, and database cleanup. No free version ($59/year).
- LiteSpeed Cache – Free and extremely powerful if your host runs LiteSpeed Web Server. Includes image optimization via QUIC.cloud, object caching, and CDN. Requires more configuration than WP Rocket.
- NitroPack – A cloud-based solution that handles optimization on external servers, meaning your server resources aren’t consumed. Includes CDN, image optimization, and critical CSS generation. Has a free tier.
- W3 Total Cache – Free and highly configurable, but requires technical knowledge to set up correctly. Not ideal for beginners.
One critical rule: Never run two caching plugins simultaneously. They will conflict, and the results are unpredictable – usually broken pages.
CDN: what it does and when you need it
A Content Delivery Network (CDN) distributes your static assets (images, CSS, JavaScript) across servers in multiple geographic locations and serves each visitor from the location closest to them. This reduces the physical distance data has to travel, which directly reduces latency.
If most of your visitors are in one country, you may not see dramatic CDN improvements for dynamic page loads. But for static assets – especially images – a CDN will consistently shave load time for users who aren’t geographically close to your server.
Cloudflare is the most widely used free option. Many managed WordPress hosts include CDN functionality. WP Rocket integrates with Cloudflare and RocketCDN. NitroPack has its own built-in CDN.
If your WordPress site handles bookings or appointments – say, you’re running a salon booking plugin for WordPress – a CDN is especially important because your visitors come from a wide geographic area and every millisecond of TTFB affects whether they complete a booking.
Clean Up Your WordPress Database
Over time, your WordPress database accumulates a significant amount of junk that it doesn’t need: old post revisions, auto-drafts, spam comments, orphaned metadata, expired transients, and deleted content that was never fully purged. None of this is visible to users, but all of it slows down database queries.
What typically accumulates
- Post revisions – Every time you save a draft, WordPress saves a new revision. A post edited 30 times has 30 revisions in the database. Most of these are never needed.
- Auto-drafts – WordPress saves these automatically while you’re writing. They pile up.
- Spam and trashed comments – These are counted even after moving to trash.
- Orphaned metadata – When you delete a post, some associated metadata records aren’t always deleted with it.
- Expired transients – Plugins store temporary data as transients. Old ones accumulate after expiry.
- Pingbacks and trackbacks – Usually spam and rarely useful.
How to clean it up
Always back up your database before cleaning it. This is not optional – a bad database cleanup can break your site.
The easiest approach is a plugin that handles this safely. If you’re already using WP Rocket or WP-Optimize, database cleanup is built in. Perfmatters includes it too. For dedicated database management, WP-DBManager and Advanced Database Cleaner are reliable options.
Understand Your Core Web Vitals – And Actually Fix Them
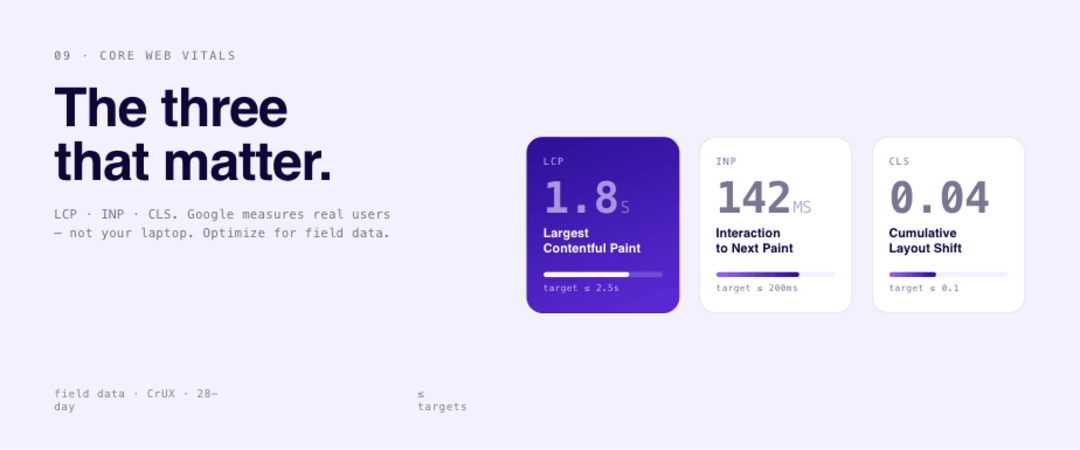
Core Web Vitals are Google’s standardized set of metrics for measuring real user experience. They’re not just a ranking factor – they’re a direct measure of how your site feels to use. There are three:
LCP – Largest Contentful Paint (target: ≤ 2.5s)
LCP measures how long it takes for the largest visible element on the page to fully render. This is usually your hero image, a large heading, or a prominent banner.
The most common causes of poor LCP:
- A large, unoptimized image above the fold (fix: compress and preload it)
- The image isn’t preloaded, so the browser discovers it late in the loading process
- Render-blocking CSS or JavaScript delaying the page from rendering at all
- Slow server response time (TTFB > 800ms)
LCP has phases: server response → resource load delay → resource load time → render time. You can see these phases in WebPageTest’s LCP breakdown. Address whichever phase is largest first.
INP – Interaction to Next Paint (target: ≤ 200ms)
INP measures how long it takes for your page to respond after a user interacts with it – a click, a tap, a keyboard input. It replaced First Input Delay (FID) in March 2024 and is a much more comprehensive measure of interactivity.
The most common causes of poor INP:
- Long JavaScript tasks blocking the main thread (check TBT in Lighthouse – high TBT usually means high INP)
- Heavy click handlers or event listeners on interactive elements
- Too many third-party scripts executing in the foreground
Fixes: Use defer for non-critical scripts, delay third-party scripts, reduce JavaScript bundle size, break up long tasks with requestAnimationFrame or scheduler.yield.
CLS – Cumulative Layout Shift (target: ≤ 0.1)
CLS measures how much the page layout unexpectedly shifts while loading. A page that “jumps” when an image loads, an ad appears, or a font swaps is experiencing layout shift.
The most common causes of poor CLS on WordPress sites:
- Images without defined width and height attributes (fix: always set dimensions)
- Web fonts loading and causing text to reflow (fix: use font-display: swap and preload critical fonts)
- Ads or embeds that inject content without reserved space
- Elements injected by JavaScript that push other content down
Lab data vs. field data – know the difference
Lighthouse (lab data) runs in a controlled, ideal environment. It’s useful for development and testing. But it doesn’t represent real user conditions – real devices, real network speeds, real browser extensions.
Field data (from the Chrome User Experience Report, shown in PageSpeed Insights as “Discover what your real users are experiencing”) is what Google actually uses in its ranking algorithm. It’s collected from real Chrome users across 28 rolling days.
Your lab score and field data can differ significantly. Always check both, and always prioritize fixing field data issues.
Test After Every Change – One Thing at a Time
This is the rule that separates productive optimization work from guesswork.
Change one thing, then test. If you change your theme, update your caching plugin settings, and enable CDN all at once, and your score improves, you have no idea which change helped or whether one of the changes was actually hurting you. If your score gets worse, you have no idea what caused it.
The testing workflow is simple:
- Record your baseline score (you did this in step 1)
- Make one change
- Run PageSpeed Insights and WebPageTest again
- Record the new score alongside a description of what you changed
- If the change helped, keep it. If it didn’t, revert it.
Always test both mobile and desktop. Mobile scores are almost always lower, and mobile is where Google primarily indexes your site. Don’t declare victory because your desktop score is green.
Save your test results. PageSpeed Insights results disappear after a period of time. Use the GoFullPage Chrome extension to screenshot the full results page, or just screenshot the Lighthouse section. Name your screenshots clearly and store them in a shared folder where your team can access them.
This methodology isn’t just good for performance – it’s good for accountability. When a developer deploys a change, they should run a performance test before and after and attach the screenshots to the relevant task or ticket. If you’re building sites for clients or running a WordPress booking plugin for web developers, this documentation practice protects you and gives clients clear evidence of the improvement delivered.
Quick Checklist: WordPress Speed Optimization in One Page
Use this as a reference when auditing a WordPress site for performance.
Baseline Testing
- Run PageSpeed Insights on key pages (homepage, landing pages, top blog posts)
- Run WebPageTest and review the waterfall view
- Note LCP, INP, CLS, TTFB, TBT, and FCP for both mobile and desktop
- Save screenshots of baseline results
Hosting & Server
- TTFB is under 800ms (if not, investigate hosting)
- Running PHP 8.1 or higher
- HTTP/2 or HTTP/3 enabled
- GZIP or Brotli compression enabled
Theme & Plugins
- Theme is lightweight and loads only needed scripts/styles
- No unused or duplicate plugins installed
- Plugin scripts are disabled on pages where they’re not needed
Above the Fold
- Hero image, logo, header icons are preloaded
- No image has both preload and lazy load applied simultaneously
- ATF images use decoding=”sync”
- Videos above the fold use a lightweight image placeholder (WebP, <100KB)
- Mobile-only and desktop-only assets are only loaded on the correct device
Below the Fold
- All BTF images, icons, videos, and iframes are lazy loaded
- BTF images use decoding=”async”
Images
- All images are under 100KB before upload
- Images are converted to WebP
- All images have defined width and height attributes
- Alt text is descriptive (one sentence, image content + context)
- Image titles are SEO-focused
JavaScript & CSS
- No render-blocking JavaScript in <head> without async or defer
- Third-party scripts are delayed (3+ seconds) or loaded asynchronously
- Critical CSS is preloaded; non-critical CSS loads asynchronously
- CSS and JS files are minified
- Unused CSS is removed
Caching & CDN
- A caching plugin is installed and configured (WP Rocket, LiteSpeed Cache, NitroPack)
- Browser caching is enabled
- Cache preloading is enabled
- CDN is configured for static assets
Database
- Database is backed up
- Post revisions are cleaned up
- Spam, draft, and trashed content is purged
- Expired transients are removed
Core Web Vitals
- LCP ≤ 2.5s (check field data in PageSpeed Insights)
- INP ≤ 200ms (check field data)
- CLS ≤ 0.1 (check field data)
- All <h1> through <h6> tags are used for content hierarchy, not styling
Testing
- Changes are made one at a time
- Mobile and desktop are both tested after each change
- Before/after screenshots are saved
Frequently Asked Questions
How do I check my WordPress site speed?
Use Google PageSpeed Insights for both lab and real-user data, and WebPageTest for a detailed waterfall analysis. Run tests on your most important pages – homepage, product/service pages, and top blog posts. Test mobile and desktop separately.
What slows down a WordPress site the most?
The most common culprits are: slow hosting (high TTFB), unoptimized images (especially above the fold), render-blocking JavaScript and CSS, too many poorly-coded plugins, and no caching configured. In most cases, fixing just two or three of these will produce a significant improvement.
How fast should a WordPress site load?
For Core Web Vitals, aim for LCP under 2.5 seconds, INP under 200ms, and CLS under 0.1. For overall load time, under 3 seconds on mobile is a solid target. A Lighthouse Performance score of 90+ is considered “Good” – for mobile, 75+ is a realistic competitive target. Focus on Core Web Vitals over raw load time – they’re what Google actually measures.
Does the number of plugins affect WordPress speed?
Yes, but the number alone isn’t the issue – it’s what each plugin loads and where. A site with 30 well-coded plugins can outperform one with 8 bloated ones. For example, Amelia is a WordPress booking and appointment plugin that loads its scripts only on pages where booking functionality is active – so it doesn’t add overhead to the rest of your site. The key is making sure each plugin only loads its scripts on pages that actually use it, and that no two plugins duplicate the same functionality.
Which is the best caching plugin for WordPress?
It depends on your setup. WP Rocket is the most beginner-friendly and works everywhere. LiteSpeed Cache is the best free option if your host uses LiteSpeed Web Server. NitroPack has the highest real-world Core Web Vitals pass rate and handles optimization automatically. Avoid running more than one caching plugin at a time.
What’s the difference between Lighthouse scores and Core Web Vitals?
Lighthouse (lab data) simulates performance in a controlled environment – it’s useful for testing and development. Core Web Vitals (field data) are collected from real Chrome users and represent actual performance on real devices and connections. Google uses field data for ranking. Both are important, but field data is the one to optimize for if you’re prioritizing SEO impact.
Do I need a CDN for my WordPress site?
If your audience is geographically concentrated near your server, the impact is smaller. But if you have visitors from multiple regions, a CDN meaningfully reduces load time by serving assets from a location closer to each user. Cloudflare is free and easy to set up. Many managed WordPress hosts include CDN. For image-heavy sites, a CDN almost always pays off.
References

Explore topics

Read Inspiring Customer Stories
Check out how our user set Amelia for his business