
All businesses need booking systems to manage their appointments, primarily when your business relies on multiple appointments. Appointment booking plugins use booking management systems in conjunction with WordPress sites, and Booknetic is a great example.
Booknetic is an online booking system that works for any number of businesses. From hotels to dancing classes, Booknetic can work for you.
Choosing whether Booknetic is best for you isn’t as easy as looking at features or ratings on the internet. The real questions you need to answer are: do they support what you need, do they support your existing tools, and are the pricing details within your budget?
The truth of the matter is that Booknetic is not the best choice for everyone. Booknetic is not perfectly suited to all businesses, and they have some flaws.
Users mainly complain about the following problems:
- One of the largest problems users find is the lack of customization options with the built-in interface. Of course, if you find that the preset options are all you need, good on you. If, on the other hand, you are the type of developer that likes to work with all of the other tool types or accessories, Booknetic may not be the best option.
- Many Booknetic users find that the support, although responsive, is not necessarily helpful.
- Booknetic pricing begins with a $79.00 one-time payment, with no free version. For many users, this can be a big problem. If you want to first try out some of Booknetic’s options before buying, then it may not be for you.
Is There Something Better?
Amelia can be a great easy-to-use option for booking appointments. It includes many important features, such as image galleries, support for multiple employees, local currencies, service extras, coupons, and color options for all of your frontend designs.
Many Amelia users, as well as many WordPress plugin reviewers, agree that this is a near-perfect WordPress appointment booking plugin. Customer satisfaction is also near-guaranteed with the dynamic calendar features and unique booking wizard for finding specific appointment times.
Do your customers want to pay online? They can use Amelia’s built-in payment gateways.
Using the Amelia plugin, you can send email and SMS messages to both employees and customers about their appointments. The plugin supports many languages that use RTL writing, which is an added benefit.
Amelia is very well suited to deal with unlimited amounts of employees, individual working hours, locations, and services. One of the best parts of Amelia is that it cares for all of its users equally. Employees, admins, and clients all have multiple tools at their disposal; everyone is attended to.
Employees can have personal accounts to manage their bookings themselves, if they so choose. This feature gives the plugin a sense of cohesion for the entire business; no matter what rung of the ladder you sit on, you will still have options.
Clients can also access their appointments using the frontend customer data area. Stripe and Paypal payments are available immediately by default, but if you want more, WooCommerce is also available.
Amelia is limited by little and is a perfect WordPress appointment booking plugin for any business.
Amelia is even a great choice for anyone who doesn’t have experience in WordPress. Amelia has a very beginner-friendly interface, which can make managing appointments easy.
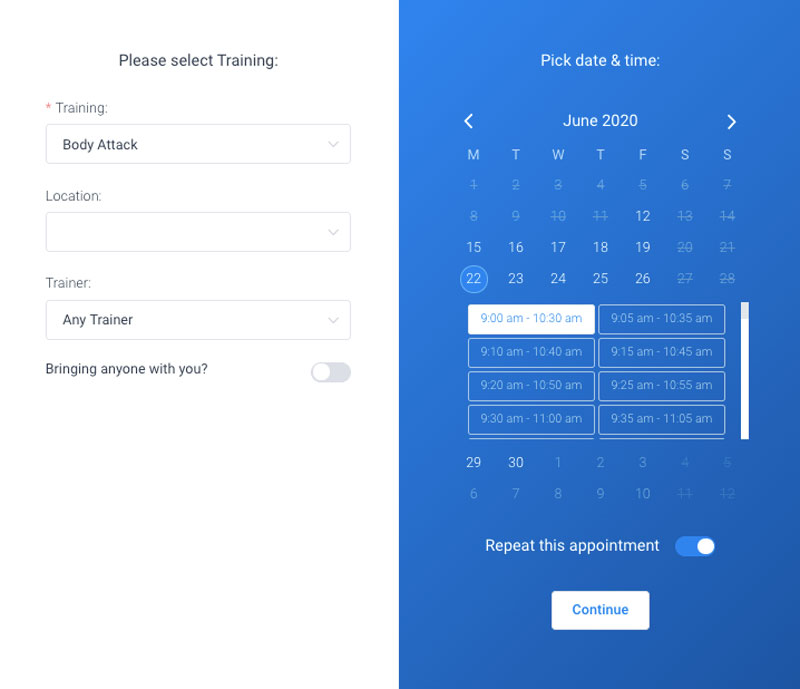
Amelia also has an appointment booking wizard that helps simplify the process of booking an appointment for your customers. If you decide to add one of these booking forms to your WordPress site, you will need to add some of Amelia’s shortcodes to some pages of your website. To do this, you can use a page builder such as Elementor, Gutenberg, Divi Page Builder, and Classic Editor.
Amelia has a whole bunch of great features, so the following is a list of a few of the most important.
Recurring Appointments
Recurring appointments allow customers to schedule appointments that repeat on a certain date or time every week, month, or year. This can allow customers to skip the hassle of scheduling the same appointment over and over again.
Discount Coupons
You can add coupons using the tab found on the Finance list. It allows you to give your customers cash or percentage discounts for events they have booked.
Coupons have brought in clients for years, so why shouldn’t they be used for online bookings as well?
Special Days
This important feature enables you to set different working hours or services on certain days.
This can be great for days for which you need to set longer or shorter working hours or for when you offer specific services on certain days. Once the day is set, it will override all employees working hours or services for the days set.
Zoom Integration

With meetings today being held almost exclusively electronically, Zoom integration is a must to keep up with the times.
Amelia is designed to let you arrange and manage all of your Zoom meetings and keep scheduled appointments recorded for future use.
Calendar View
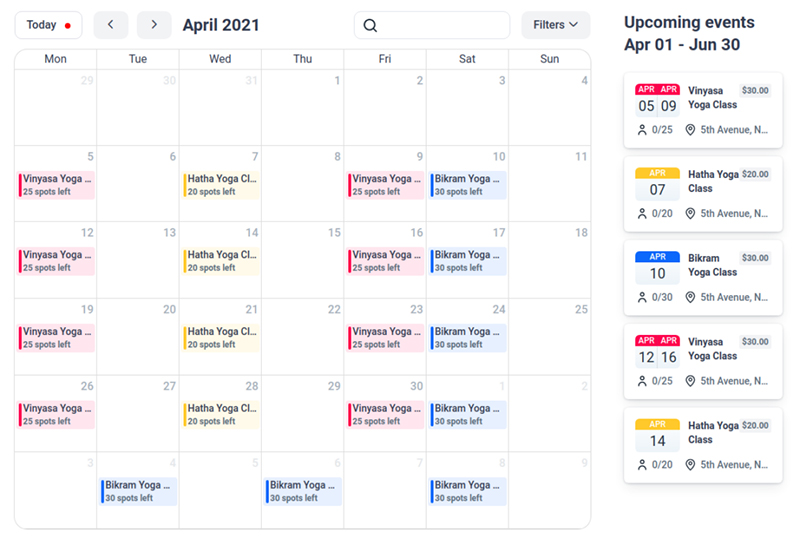
Amelia includes a user-friendly scheduler in their Calendar tab. This displays a calendar of all reservations, planned appointments, and activities arranged.
Using one of the many other features available, you can set up custom fields to help identify key data faster.
Group Appointments
Group Appointments enable multiple clients to book an employee’s service.
This can be useful for many businesses; when it is needed it can be a lifesaver. Your customers will be able to book online appointments in this way after you have set up your staff and services.
Multiple Locations
Having multiple locations for your business is a big accomplishment, and your appointment scheduling plugin should allow you to make use of such accomplishments. Amelia allows your company to select multiple locations while allowing customers to choose which location is more convenient for them. If you only have one location, don’t worry. You can
- Add the location to your appointment booking system anyways
- Leave the page empty and share the location of your business in another way
Google Calendar Synchronization
Employees can coordinate their schedule with Google Calendar using Google Synchronization.
This allows any WordPress appointment to be added to their personal Google Calendar. This also allows customers to connect their appointments using the appointment booking system with Google Calendar, which is a definite plus.
WooCommerce Integration
WooCommerce integration is one of Amelia’s key features, and it allows you to use any of their payment gateways, including taxing your services, and sending invoices.
You do need a WooCommerce product to be able to link WooCommerce to your Amelia booking plugin, but if you do, it can fully automate much of your work for you.
Is There an Alternative Appointment Booking Plugin to Booknetic?
Yes. Picking the best appointment scheduling plugin for you will be essential for your business to succeed. This article has been aimed to help you find the best alternative to Booknetic, Amelia.
And now, Amelia has been updated to 5.0. This is a Brand New Version.
The new booking forms come with the following features:
- Improved conversion rates
- Improved loading speeds
- Simple customization pages
- Better summaries of the finished bookings
- Larger calendar with both available and unavailable time slots
- Modern design
- Category selection
- Improved UI for the booking packages
- Sidebars for easy tracking of the booking process
- Contact Us option
Smooth and animated transitions
If you enjoyed reading this article about Booknetic, you should check out this one about the best group scheduling apps.
We also wrote about a few related subjects like important features that an appointment booking app should have, photography booking apps, double booking appointments, best appointment scheduling software, top appointment reminder apps, and WordPress booking theme examples.
There is no better feeling than when clients book appointments online, no matter your business. And a great way to get more of these coveted bookings and more leads is to add a book now button to your website.
How to Create Private Events in WordPress
Amelia is a fantastic way to create and display events in WordPress. But what do you do if you want to restrict access to any or all of your events? In other words, how to create private events in WordPress so only certain people can view and book them?
The solution is to use Amelia with the Password Protected Categories plugin by Barn2. Password Protected Categories is an easy-to-use plugin that lets you make events private. This means you can restrict access to events so only authorized people can see them.
In this tutorial, we’ll show you step-by-step how to create private events in WordPress using Amelia with the Password Protected Categories plugin.
Why Create Private Events?
If you’re looking for a way to organize an event that only pre-approved attendees can access, you’ll need a way to create private events. These are events that only certain types of users can make bookings for.
Let’s take a look at some examples of why you might want to create private events:
- Staff-only events. Companies might want to host an event for board members and staff members only. The easiest way to do this is by setting up a private event in WordPress. Corporate events, workshops, training sessions, and seminars are examples of staff-only events.
- Members-only events. Membership site owners might need a way to accept bookings for members-only events. By creating a private event, they can let authorized members register for the event.
- Training events. Businesses that organize training workshops for new hires can set up private events on their website. They can list the different training workshops in a password-protected events category and grant access to the new hires.
Depending on your specific use case, you can create private events that are:
Shown publicly on your event website but only authorized users can access them.
Hidden from public view on your website.
The good news is that you can create both types of private events using the Password Protected Categories plugin with Amelia.
How to Create Private Events Using Amelia
Here, we’ll show you step-by-step how to create private events in WordPress using Amelia with the Password Protected Categories plugin.
The plugin lets you hide or password-protect categories in WordPress. You can use it with Amelia to restrict access to events simply by hiding or password-protecting event categories. It’s the easiest way to create private events in WordPress.
Password Protected Categories come with 3 options for restricting access to the category:
- Password protection – Use this if you don’t want the people who book your events to have individual user accounts on your WordPress events site.
- User role protection – Use this if the people booking your events have an account on your site. (Tip: You can use the free User Role Editor plugin to create a dedicated user role for your event attendees. That keeps them separate from the standard WordPress user roles such as Subscribers.)
- User protection – For even more fine-grained protection, you can choose which individual users on your website will access the category.
You can mix and match the above options as needed.
For this tutorial, we’ll assume you already have the Amelia plugin set up on your WordPress site and added some events.
Step #1: Install Password Protected Categories
Get the Password Protected Categories plugin. You’ll receive the plugin files along with a license key in a confirmation email.
Log into your WordPress site and install and activate the plugin. Then, go to Settings → Protected Categories and enter your license key to start using the plugin (or do it in the setup wizard).
Click the Save Changes button.
Step #2: Create Events Using Amelia
If you haven’t done so already, create events in WordPress using Amelia. Here’s how:
Head over to Amelia → Events from the WordPress admin panel and click the + New Event button. Fill out the event details and pricing information.
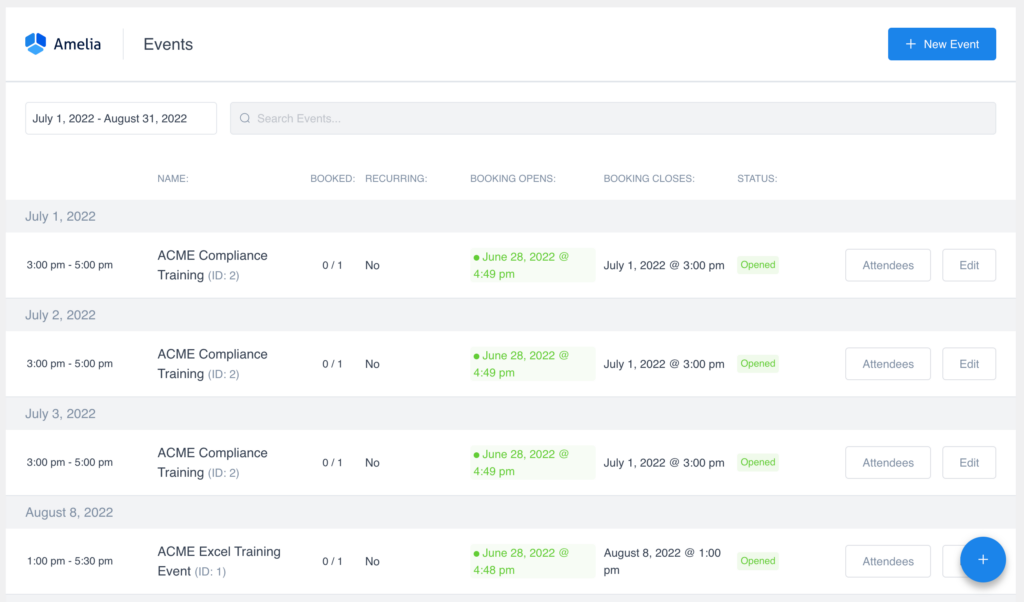
Once that’s done, click the Save button to continue.
![]()
Step #3: Create Event Categories
Next, we’ll use the free Pages with category and tag plugin to create categories for pages in WordPress. Once that’s done, we’ll create event categories, add the event shortcodes to our pages, and structure them into the event categories.
To do this, install the Pages with category and tag plugin and activate it. Next, go to Pages → Categories and create a new event category. The categories you create will depend on how you want to restrict access to events.
There are two main ways you can use Password Protected Categories with Amelia:
- Restrict access to all events.
- Restrict access to specific events.
Method #1: Restrict Access to All Events
If you want to make all events private, you can create a new events category (or sub-category) and structure all events into this category. For example, you might call it Private Events or Members Only Events.
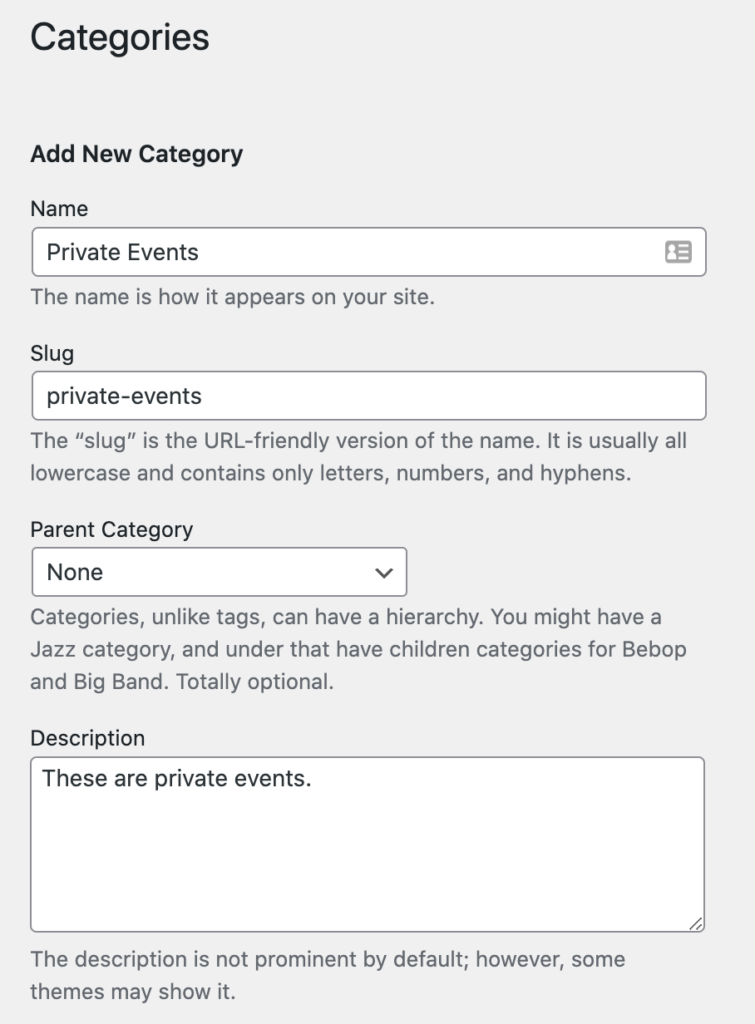
Once that’s done, all you have to do is use one of the protection options the Password Protected Categories plugin gives you to restrict access to all events in the main category. For example, if you want to password protect events, you’d tick the radio box next to the Protected option under Visibility and then enter a password.
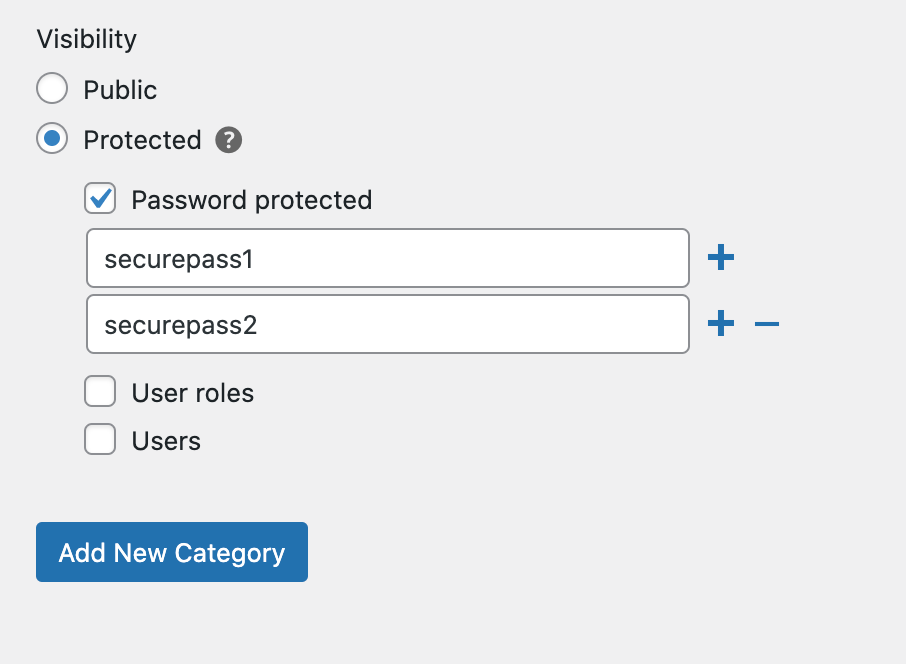
The Password Protected Categories plugin lets you enter multiple passwords, as well. This makes it easier to manage user access to events.
Click the Add New Category button to continue.
Method #2: Restrict Access to Specific Events
If you have a few different events that you want to restrict access to, you can use Password Protected Categories with Amelia to hide specific event categories only. For example, you might want to make all Training Events private.
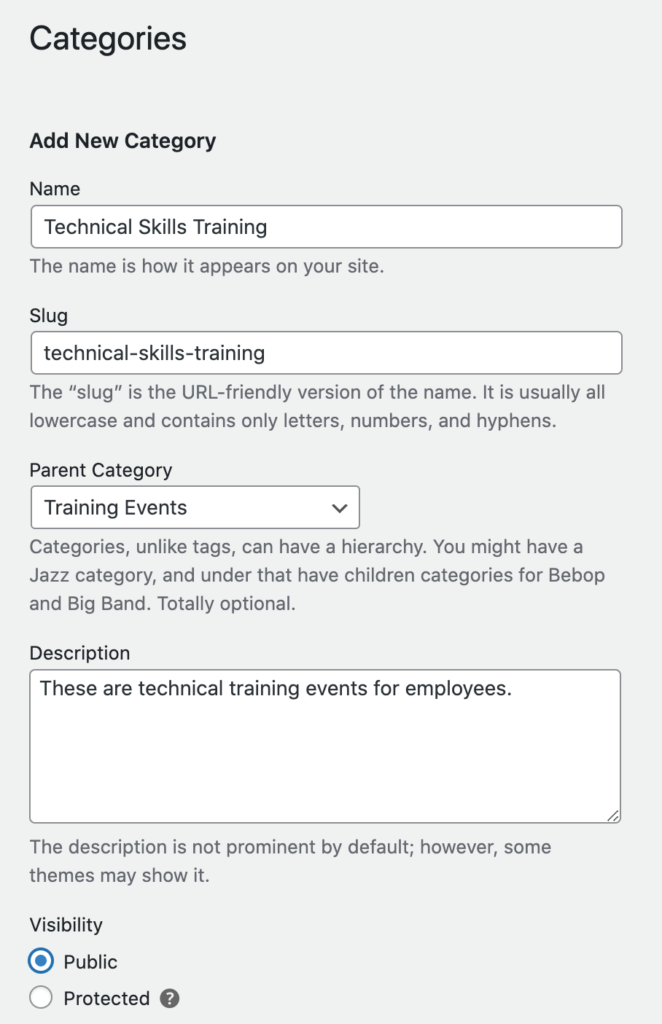
This will automatically make events in any sub-categories private too. So, if you have sub-categories called Onboarding Training, Technical Skills Training, and Compliance Training, all events structured under these sub-categories of Training Events will also be protected.
We’ll use both the Password protected and User roles options to restrict access to these types of events. This way, all Amelia Employees can access the events, and so can anyone else who has the correct password.
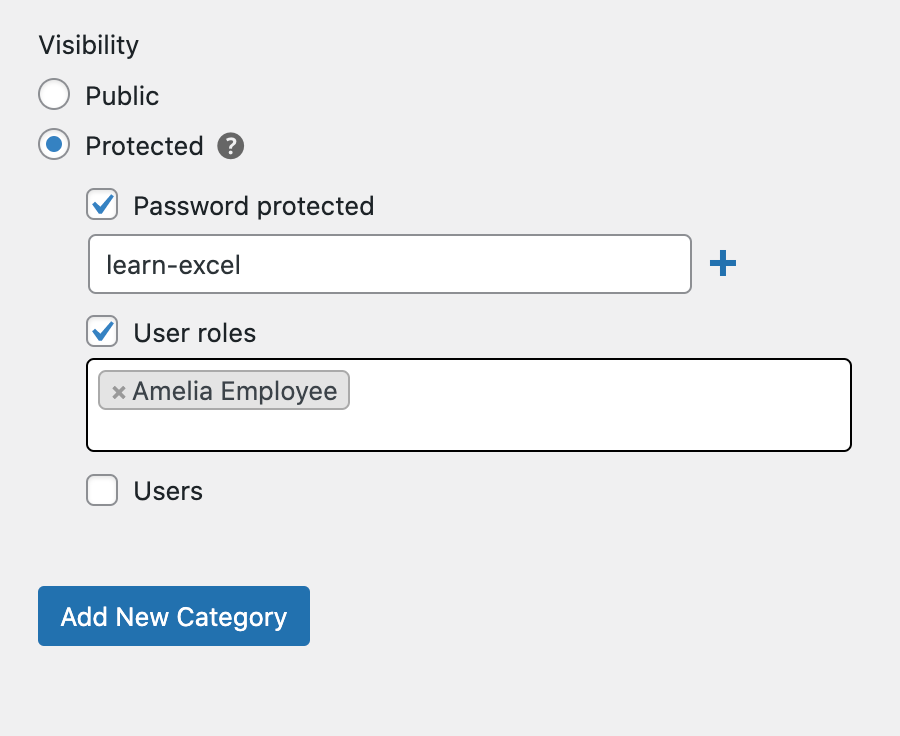
Click the Add New Category button to continue.
Step #4: Display the Private Events on Your Website
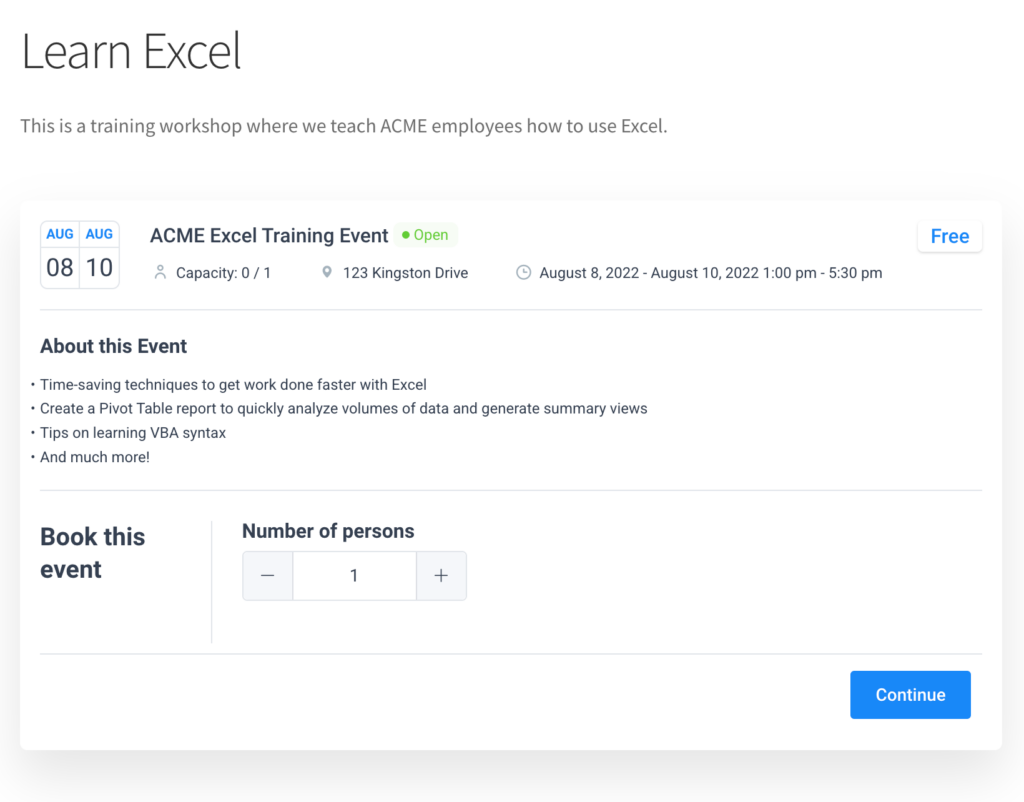
To display the private events in WordPress, start by creating a new page. Give the page a suitable title such as Learn Excel.
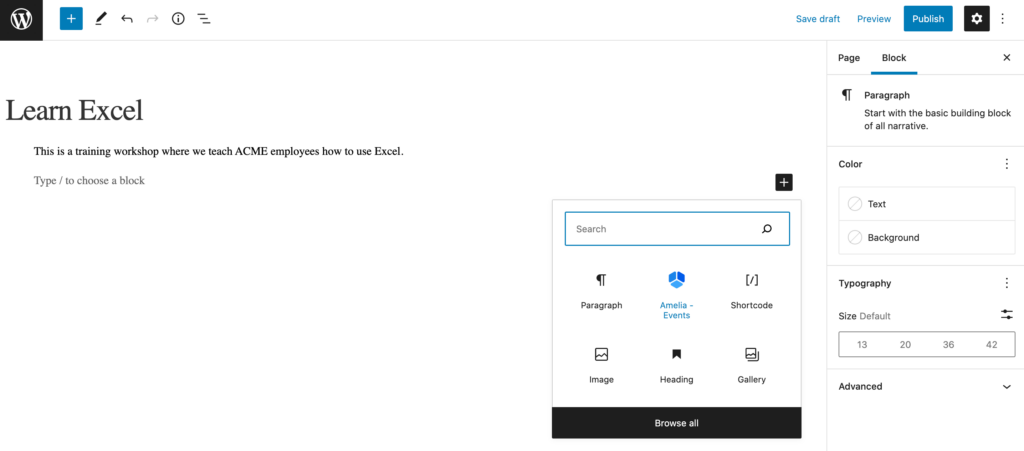
Add the Amelia – Events shortcode to the page and toggle the Preselect Booking Parameters option. Next, use the Select Event dropdown to choose the event you want to display on the page.
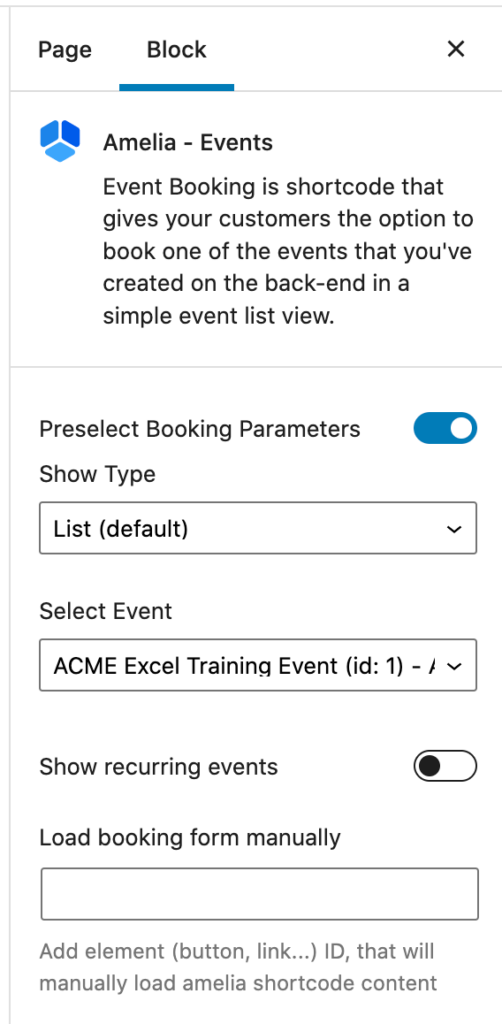
Finally, use the Categories option to structure the event into suitable categories. Following our example from above, we’ll categorize this under Technical Skills Training.
Click the Publish button to continue.
The event page will look something like this on the front end:
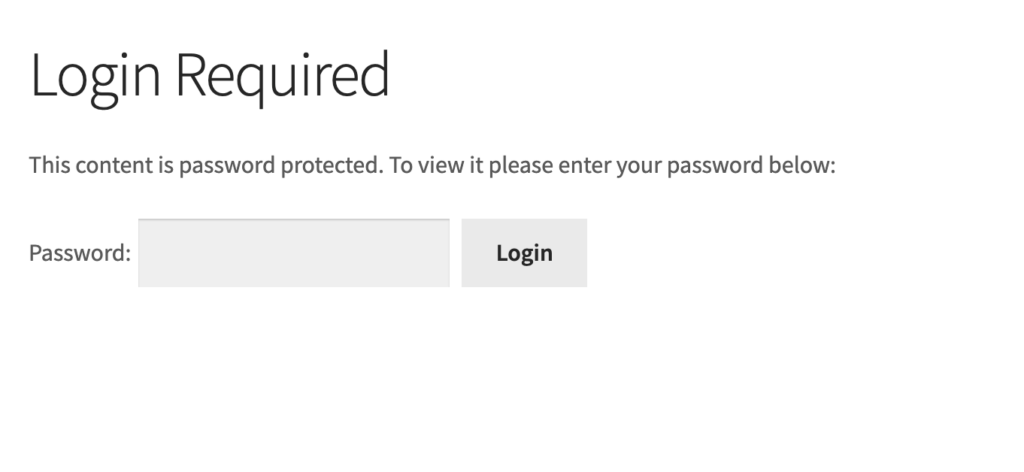
When the user enters the correct password, they’ll see the event details and booking options. It will look something like this:
How to List Events Publicly but Restrict Who Can Make Bookings
So far, we’ve assumed that you want to completely hide events from public view. However, you might want to display events publicly on your website but require people to enter a password to make a booking.
For this, you can use Password Protected Categories’ visibility options to display private events publicly while still requiring authorized users to enter the event category password or login to their user account to access the single event page or make a booking.
Here’s how:
Go to Settings → Protected Categories from the WordPress admin panel. On the plugin’s settings page, you’ll see the Show protected categories? option. Tick the checkbox next to it and then click the Save Changes button at the bottom of the screen to continue.
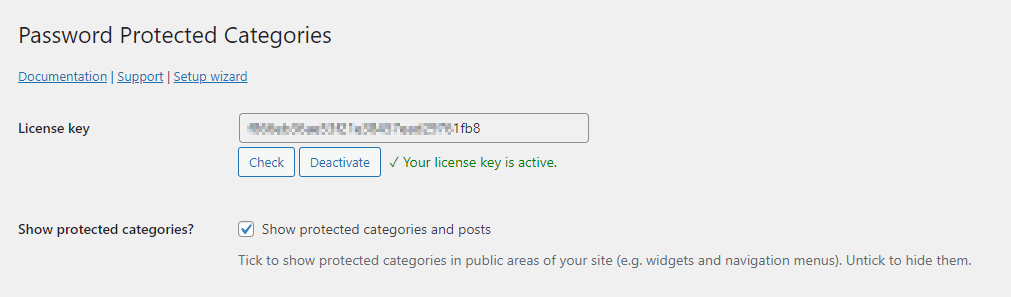
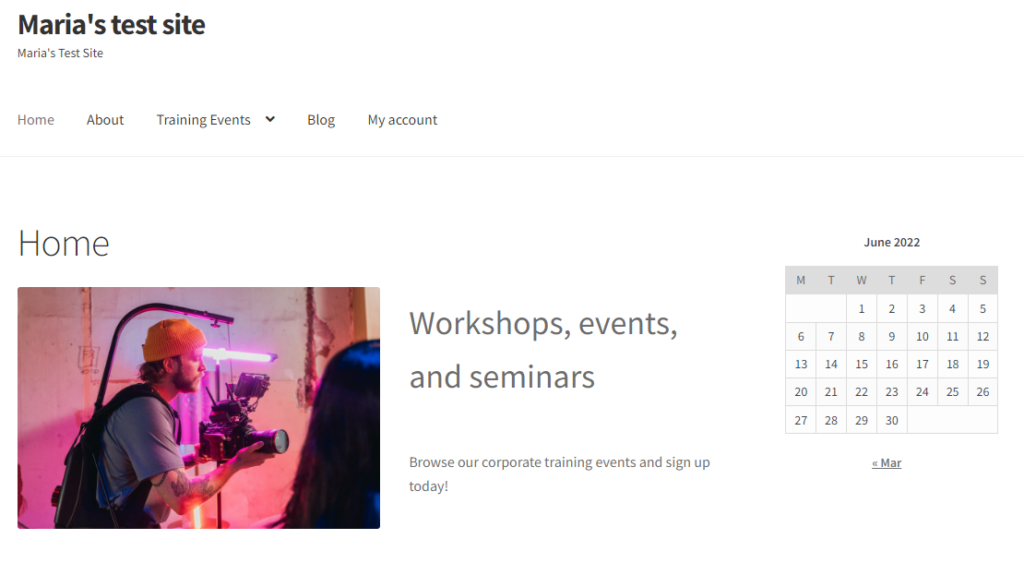
This will show the protected event categories in public areas of your site including navigation menus and widgets. The benefit of this is that site visitors will be able to discover your events.
Once they click on the event page, they’ll need to enter the correct password to make their booking.
Create Private Events in WordPress Today!
Using Password Protected Categories with Amelia, you can easily create private events in WordPress. It gives you the option to create private events that are hidden from the public-facing site or display them on the website while still requiring users to enter the event password to view event details or make a booking.
You can restrict access to private events by password-protecting them or by preventing specific users or user roles from accessing the events. The Password Protected Categories plugin lets you set up multiple passwords per event category which makes it easy to grant and revoke access to private events.
Get Amelia today to create events in WordPress and use Password Protected Categories to make them private in a few simple steps.