With accelerated digitalization providing us with so many ways to connect, each individual selects at least one preferred communication channel. WhatsApp is one of the most popular among them. Within the latest update, the Amelia team worked on WhatsApp integration. We wanted to give you the ability to send notifications to your clients through this app. This feature comes in handy as numerous people check their WhatsApp notifications more frequently than SMS or email. As a result, it’s reasonable to expect that many of you will benefit from this integration.
Although this is the main feature of the Amelia 5.2 update, it’s not the only one. We have implemented a few other options, stability improvements, and some bug fixes.
How to Set up the WhatsApp Integration?
Because WhatsApp is part of the Meta family, you must log in to your Facebook Developer Account to make this integration work. You can use a personal account or the account of your company. If you don’t already have one, you’ll need to consider creating it. But if you already have a Facebook Developer Account, you can skip the account creation step and proceed directly to App Creation. For those of you who prefer documentation over blog posts, you can find the entire procedure here. Additionally, if you’re looking to integrate a virtual phone number for WhatsApp, ensure to follow the specific guidelines provided by WhatsApp and Meta for seamless integration.
Creating Developer Account
If you’re creating a new developer account, you’ll need to log in after you’ve created it. You’ll be logging into Facebook because WhatsApp is now part of the Meta family. After you agree to Facebook’s Terms and Developer Policies, you’ll be redirected to account and email verification. After completing registration, you can move on to App Creation.
App Creation
You’ll want to select the “Business” app type because you’ll use WhatsApp for business purposes. In the basic information section, enter the display name of your app. It’s editable, so you can make changes later if needed. The email address is automatically added, and the Business Account is optional. To proceed, create an app, enter a password, and submit.
Set WhatsApp and get started with WhatsApp API
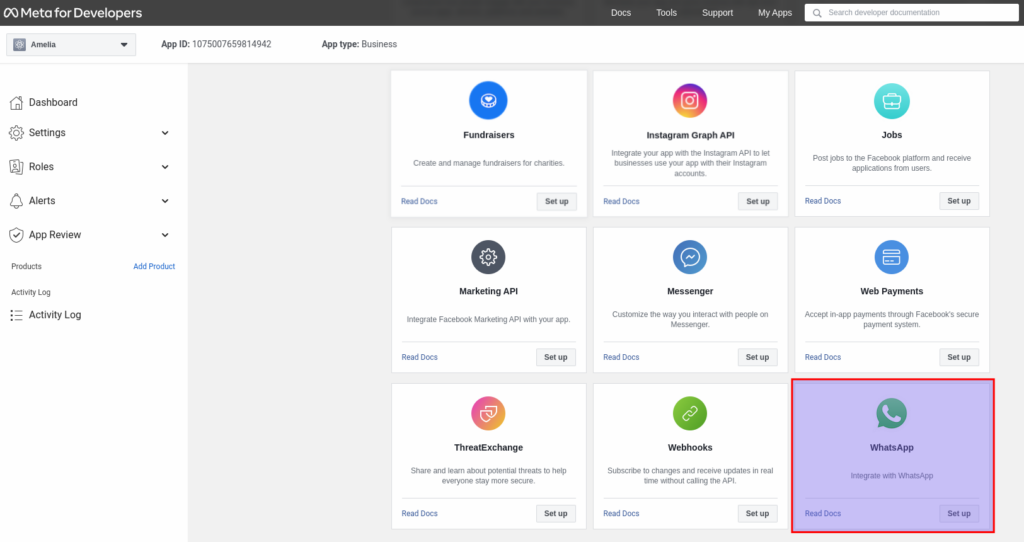
Scroll to the bottom of the page, select WhatsApp card, and then click Set up. You agree to the Facebook Terms for WhatsApp Business and the Meta Hosting Terms for Cloud API by clicking Continue on the showing pop-up. Following testing and configuration, the next step is to create templates, which comes after adjusting the WhatsApp settings in Amelia. The detailed procedure can be found here.
WhatsApp Settings in Amelia
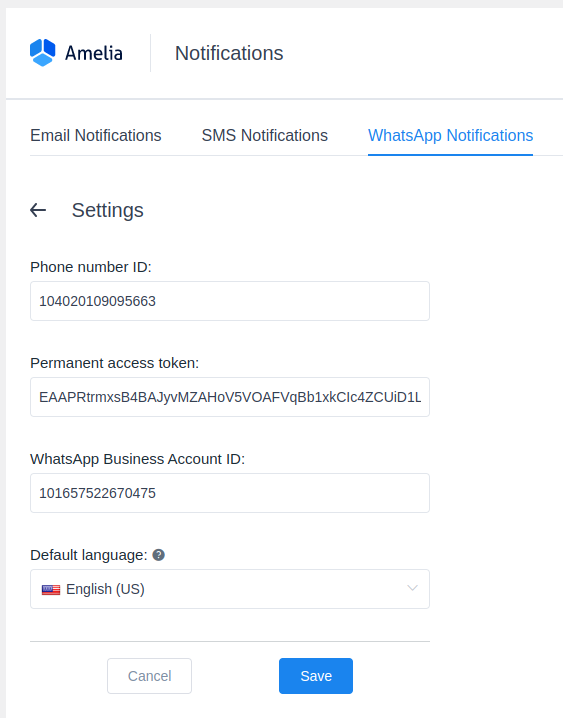
Return to the WordPress site after receiving a permanent token in Facebook for Developers by following the steps outlined in the documentation. Under Amelia > Notifications, select “WhatsApp Notifications”. Configure and start creating templates. Creating WhatsApp templates is similar to creating SMS and. Email notifications. The only distinction is that you can’t configure WhatsApp templates in Amelia. You can create them on your Business Settings Page.
Creating Templates
There are certain rules you need to follow to meet WhatsApp Criteria. WhatsApp doesn’t accept line breaks, TAB, and 4 spaces put together, so avoid using them in the template. You can add new languages after you’ve created and submitted the template. You’ll be notified if you forget to add the additional language template, which is very useful. WhatsApp will review each template you create, and approval usually takes an hour. In an approved template, a green circle indicator will appear next to the language, whereas a blank circle indicator will appear in a pending template.
After refreshing the page, return to Amelia > Notifications > WhatsApp Notifications and select the “Template name” drop-down to see a list of all templates created in the app (both approved and pending ones). Continue linking variables to placeholders by selecting the template you want to link to the Amelia template you clicked on (or created). Save your template once you’ve finished linking the variables to placeholders. Now you can test your messages!
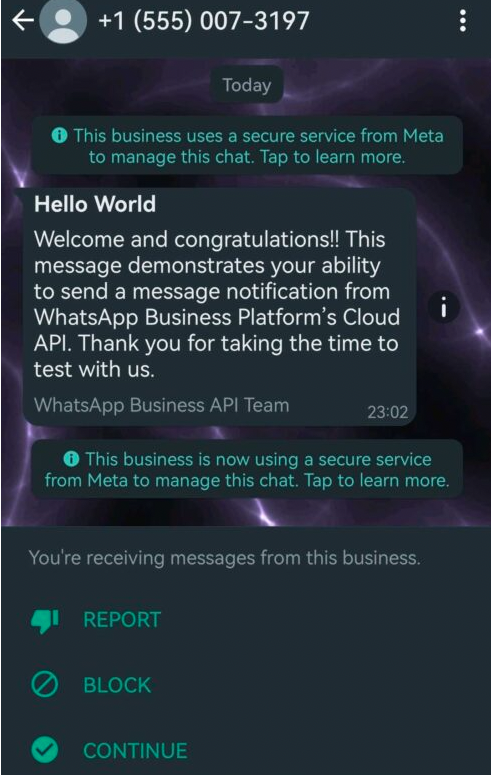
Note: WhatsApp integration is available within the Pro and Developer licenses.
What else is new?
Aside from the main feature of the Amelia 5.2 update, WhatsApp integration, there are a few other improvements worth mentioning.
The Minimum of Attendees for Booking the Event
This option allows you to specify whether the event will be closed to new bookings once the minimum booking or number of attendees is reached – regardless of the maximum capacity set. This setting option is quite useful for those of you who hold private events like classes or training.
Difference between bookings and attendees’ minimum setting:
- When the booking minimum is set to one, the event ends as soon as the first person books. However, that person will be able to select X people, up to the maximum capacity, ensuring that no one else (e.g. strangers) can book the same event.
- When a minimum of one attendee is chosen, the event closes after the first person books, but adding anyone else is not possible.
Booking Without the Login to BuddyBoss
For those of you who use BuddyBoss, we have included a new significant option. Now your clients can book appointments without the need to log into BuddyBoss, which was previously required.
Conclusion
This update included some intriguing new features. Not to mention numerous stability improvements and bug fixes. All you have to do now is seize them in order to take your business to the next level.
However, we continue to work on upgrading your fav booking plugin, so in the next series of upgrades, you may anticipate Custom Duration, Multiple Locations in Working Periods, Resources, and Catalogs.
With Custom Duration, the admin may set multiple durations and prices for each service, so that when booking, the customer can pick whatever duration he wants and, based on that, choose the day and time of the appointment.
With Multiple Locations in Working Periods, you will be able to add more locations in one generated time. When it comes to group appointments, the employee will be able to be booked only at that location for that period, but during subsequent periods, clients will be able to pick any of the sites introduced during that period.
When we implement Resources, admins will be able to create resources visible only on the back-end. This will be able to set the resource quantity, and which services, employees, and locations are connected with which resources. When a resource is depleted for a certain time slot, that time slot becomes unavailable.
In addition, we intend to completely revamp the Catalog Booking Form.
Keep tuned…
