Amelia is a fantastic way to create and display events in WordPress. But what do you do if you want to restrict access to any or all of your events? In other words, how to create private events in WordPress so only certain people can view and book them?
The solution is to use Amelia with the Password Protected Categories plugin by Barn2. Password Protected Categories is an easy-to-use plugin that lets you make events private. This means you can restrict access to events so only authorized people can see them.
In this tutorial, we’ll show you step-by-step how to create private events in WordPress using Amelia with the Password Protected Categories plugin.
Why Create Private Events?
If you’re looking for a way to organize an event that only pre-approved attendees can access, you’ll need a way to create private events. These are events that only certain types of users can make bookings for.
Let’s take a look at some examples of why you might want to create private events:
- Staff-only events. Companies might want to host an event for board members and staff members only. The easiest way to do this is by setting up a private event in WordPress. Corporate events, workshops, training sessions, and seminars are examples of staff-only events.
- Members-only events. Membership site owners might need a way to accept bookings for members-only events. By creating a private event, they can let authorized members register for the event.
- Training events. Businesses that organize training workshops for new hires can set up private events on their website. They can list the different training workshops in a password-protected events category and grant access to the new hires.
Depending on your specific use case, you can create private events that are:
Shown publicly on your event website but only authorized users can access them.
Hidden from public view on your website.
The good news is that you can create both types of private events using the Password Protected Categories plugin with Amelia.
How to Create Private Events Using Amelia
Here, we’ll show you step-by-step how to create private events in WordPress using Amelia with the Password Protected Categories plugin.
The plugin lets you hide or password-protect categories in WordPress. You can use it with Amelia to restrict access to events simply by hiding or password-protecting event categories. It’s the easiest way to create private events in WordPress.
Password Protected Categories come with 3 options for restricting access to the category:
- Password protection – Use this if you don’t want the people who book your events to have individual user accounts on your WordPress events site.
- User role protection – Use this if the people booking your events have an account on your site. (Tip: You can use the free User Role Editor plugin to create a dedicated user role for your event attendees. That keeps them separate from the standard WordPress user roles such as Subscribers.)
- User protection – For even more fine-grained protection, you can choose which individual users on your website will access the category.
You can mix and match the above options as needed.
For this tutorial, we’ll assume you already have the Amelia plugin set up on your WordPress site and added some events.
Step #1: Install Password Protected Categories
Get the Password Protected Categories plugin. You’ll receive the plugin files along with a license key in a confirmation email.
Log into your WordPress site and install and activate the plugin. Then, go to Settings → Protected Categories and enter your license key to start using the plugin (or do it in the setup wizard).
Click the Save Changes button.
Step #2: Create Events Using Amelia
If you haven’t done so already, create events in WordPress using Amelia. Here’s how:
Head over to Amelia → Events from the WordPress admin panel and click the + New Event button. Fill out the event details and pricing information.
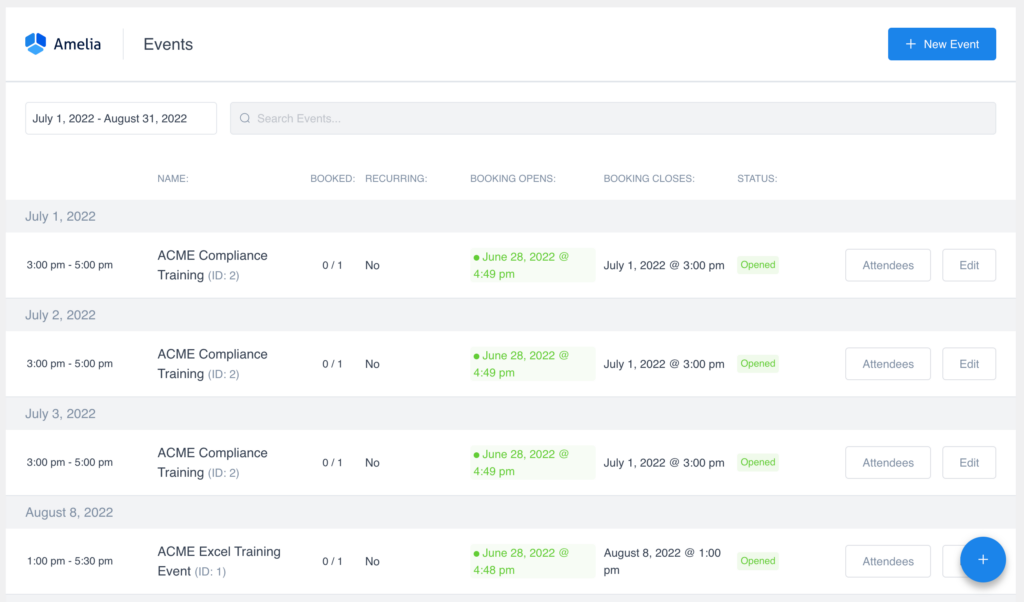
Once that’s done, click the Save button to continue.
![]()
Step #3: Create Event Categories
Next, we’ll use the free Pages with category and tag plugin to create categories for pages in WordPress. Once that’s done, we’ll create event categories, add the event shortcodes to our pages, and structure them into the event categories.
To do this, install the Pages with category and tag plugin and activate it. Next, go to Pages → Categories and create a new event category. The categories you create will depend on how you want to restrict access to events.
There are two main ways you can use Password Protected Categories with Amelia:
- Restrict access to all events.
- Restrict access to specific events.
Method #1: Restrict Access to All Events
If you want to make all events private, you can create a new events category (or sub-category) and structure all events into this category. For example, you might call it Private Events or Members Only Events.
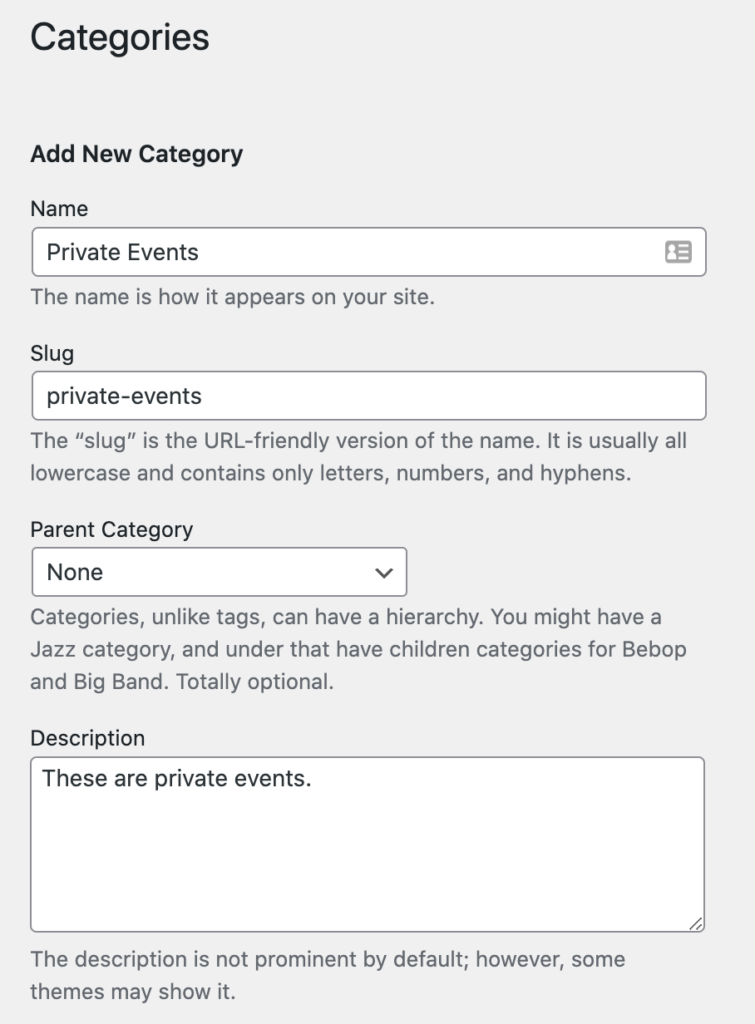
Once that’s done, all you have to do is use one of the protection options the Password Protected Categories plugin gives you to restrict access to all events in the main category. For example, if you want to password protect events, you’d tick the radio box next to the Protected option under Visibility and then enter a password.
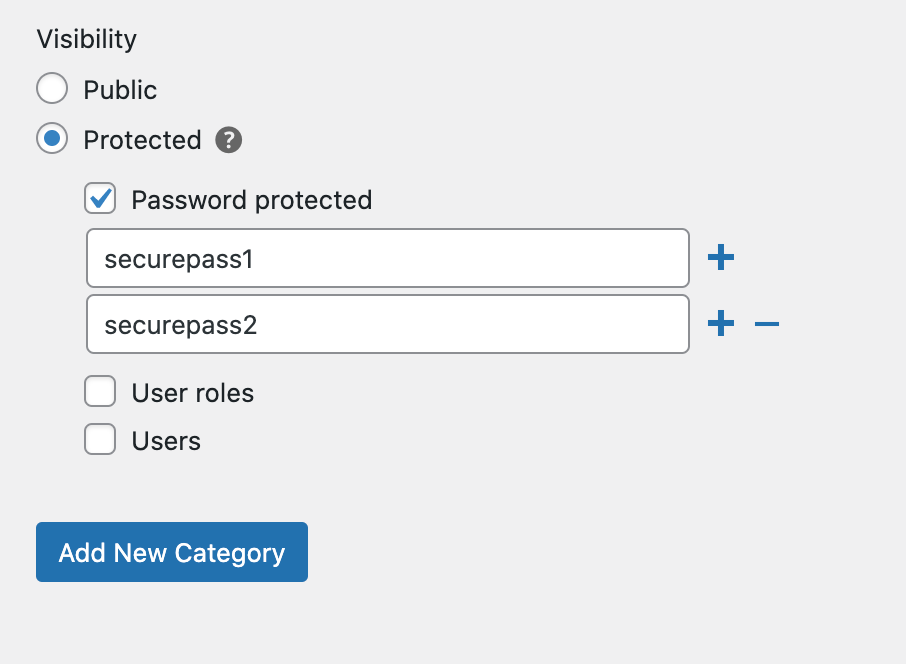
The Password Protected Categories plugin lets you enter multiple passwords, as well. This makes it easier to manage user access to events.
Click the Add New Category button to continue.
Method #2: Restrict Access to Specific Events
If you have a few different events that you want to restrict access to, you can use Password Protected Categories with Amelia to hide specific event categories only. For example, you might want to make all Training Events private.
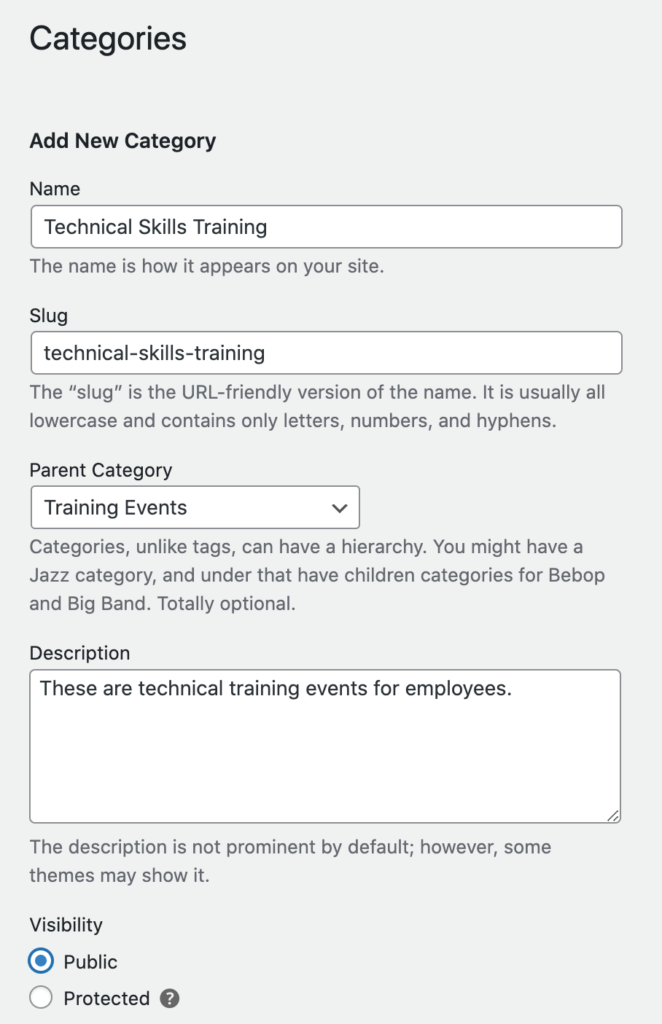
This will automatically make events in any sub-categories private too. So, if you have sub-categories called Onboarding Training, Technical Skills Training, and Compliance Training, all events structured under these sub-categories of Training Events will also be protected.
We’ll use both the Password protected and User roles options to restrict access to these types of events. This way, all Amelia Employees can access the events, and so can anyone else who has the correct password.
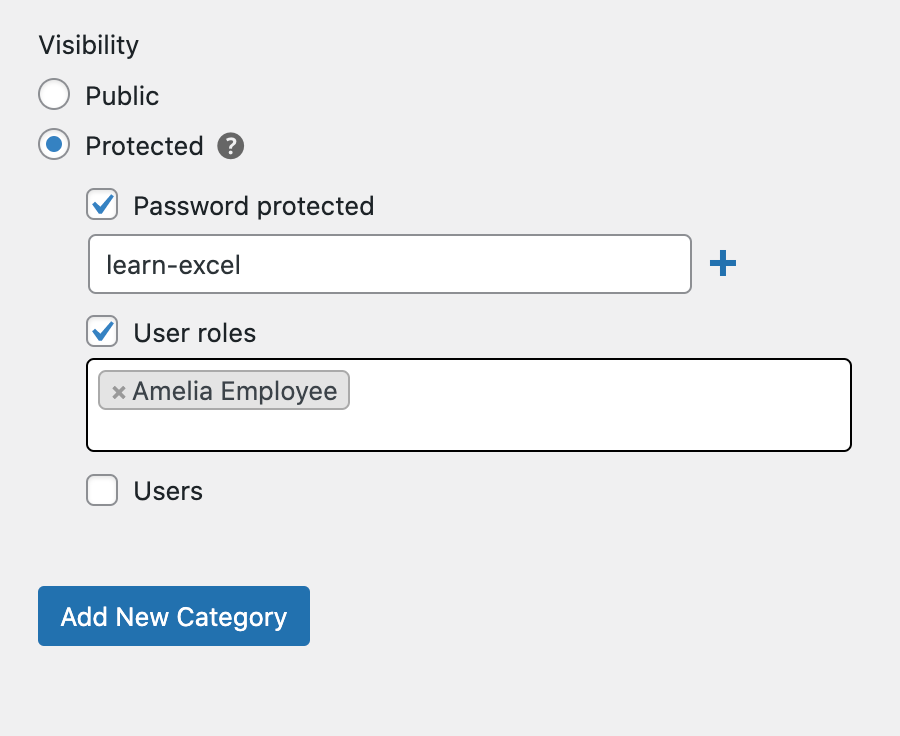
Click the Add New Category button to continue.
Step #4: Display the Private Events on Your Website
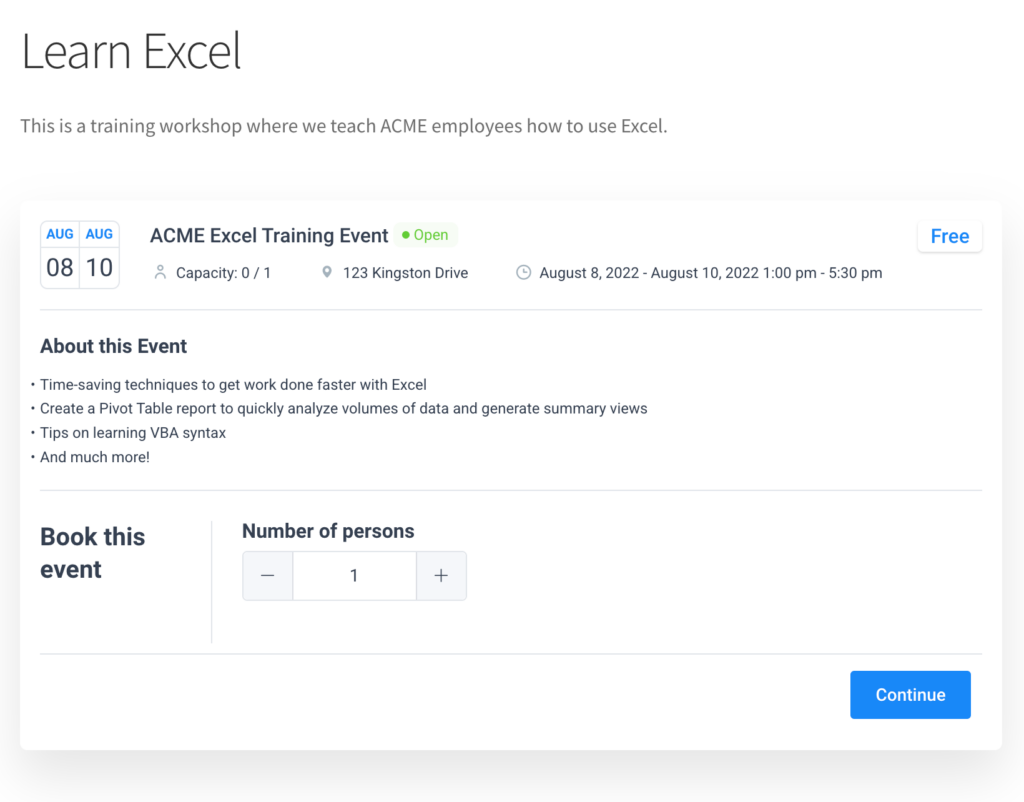
To display the private events in WordPress, start by creating a new page. Give the page a suitable title such as Learn Excel.
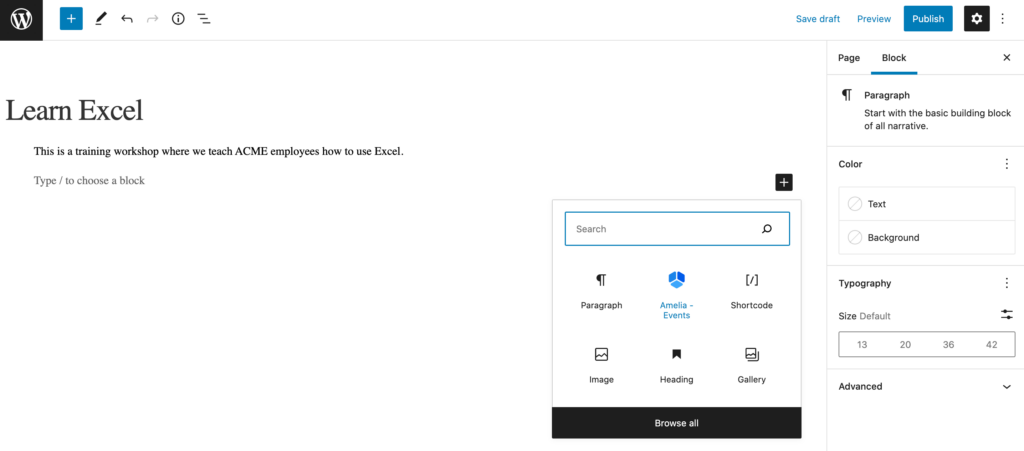
Add the Amelia – Events shortcode to the page and toggle the Preselect Booking Parameters option. Next, use the Select Event dropdown to choose the event you want to display on the page.
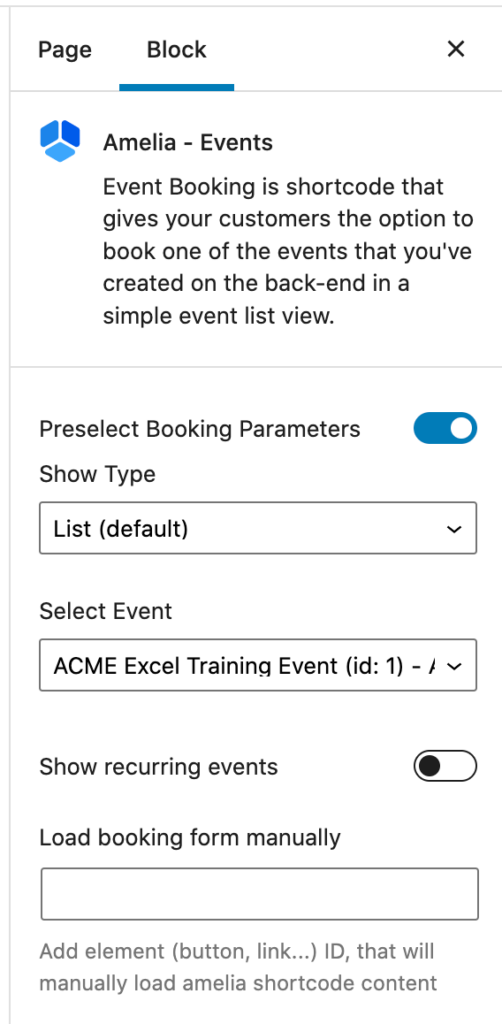
Finally, use the Categories option to structure the event into suitable categories. Following our example from above, we’ll categorize this under Technical Skills Training.
Click the Publish button to continue.
The event page will look something like this on the front end:
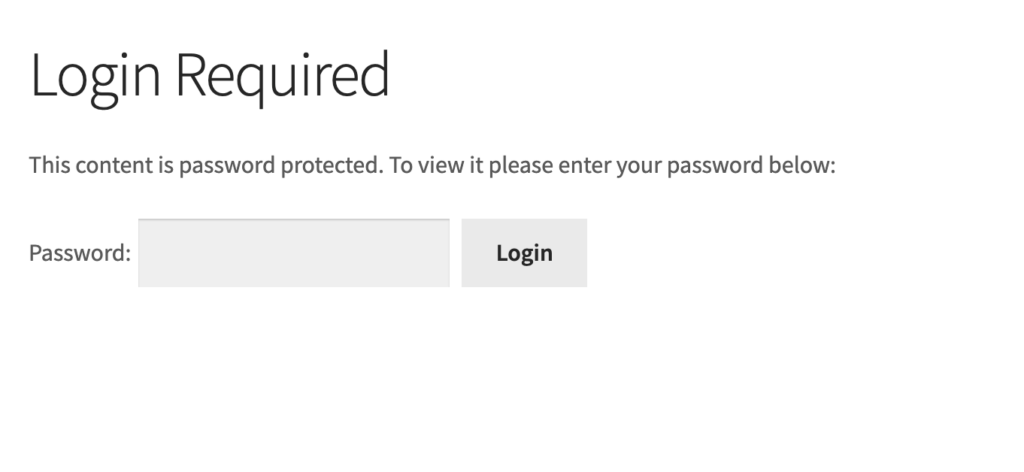
When the user enters the correct password, they’ll see the event details and booking options. It will look something like this:
How to List Events Publicly but Restrict Who Can Make Bookings
So far, we’ve assumed that you want to completely hide events from public view. However, you might want to display events publicly on your website but require people to enter a password to make a booking.
For this, you can use Password Protected Categories’ visibility options to display private events publicly while still requiring authorized users to enter the event category password or login to their user account to access the single event page or make a booking.
Here’s how:
Go to Settings → Protected Categories from the WordPress admin panel. On the plugin’s settings page, you’ll see the Show protected categories? option. Tick the checkbox next to it and then click the Save Changes button at the bottom of the screen to continue.
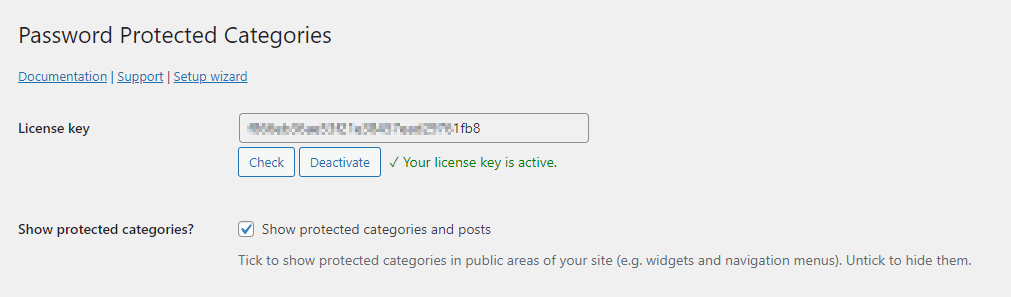
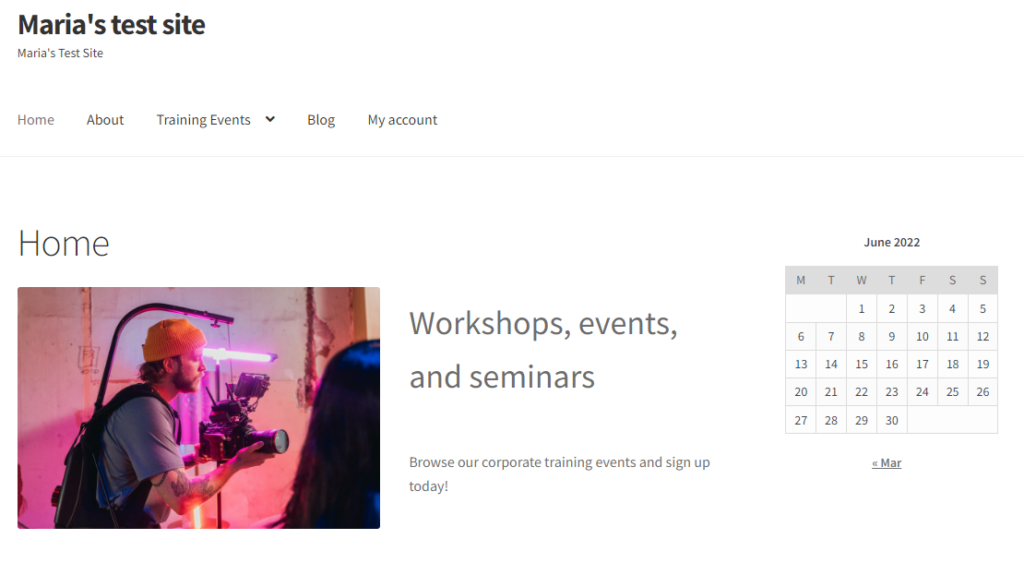
This will show the protected event categories in public areas of your site including navigation menus and widgets. The benefit of this is that site visitors will be able to discover your events.
Once they click on the event page, they’ll need to enter the correct password to make their booking.
Create Private Events in WordPress Today!
Using Password Protected Categories with Amelia, you can easily create private events in WordPress. It gives you the option to create private events that are hidden from the public-facing site or display them on the website while still requiring users to enter the event password to view event details or make a booking.
You can restrict access to private events by password-protecting them or by preventing specific users or user roles from accessing the events. The Password Protected Categories plugin lets you set up multiple passwords per event category which makes it easy to grant and revoke access to private events.
Get Amelia today to create events in WordPress and use Password Protected Categories to make them private in a few simple steps.

Explore topics
Google Calendar Vs Apple Calendar: Which One to Use
Acuity Scheduling vs Square Appointments: The Best of the Two
Introducing Amelia and IvyForms: A New Way to Collect Details Before Booking
Calendly vs. Doodle: Why One Is Better Than the Other
Per-Person Pricing vs Flat Rate Pricing: Which One Fits Your Service?

Read Inspiring Customer Stories
Check out how our user set Amelia for his business