Running a business involves many tough decisions – some big, some small. And while finances are just the tip of the iceberg, getting them right is crucial. For a business owner who handles multiple appointments a day, setting up deposit payments can be a smart way to balance financial security and customer satisfaction. Requiring a deposit not only helps secure your client’s commitment but also protects your business from no-shows.
Whether you’re running a salon, a consultancy, or an event planning service, this practice can be a game-changer in ensuring your business runs smoothly and profitably. Thankfully, if you’re using Amelia, you don’t have to worry about complicated setups or confusing processes.
In this article, we’ll show you how to set deposit payments for appointments using Amelia step-by-step so you can reduce the financial strain caused by cancellations.
Overview of Amelia’s Deposit Payment System
Managing bookings and payments can be a complex process, especially when you add your other daily tasks. This is where Amelia steps in, simplifying booking management and deposit handling.
With Amelia, you can set up deposits as a fixed amount or a percentage of the total service cost, depending on what works best for your business. This flexibility allows you to customize the payment structure for each individual service, giving you control over how and when clients pay.
Once configured, clients will see the deposit requirement clearly during the booking process, ensuring transparency from the start. They’ll be prompted to pay the deposit via integrated payment gateways like PayPal, Mollie, Razorpay, Square, or Stripe, streamlining the process for both you and the client.
Step-by-Step Guide for Setting Up Deposit Payments in Amelia
Deposit payments in Amelia are configured within every service or event. And if you are looking to add these payments to your services, here are the steps to follow:
1. Log into your WordPress Admin account.
2. From your WordPress Dashboard, choose “Amelia” and then click on “Services”.
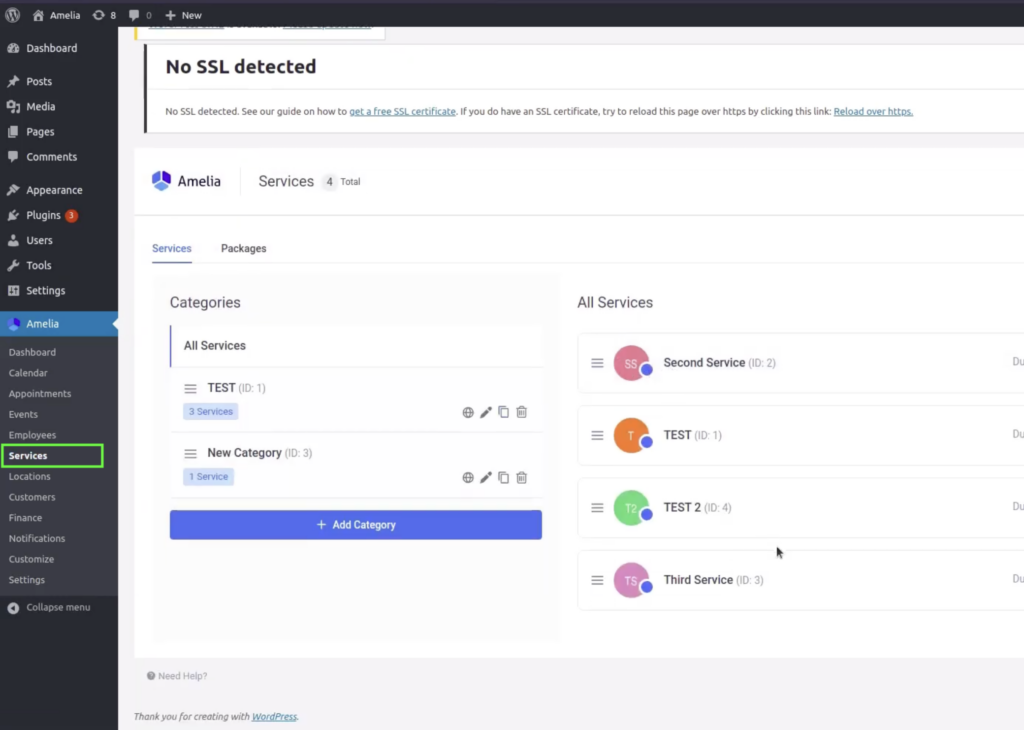
3. Here, you’ll see all the services you are offering listed. You can choose the existing service for which you want to receive deposit payments and then toggle the “Enable Deposit Payment” option.
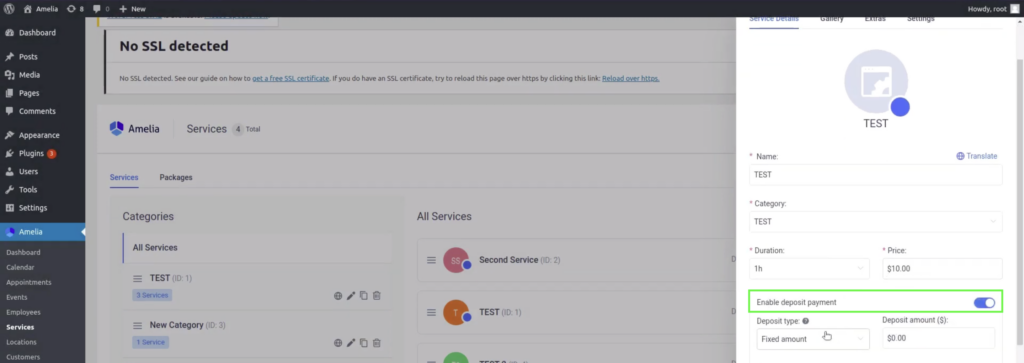
4. Once this option is enabled, you can further configure deposits. The deposit type can be either a fixed amount or a percentage of the service price.
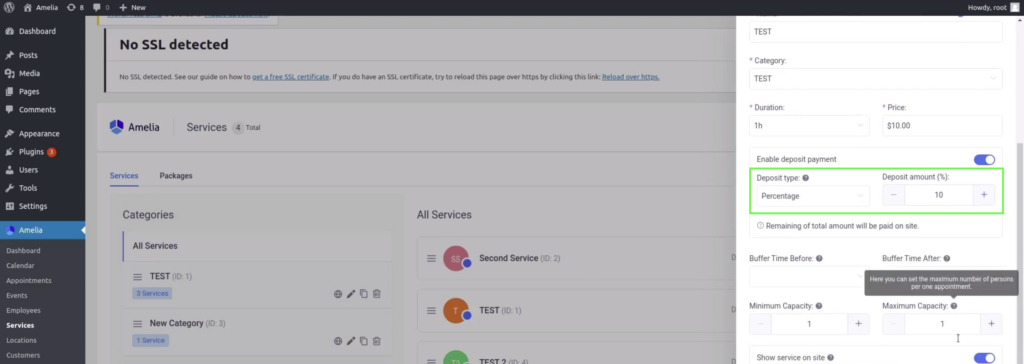
5. Lastly, after you choose the amount or the percentage you desire, just click on “Save”.
6. After this, click on “Pages” from the WordPress dashboard.
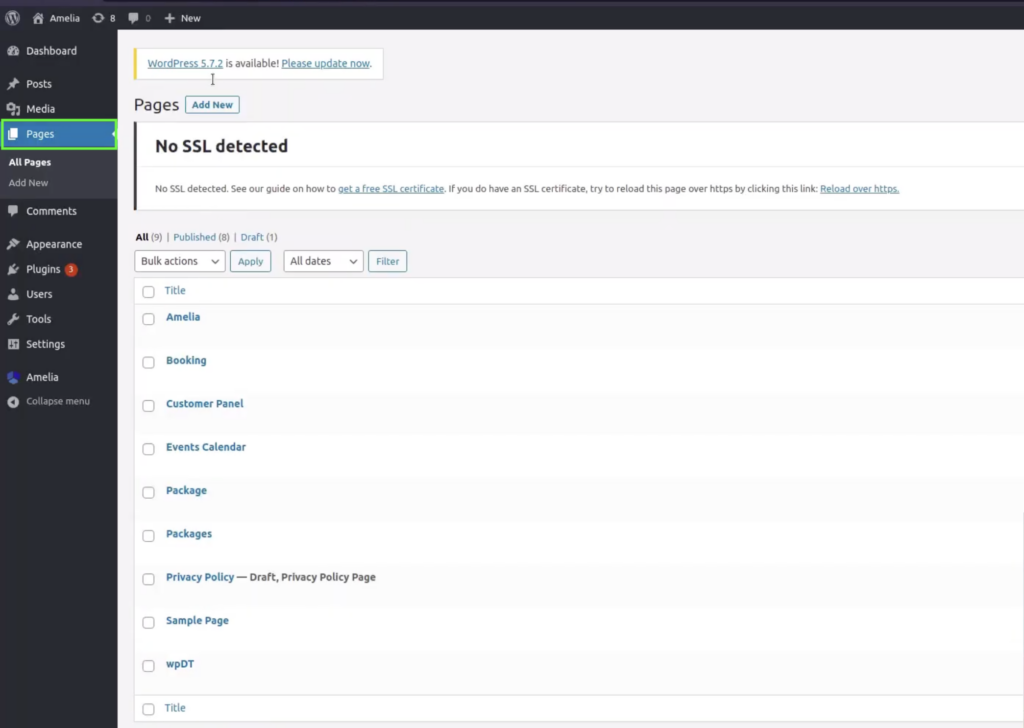
7. Click on “Add New” at the top of the screen and add a title to your page. You can use “Deposit Payments” or something similar to name this page.
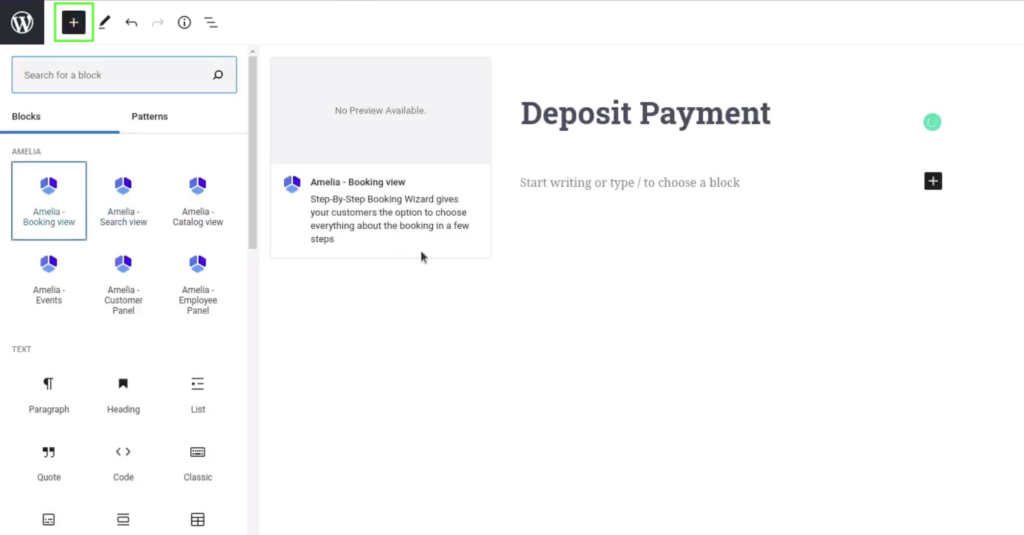
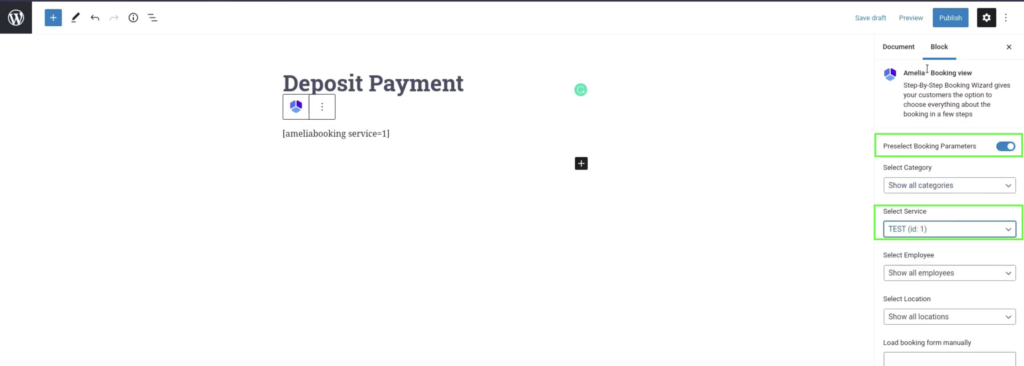
8. Click on the plus sign at the upper left corner and add Amelia’s booking view block. Here, you need to toggle on the “Preselect booking parameters” button, and in “Select service”, choose the services for which you added deposit payments.
9. After all this is done, just click on the “Publish” button in the upper right corner, and your changes will be implemented immediately.
Now, when someone is booking an appointment, they will be informed about the deposit needed in advance, and if they click on the confirm button, they will be redirected to the appropriate payment gateway. It’s important to mention that deposit payments work only with online payments as they need to be settled at the time of booking.
How to Set up Deposit Payments for Events in Amelia
If you are looking to set up deposit payments for the events, the process is pretty similar. Here are the steps to follow:
- From your WordPress Dashboard, choose “Amelia” and then click on “Events”.
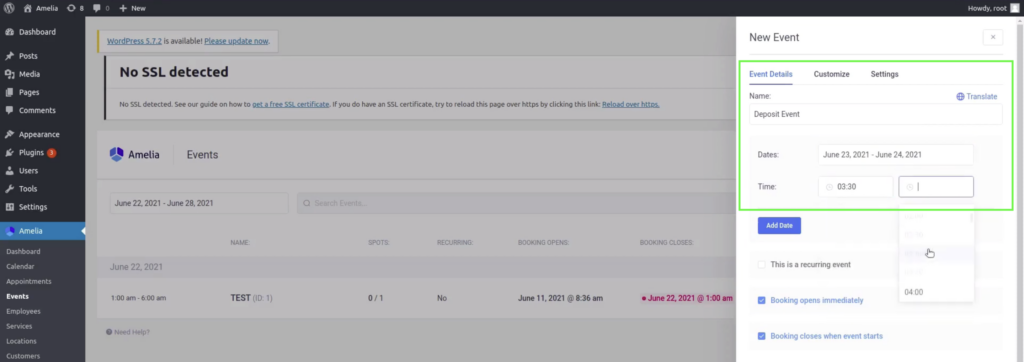
- If you don’t have any events created, click on the “New Event” button on the right. Name your event and input all the information, such as dates and times.

- Scroll down in this event configuration menu and put in the price. Here, you’ll need to toggle the Enable deposit payment option and choose either a percentage or fixed amount for your deposits.
- The rest of the process is the same as setting up the deposit for services. You need to navigate to “Pages” and add a new page for this event.
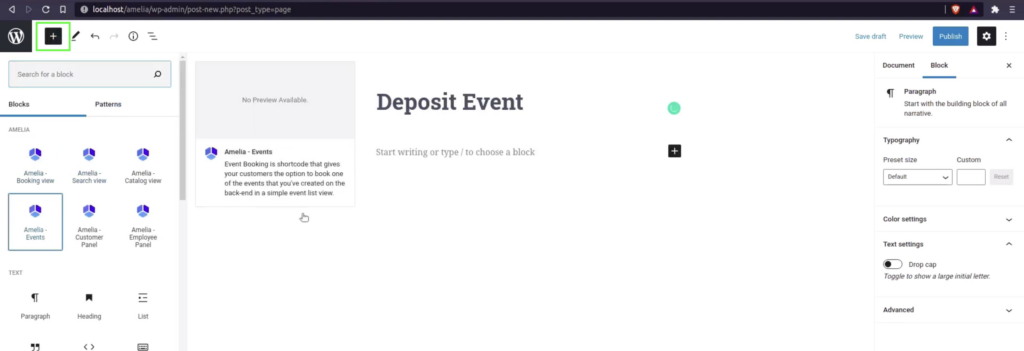
- Name the page however you want, click on the plus sign in the upper left corner, and add the Amelia event block.

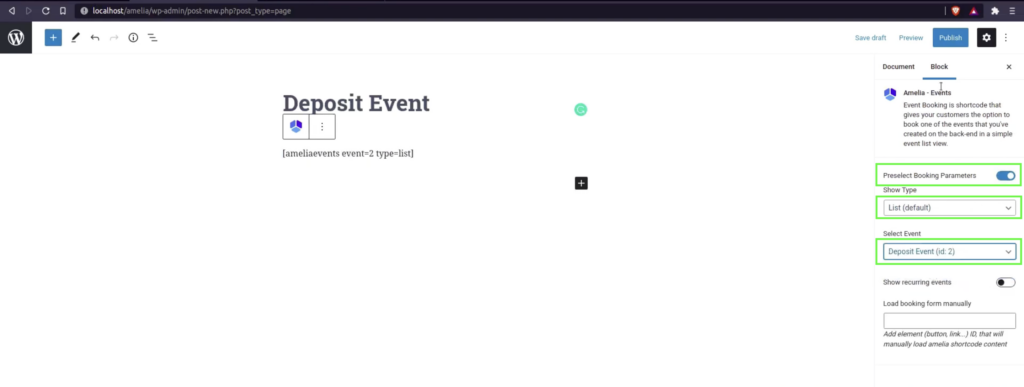
- Click on “Preselect booking parameters”, and from the “Select Event” drop-down menu, choose the event you created.

- After you’ve configured everything, click on “publish”, and that’s it!
Once someone books an appointment and pays the deposit fee, you’ll be able to see these transactions by navigating to Amelia -> Finance. As of right now, deposit payments are available in Standard, Pro, and Elite licenses.
If you have any trouble navigating this guide, here is a video version to help you set everything up.


