How to Add the Step-by-step Booking Form to Your Website
Video version
The new Step-By-Step booking form is here! We hope you’ll love it, just like we do!
Our developers worked harder to make Amelia better, to make it work faster, and to make your front-end booking pages stronger!
We’ve modernized the look and simplified the steps, and we’ll also be working on the “Event List”, “Event Calendar”, and the “Booking Catalog” views in the near future, so hold on to your hats!
The “Step-By-Step Booking Wizard” gives your customers the option to choose everything about the booking in a few steps.
In order to add this booking form to your website, you will need to add Amelia’s shortcode to one (or more) of your website’s pages. You can add Amelia’s shortcode using different page builders: Gutenberg, Elementor, Classic editor, and Divi Page Builder.
If you use another page builder or cannot find the shortcode button you can use the following shortcodes:
- [ameliastepbooking] if you want to show the basic Step-by-step Booking wizard,
- [ameliastepbooking category=1] if you want to show only the services from a category with ID 1,
- [ameliastepbooking service=1] if you want to show the booking form for the service with ID 1.
- [ameliastepbooking employee=1] if you want to show the booking form for the employee with ID 1,
- [ameliastepbooking location=1] if you want to show the booking form for the location with ID 1,
Or any other combination that you need. Also, if you have Packages (included in Pro and Elite licenses only) you can choose whether you will show just services, just packages, or both.
- [ameliastepbooking show=services] if you have Packages enabled, but only want to show services in the form,
- [ameliastepbooking show=packages] if you have Packages enabled, and you only want to show packages, without services in the form.
- [ameliastepbooking package=1] if you have Packages enabled, and you only want to show a specific package.
Just put the shortcode on the page and “Publish” it. You will find all the shortcodes available for Amelia on the Amelia Shortcodes page.
Classic Editor
If you’re still using the Classic editor, you will be able to use Amelia’s icon to select and insert the Step-By-Step booking form through the editor.
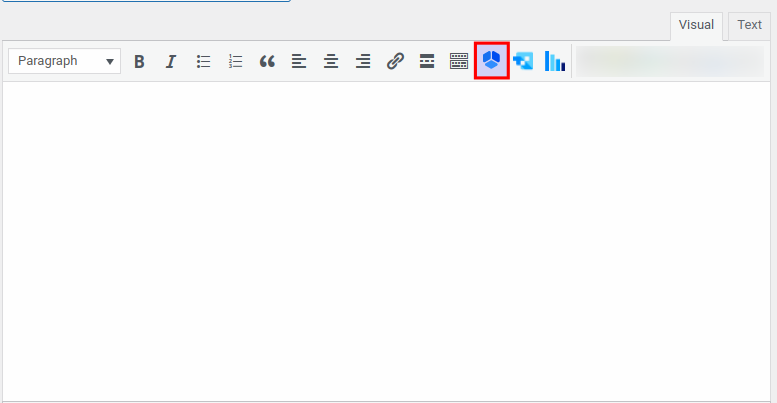
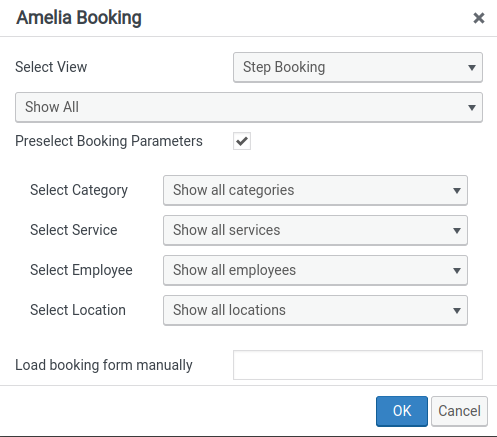
After you click on it, the Amelia booking widget will open. Select “Step Booking” from the drop-down, click “OK”, and publish your page. This will show you the basic booking form with all the options for choosing the services, locations, and employees (if you have more than one). However, if you want to show a booking form for one specific employee, location, or service, or you want to show the services from one specific category, click on the “Preselect Booking Parameters”. Four new options will appear so you can show a different booking form. These options allow you to set, for example, a different booking form for each employee. If you have the “Packages” feature in Amelia (available only in Pro or Elite license plans), there is also an option to choose whether you will show only services or only packages in the form, or both.
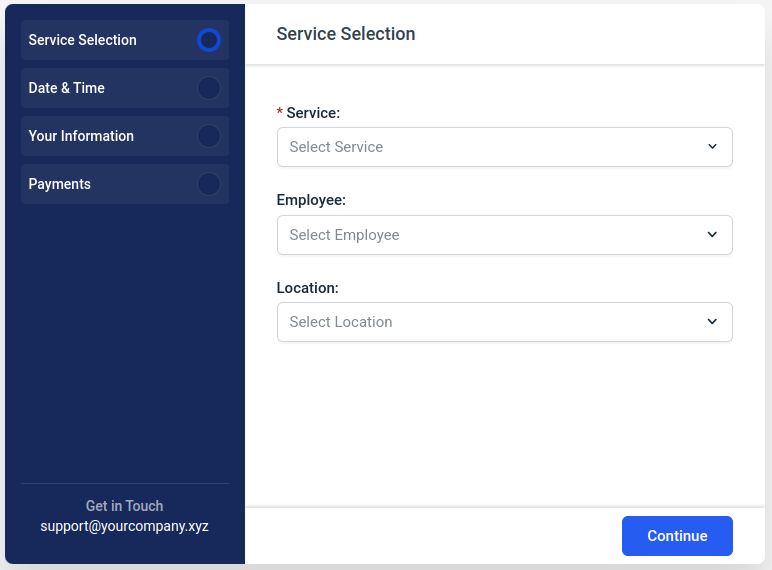
Step-by-step Booking View on Front-end
In the first step, your customer will be offered to choose a “Service”, a “Location” and an “Employee”. If you configured the company email in Company Settings it will be displayed in the bottom left corner of the form.
This email is clickable, so when clicked, it will open a new email window so a customer can reach out to you directly.
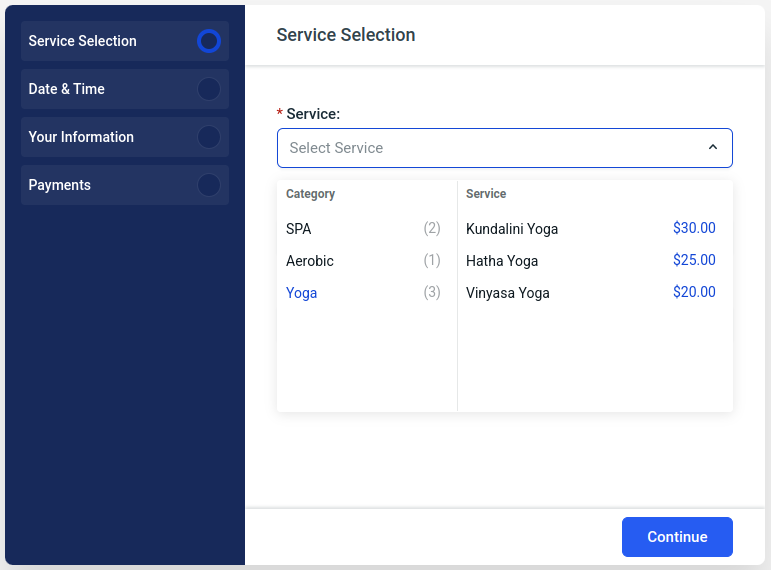
When you click on the “Service” drop-down, you’ll see all available categories, and when you hover over a category, the list of included services will appear on the right. Click on one to select it.
The numbers in brackets next to Category names represent the number of services that are created (and set to be visible on the front-end) in that specific category.
Once the service has been selected, you’ll see the name of the category, followed by ” / ” and the name of the service.
You’ll also notice that once you click on the drop-down again, you’ll only be able to select the services within that category. In order to see all categories again, you’ll need to click on the ” X ” icon on the far right of the drop-down. The same behavior can be seen with employees and locations below, so if you want to change the employee and/or the location of the service you selected, you can clear the Employee or the Location selection by clicking on ” X “.
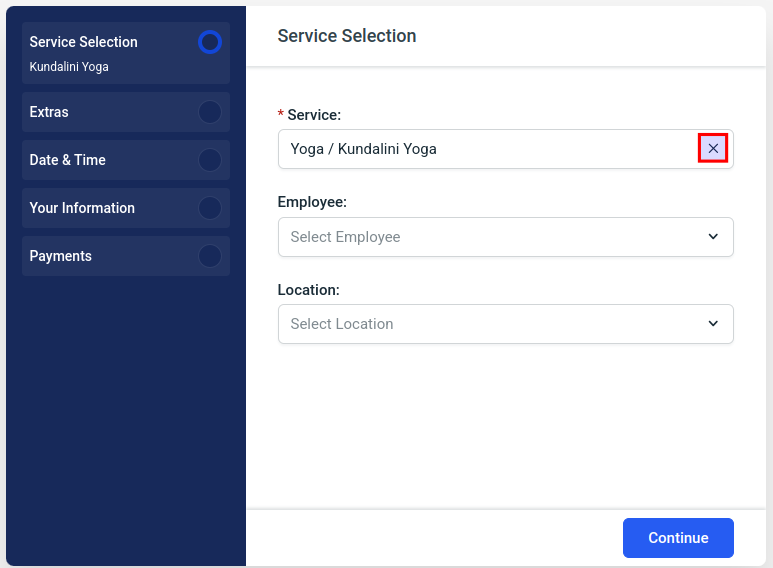
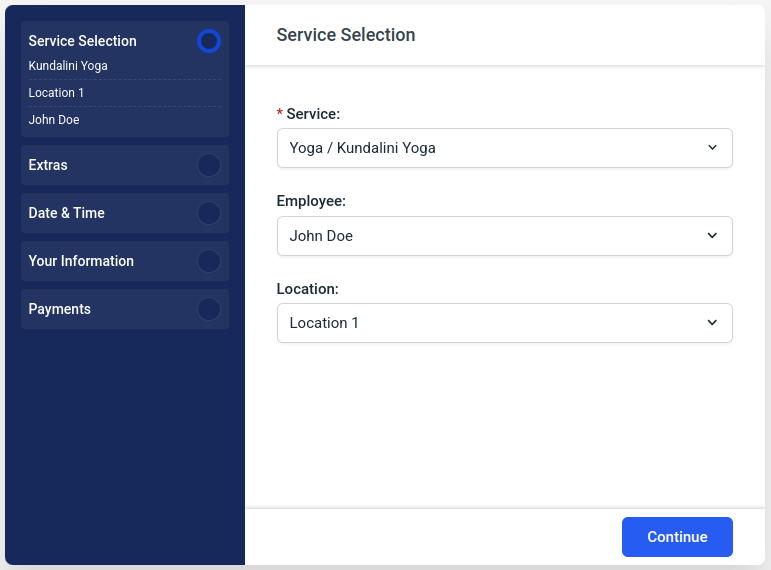
As you can see in the screenshots, we’ve configured the form so Employee and Location are not mandatory fields (notice there’s no asterisk ( * ) next to the field name), but this can be changed in Amelia’s General Settings.
Also, in the side menu, you’ll see that the “Service Selection” step has been populated with the name of the service, employee, and location.
All available dropdowns in the form function as filters, so if (for example) you select an Employee first, Locations and available Services will be filtered per that employee.
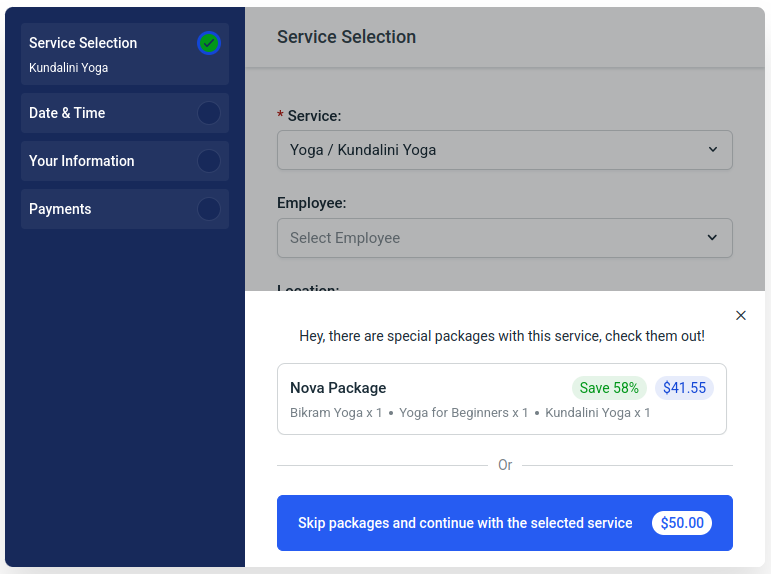
In case you have the Pro or the Elite license plan, and the selected service is included in one or more packages you’ve created, the form will offer these packages as an option for booking to the customers. In the example below, you can see that the selected service is also offered in two packages. Your customers are able to choose whether they’ll continue with booking just the single appointment, or if they want to purchase the package with the displayed services included.
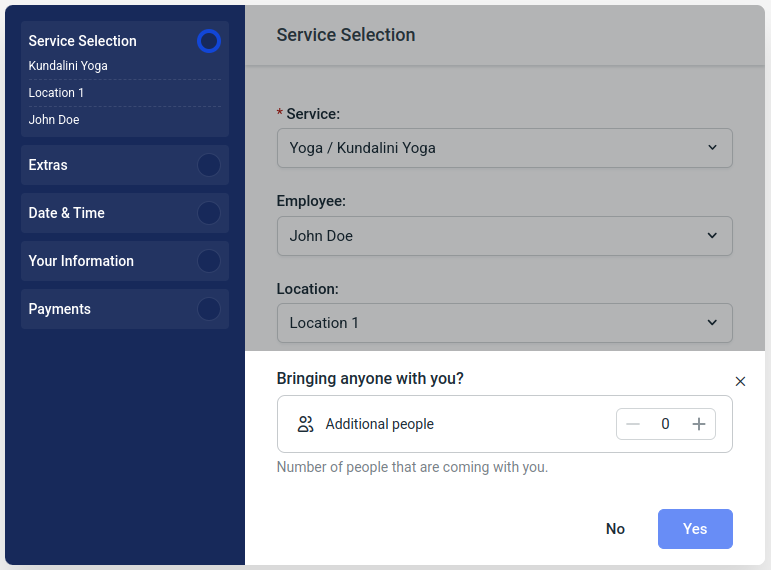
If the selected service has “Maximum Capacity” above “1”, and you enabled the “Show “Bringing anyone with you” option” slider when you created the service, the form will ask the customer if they are booking an appointment only for themselves, or if they are bringing someone with them.
If the customer skips the offered packages
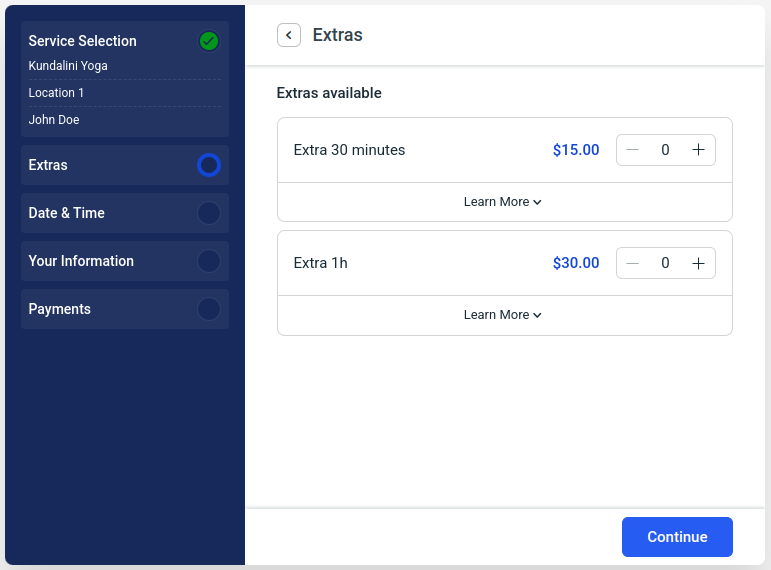
When your customer selects all options in the first step, and they chose to skip the offered packages (or if you have a shortcode that doesn’t include packages, or you have the Starter or Standard License plans), the second step varies depending if you added Extras to the service. If you have Extras added to the service, this will be the second step.
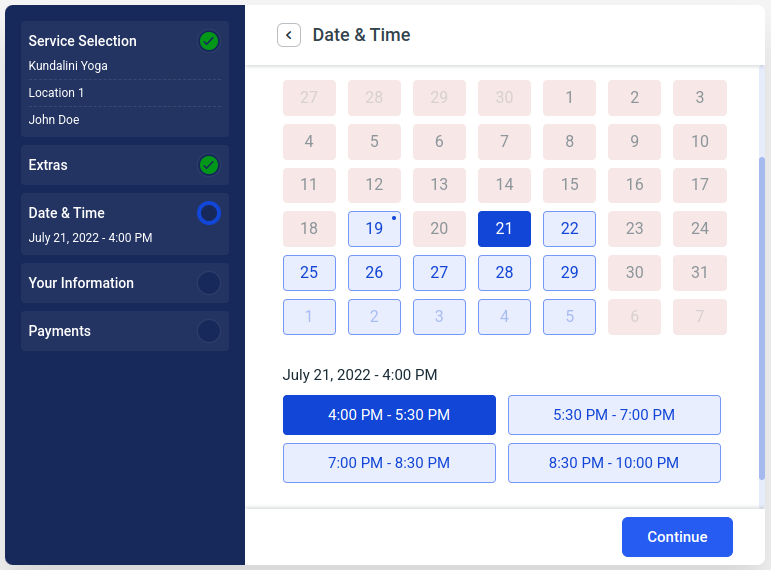
If you haven’t added Extras, the second step will be the date and time selection.
Once the date is selected, the available time slots will appear below.
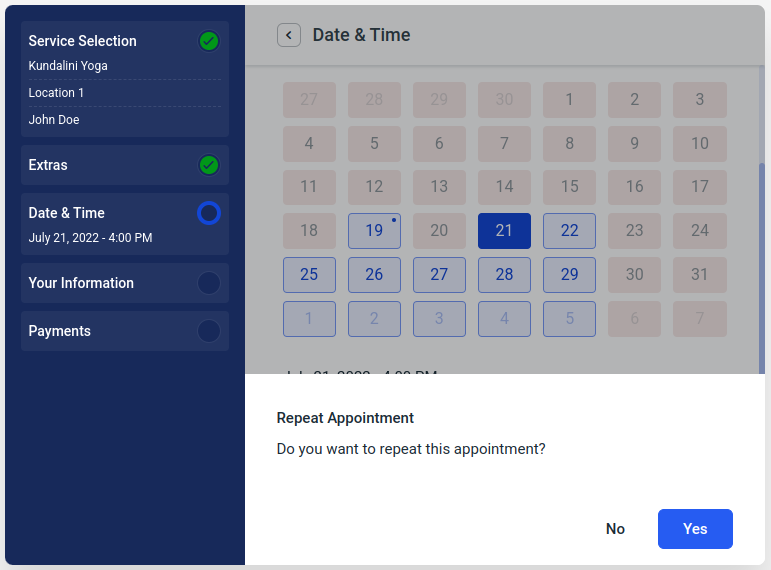
In case you configured the selected service so it can offer recurring appointments, a popup asking if the customer would like to repeat this appointment will come up.
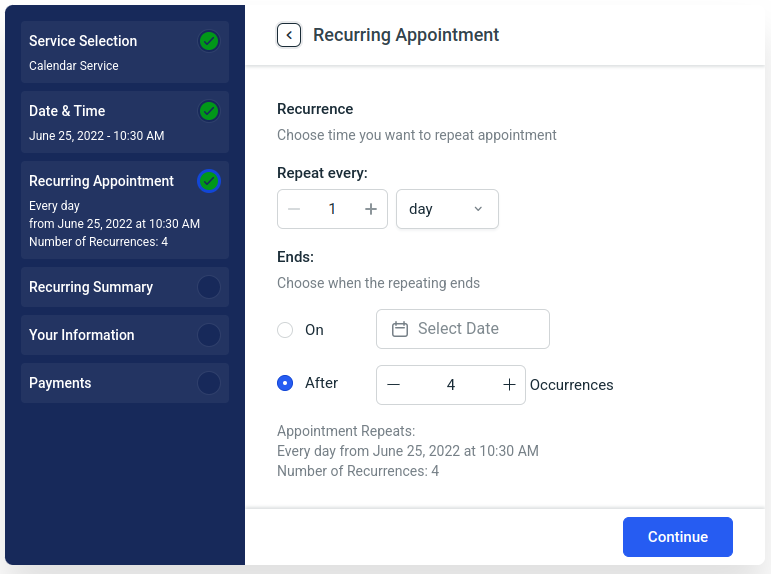
Depending on how you configured the recurring logic for the service, the screen below may vary. This screen allows the customer to choose when the appointment will recur and when the recurrence will end.
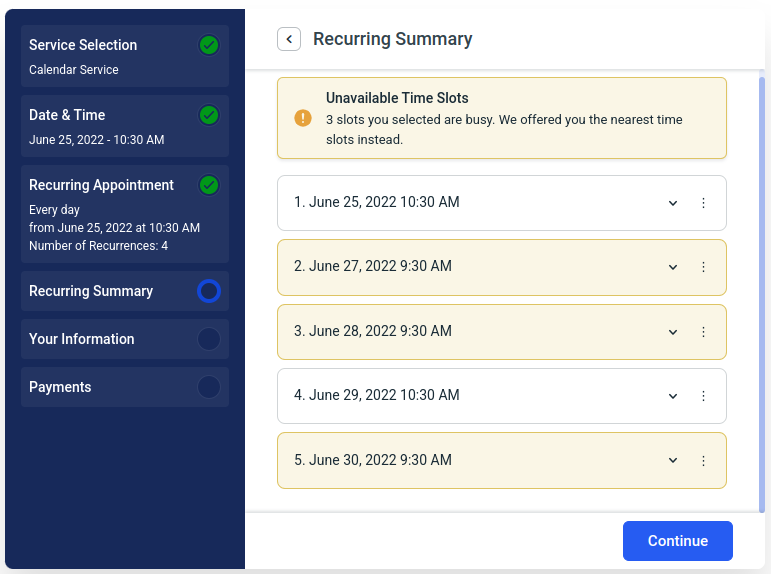
The next screen shows the details of recurring appointments and informs the customer if there were some unavailable time slots. The customer still has the freedom to click on any of these recurring dates and change them if needed.
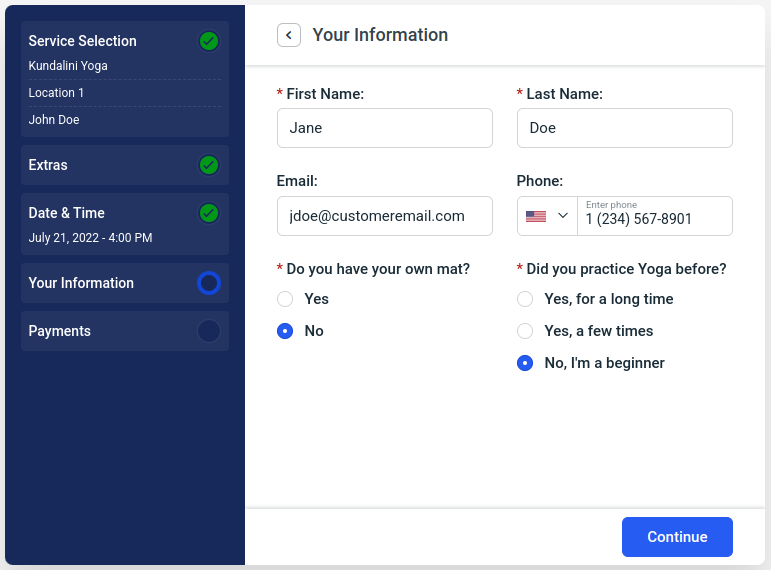
The next step of the “Booking Wizard” is where your customers fill in their details (Name, Last Name, Email, and Phone number) and select or fill in the custom fields (if they’re added to the selected service).
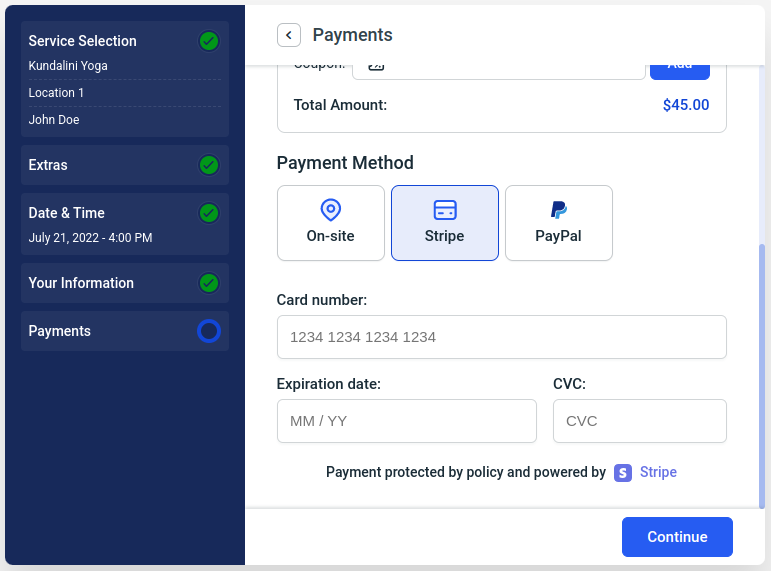
The next step is related to Payments. This is where a coupon can be added (if you enabled Coupons in Amelia’s Payment Settings, and if there’s a coupon that applies to the selected service), and where your customers will be able to choose which payment method they will use.
If the service is free, this screen will not appear.
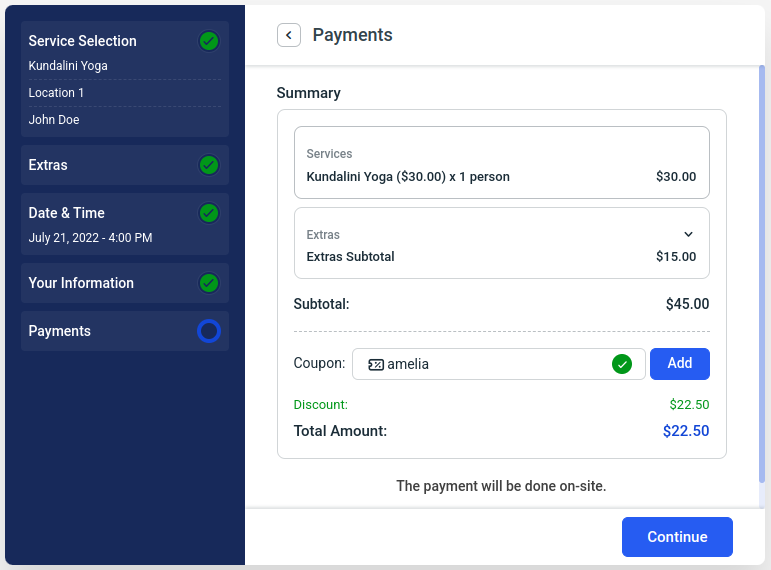
If the payment is set to be “On-Site”, your customers will see the “The payment will be done on-site.” notice below the total amount (as seen in the screenshot above). These notices vary from payment provider to payment provider:
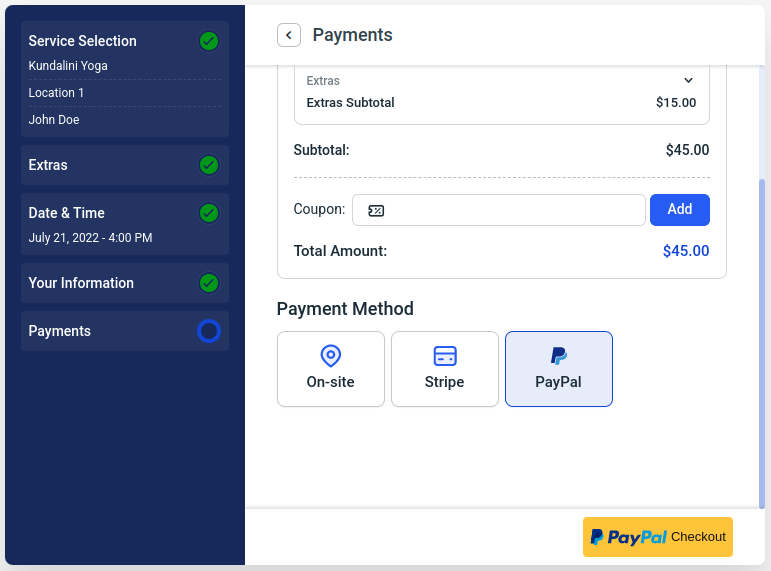
PayPal changes the button to a yellow “PayPal Checkout” button, indicating the customer will open a PayPal checkout window once they click on it:
Stripe payment integration is embedded in Amelia’s booking form, so when this is selected, your customers will see that the payment is protected by Stripe.
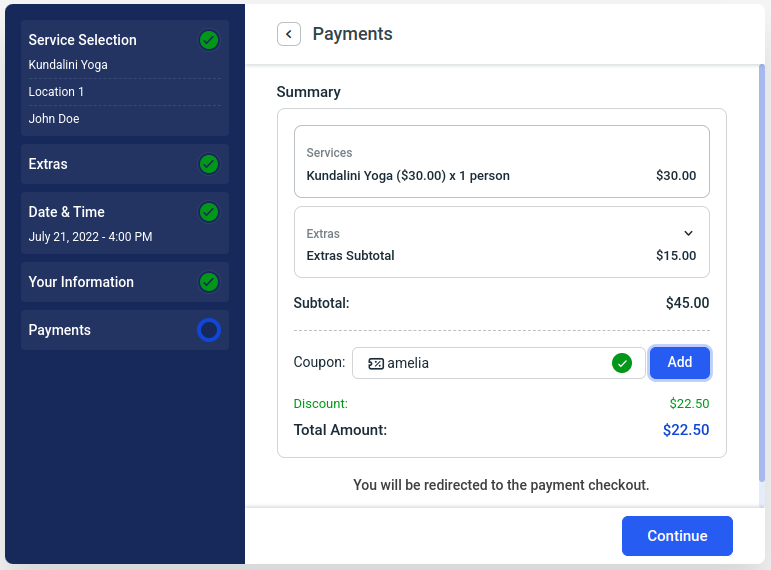
Mollie, RazorPay, and WooCommerce will lead the customers away from Amelia’s booking form, so they will see a notice that says “You will be redirected to the payment checkout.”:
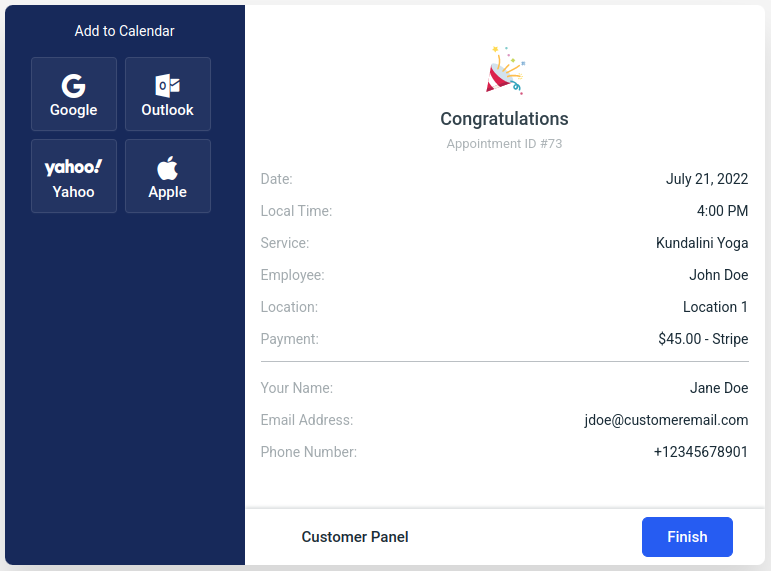
The Final Step of the booking form is the “Congratulations” screen where your customer will be able to see details of the booked appointment (Appointment ID, date, time, service, employee, location, payment amount, payment type, and the details of the customer).
They’ll also be able to add the appointment to their Google, Outlook, Yahoo, or Apple Calendars by clicking on one of the options in the top left.
At the bottom, they can directly access the “Customer Panel” (if you configured it) or click on “Finish” to close the form. By clicking on the “Finish” button, the default action is for the booking page to refresh, but you can also configure a custom page that can be added to the “Redirect URL After Booking” section in Amelia’s General Settings.
If the customer selects one of the offered packages
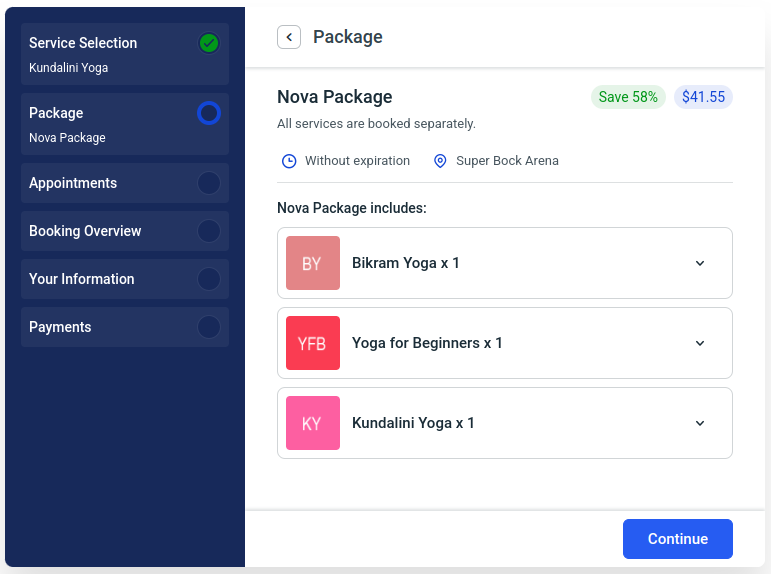
When the customer selects a package, they will see the list of services that the package includes and the number of appointments included in each service within the package.
The next step of Package booking is the appointment booking. Depending on how you configured the services within the package, your customers would either see the following screen, or they’ll be taken to the “Your Information” section. If there are multiple employees assigned, the customers will be able to select the employee before booking a time slot.
The “Your Information” section is displayed straight away only if you set the “Minimum bookings required” and the “Maximum bookings required” to “0”. If the “Maximum bookings required” is set to anything but “0”, the customers will have the option to book appointments, and if the “Minimum bookings required” is set to anything but “0”, the customers will have to book the number of appointments defined in “Minimum bookings required”.
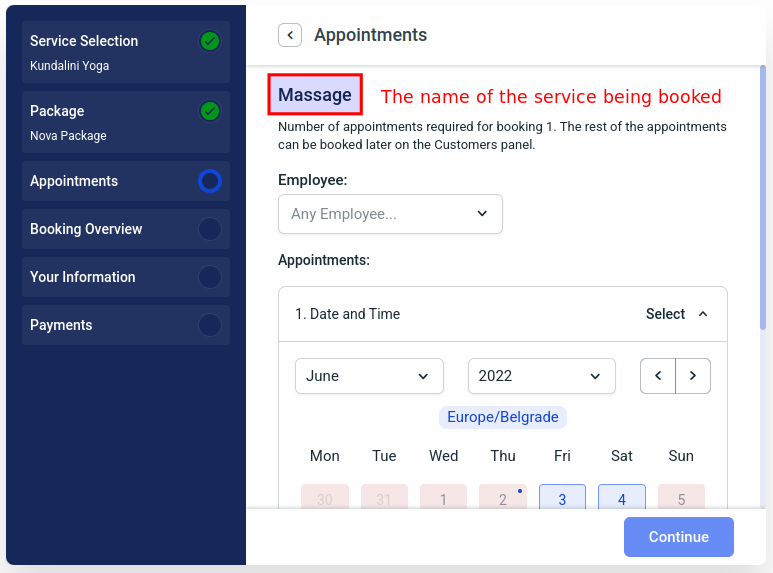
As you can see in the screenshot above, the name of the service an appointment is being booked for is displayed on the top of the form. When a customer books an appointment for the “Massage” service, and if only 1 appointment is set to be booked at this time for this service, they’ll move on to the next service within a package until all appointments that need to be booked within the package are booked.
The dates and times of all booked appointments are visible in the preview on the left-hand side menu as soon as they are selected and the next screen shows the overview of the package that’s being booked.
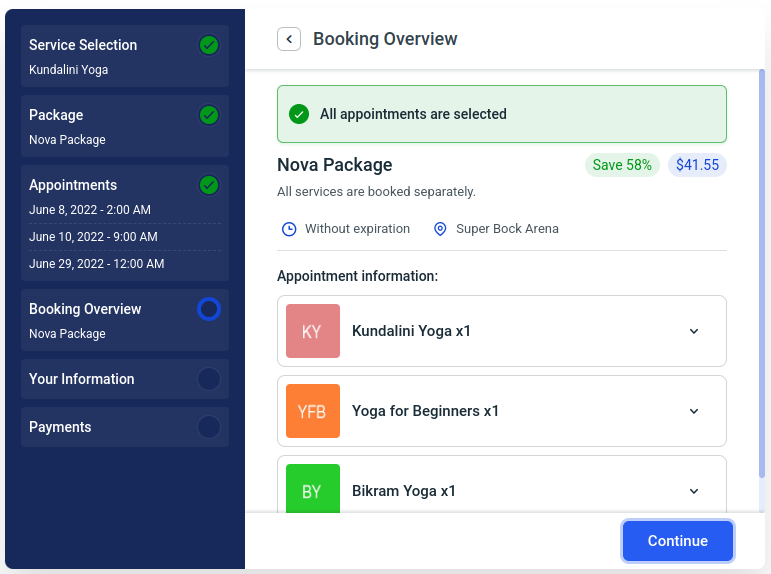
The last two steps are the same as the last two steps when the services are being booked – “Your Information” and the “Payment” step. After completing these two steps, the Package booking is complete and if there are any appointments left within the package, the customer can book them through their Customer Panel.
